Some people consider refinishing furniture to be a chore. But, depending on your approach, it really is an art. And it’s an art that allows you to transform your space–no matter your budget, square feet, or skill level.
Read on to learn how to freshen up your space by refinishing furniture!
Furniture Refinishing as an Art
Refinishing furniture involves a blend of creativity, restoration, self-expression, skill, and emotional investment. Each swipe of the sandpaper or stroke of the paintbrush transforms the piece into a brand-new creation.
Creativity
Refinishing furniture provides you with a blank canvas, allowing you to envision a finished piece that’s a unique fusion of colors, textures, and finishes.
You have control over everything, from choosing paint hues that evoke certain moods to inventing distressing techniques that replicate years of wear.
Restoration and preservation
Furniture holds stories and memories. Have a piece that’s new to you? Create furniture that will help you make memories!
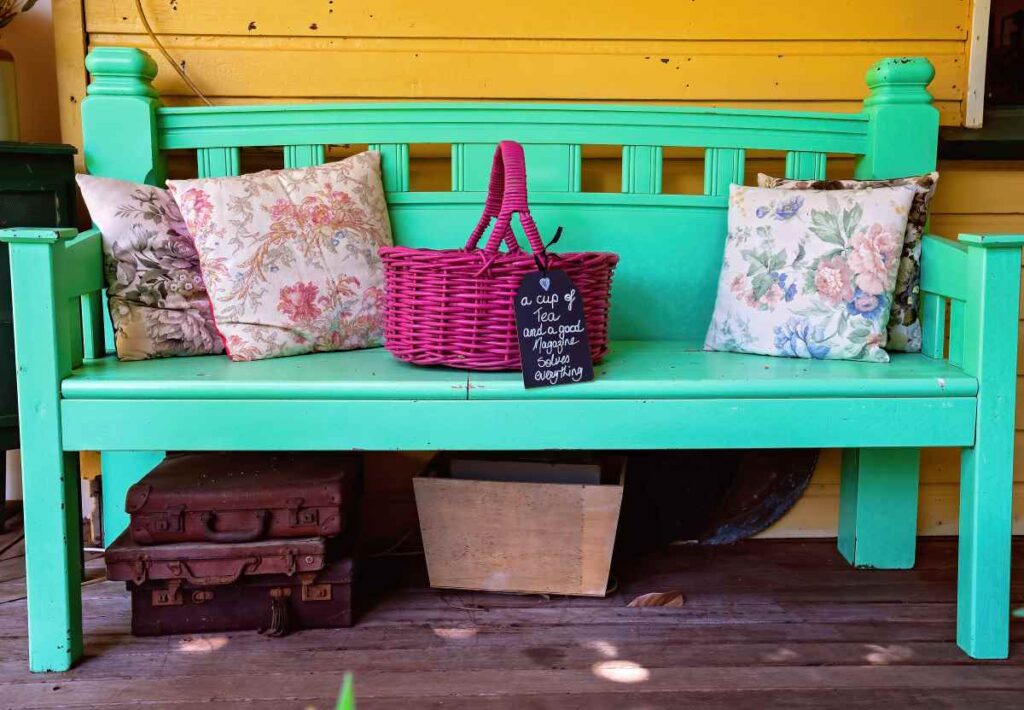
When you refinish furniture, you breathe new life into pieces that might have lost their luster. Balancing the desire for a fresh, updated appearance with respect for its history requires an artful touch.
You may decide to preserve scratches and marks that tell a story, or erase them entirely.
Self-expression
Refinishing furniture is a vessel for self-expression. You infuse your refinished piece with elements of your own identity, from choosing colors that resonate with your personality to incorporating your own designs.
Execution skills
Behind every refinished furniture piece is the unseen skill that brought it new life. Everything from carefully preparing the wood’s surface to applying paint, stain, and finish requires steady hands and precise technique.
Distressing, layering, and stenciling require expertise that can only be honed through practice.
Emotional investment
Furniture refinishing is as much a technical endeavor as it is an emotional investment. The blood, sweat, and maybe even tears you put into the project connect you to the piece in a way that buying finished furniture can’t.
How to Transform Your Space by Refinishing Your Furniture
So, now that you’re sold on the merits of refinishing furniture to transform your space, read on to learn about the process.
Assess your furniture
Evaluate your space. Imagine how you want to freshen up the room or area where your project will reside. Consider the existing color scheme, style, and overall ambiance of the area.
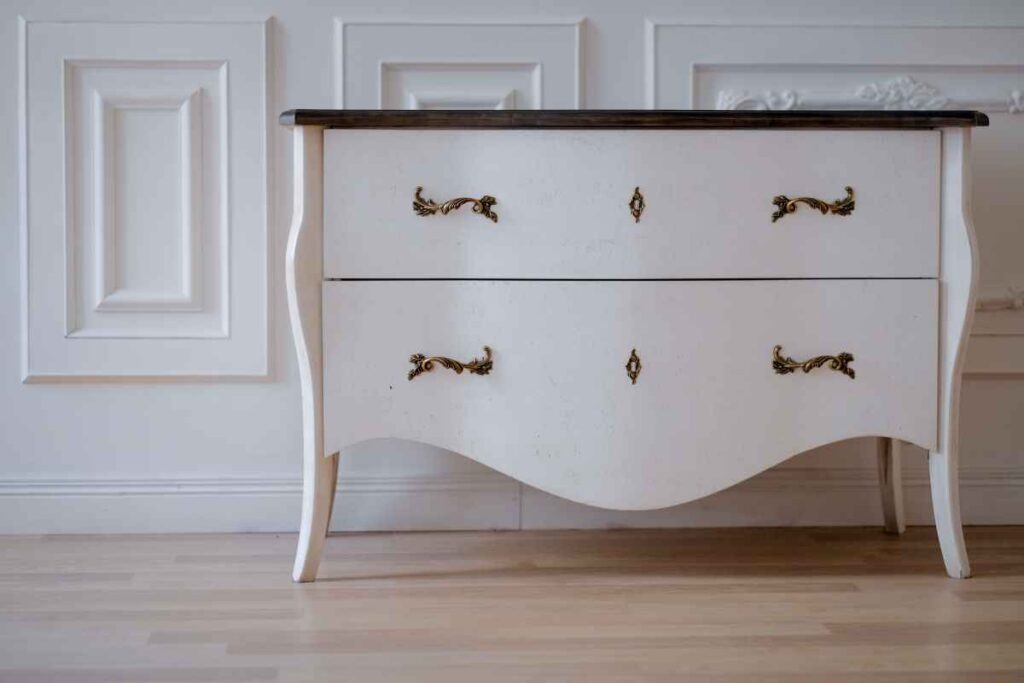
Next, identify the furniture pieces you want to refinish. Common projects are dressers, tables, chairs, or bookshelves. Assess their condition.
Plan your design
Now that you know what you want to refinish, it’s time to plan your design. There are so many creative techniques you can use for your project. Decide the overall method you want to use on your piece.
As you think about your technique, consider any potential future projects and how your chosen technique will influence your direction.
Most importantly, think about how the refinished piece will “fit” in your space. For example, if you want to stencil your furniture piece, how will your design mesh with the other furniture and decor in the area?
Gather supplies
It’s time to gather your supplies! You will need a good sander for refinishing furniture and a variety of sandpaper grits that fit that sander (coarse for removing thick paint, fine for detail work and removing finish).
You’ll also want to consider using a drop cloth under the piece you’re refinishing to help collect any dust that escapes your sander’s dust collector and any drips of paint or stain.
Be sure you’re working on your project in a space that’s low-traffic with lots of ventilation.
Collect your paint, stain, finish, stencils, and whatever else you plan to use to create your unique piece, including brushes and sponges.
Prepare the furniture
Once you have your space set up and your supplies on hand, it’s time to prepare the furniture.
Ideally, you’ll be wearing comfortable clothes that you aren’t afraid of getting paint or stain on. You should also don safety goggles and a mask.
First, remove all hardware. Keep it together and remember where you stash it!
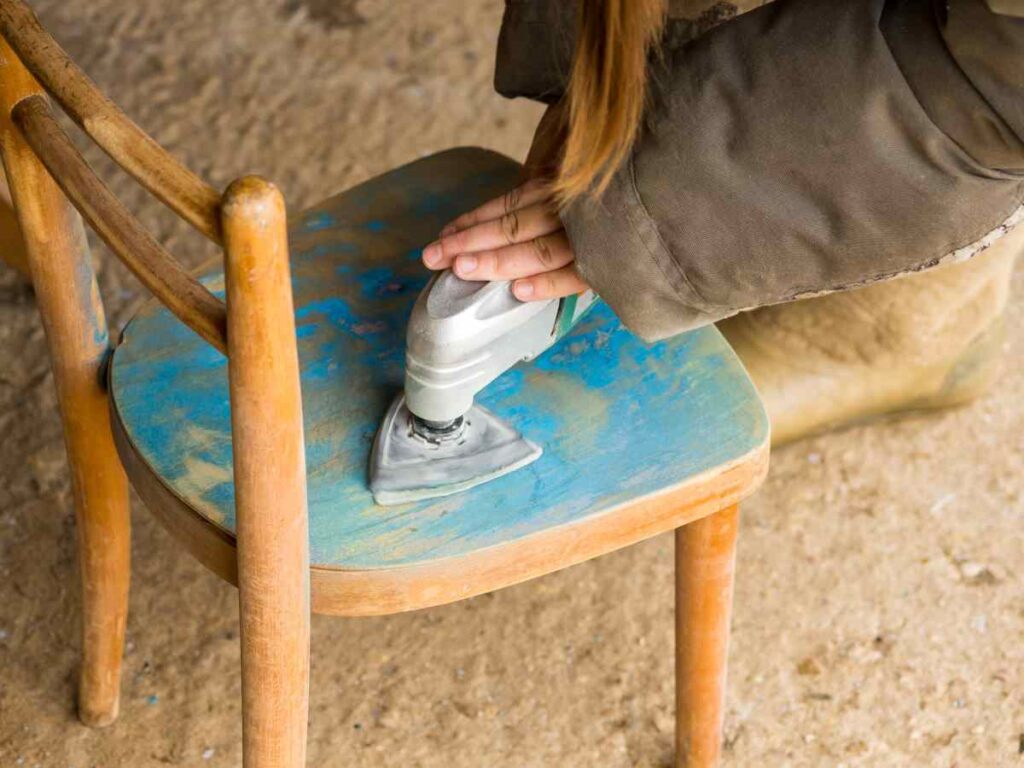
Next, with a damp cloth, wipe down the furniture to remove any dirt or debris. Making sure it’s totally dry, begin sanding.
When you’ve finished sanding, use another damp cloth to wipe down the furniture again to remove any leftover dust.
Apply the paint, stain, and embellishments
When the furniture is dry from the second wipe-down, it’s time to start painting! Apply your chosen paint or stain in smooth, even strokes. Allow the first coat to dry, then apply a second, if desired.
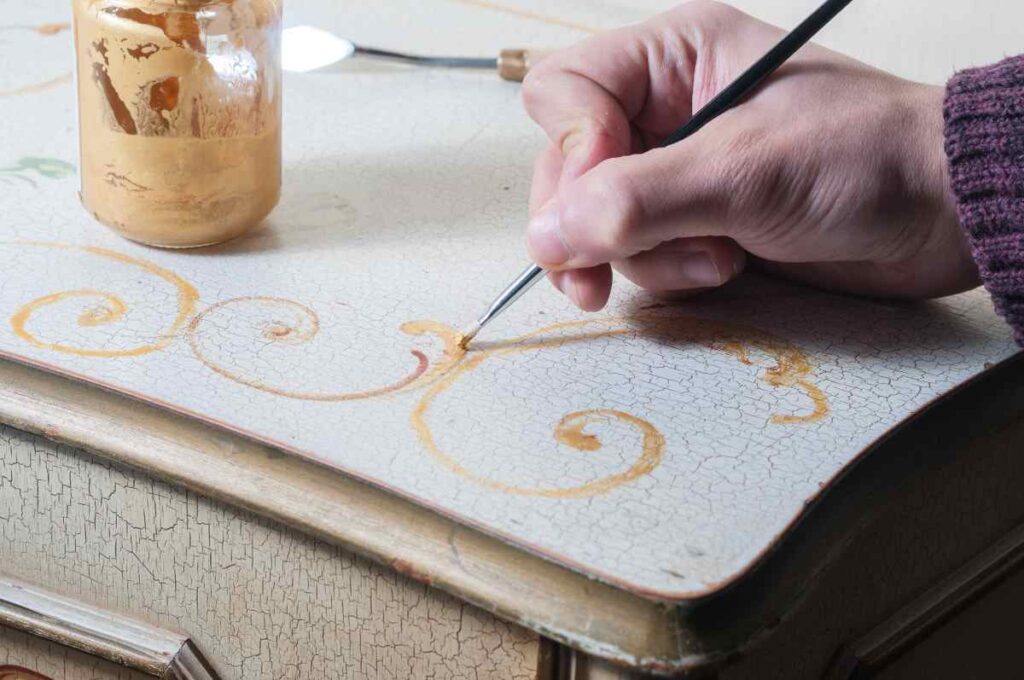
If you want to add handpainted details or stencil the piece, do it after painting but before applying the finish. Wait until the refinished piece is completely dry, then paint your masterpiece with a protective finish.
Reassemble
When all your paint or stain is dry and set, reassemble the furniture and reattach the hardware.
Frequently Asked Questions
Is refinishing furniture difficult?
No! Basic refinishing is relatively easy, though it can get challenging as the project gets more complex. The following factors will determine the difficulty of your project.
Skill level
If you’re experienced in DIY projects, woodworking, or painting, you might find furniture refinishing more manageable than someone just starting out.
That being said, however, even beginners can learn the basics and achieve great results!
Type of furniture
The complexity of the furniture piece you plan to refinish also affects your project’s difficulty. Simple items with many flat, smooth surfaces, like chairs, small tables, or dressers, are easier to refinish than intricate pieces with ornate carvings, multiple surfaces, and complex shapes.
Technique
Different refinishing techniques have varying levels of difficulty. Basic techniques, like sanding and painting, are relatively straightforward. On the other hand, more advanced techniques like distressing, staining, or achieving specific paint effects require more skill and practice.
Preparation and sanding
Proper preparation is crucial for a successful refinishing project. Sanding the old finish off the furniture can be time-consuming and physically demanding.
Material and condition
The type of material the furniture is made from also impacts the difficulty. Wood covered with a veneer or laminate requires more work than bare furniture. Additionally, the condition of the furniture, such as the presence of old paint or deep scratches, can affect the level of difficulty.
Patience and detailing
Refinishing furniture requires attention to detail to achieve a smooth and even finish. You must have patience and work with precision, especially when it comes to applying paint, stain, or varnish.
Tools and equipment
Having the right tools can make the process smoother. Basic tools like sandpaper, brushes, and paint sprayers are necessary. More advanced techniques might require specialized tools.
Trial and error
Like any skill, refinishing furniture involves a learning curve. Your first few projects might not turn out perfectly, but each attempt will teach you valuable lessons you can apply to your next one!

What tools will I need?
For the best results, you should have a sander with varying grits of sandpaper to ensure you get the smoothest finish possible on your furniture piece.
The other supplies you have will vary depending on the technique you choose to use, but, at the very least, you will need paint brushes, stain or paint, and safety gear like a pair of goggles and a face mask.
Can all materials be refinished?
Most furniture materials can be refinished with the right tools and care.
Solid wood
Solid wood is the easiest to finish of typical furniture material, though the condition of the wood can pose different challenges. For example, a really scuffed-up or scratched piece will require more work than one in good condition.
Veneer and laminate
Veneer and laminate pieces can also be refinished, but they must be treated gently. These materials have a synthetic or real wood layer over a core material (think, Ikea furniture). The layer of real wood is typically very thin, so if you do refinish one of these pieces, sand lightly.
Metal
Metal furniture can also be refinished! You’ll have to strip old paint, sand, and then repaint or apply a protective finish, just as you would with wood. However, rust removal and prevention are important factors to consider when refinishing metal.
Wicker and rattan
Natural materials like wicker and rattan can be painted or stained, but they require special care due to their porous nature. Proper cleaning and gentle refinishing techniques are essential to avoid causing damage. These pieces should not be sanded.
Plastic and resin
Pieces made from plastic or resin can be tricky. These materials often require a specially formulated paint and need extra preparation.
Do I have to sand the furniture?
Although sanding is usually recommended before refinishing furniture, it’s not always necessary. Sanding is time-consuming and messy, and maybe you want to go for a more rustic, textured look with your freshly refinished piece.
Consider the following factors when deciding if you need to sand a piece of furniture before refinishing it.
Current finish
If the furniture has an old finish that is chipping, peeling, or cracking, sanding is important to create a smooth surface to which the new paint can adhere. Sanding removes the old finish and creates a slightly rough texture that helps the new paint grip better.
Similarly, glossy or smooth surfaces might not allow the paint to adhere well.
Paint type
The type of paint you’re using can affect whether you need to sand. Chalk paint and mineral-based paints often adhere well to various surfaces, even without extensive sanding. However, oil-based and latex paints might require a sanded surface for better bonding.
Paint finish
You might not need to sand as thoroughly to get a distressed or vintage look. Leaving some of the old finish visible can contribute to the desired effect.
Surface imperfections
Sanding can help smooth out minor scratches, dents, or imperfections in the furniture’s surface. Again, if you’re aiming for vintage or distressed, these imperfections may be exactly what you’re looking for! But for a smooth, clean, more modern look, you’ll want to sand these rough spots.
Cleaning
Sanding does give you the opportunity to clean the furniture thoroughly, removing dust, grime, and residues that might affect the paint’s adherence.
Primer
Using a primer can sometimes eliminate the need for heavy sanding. Primers create a bonding layer that helps paint adhere better.
Whichever way you choose, remember that proper surface preparation can significantly impact the longevity and appearance of your painted furniture.
How long does it take to refinish furniture?
The time it takes to refinish furniture can vary widely depending on several factors, including the size of the furniture piece, the complexity of the project, the refinishing techniques you’re using, your level of experience, and the drying times of the materials you’re using.
However, you can get a general idea of the time commitment by considering the following steps and their level of complexity.
Preparation
Depending on the size of the furniture and the amount of old finish that needs to be removed, sanding can take a few hours to a full day. Cleaning the piece will require less time, but should still be factored into the overall time calculation.
If the furniture requires repairs like fixing loose joints or replacing hardware, this can add extra time.
Priming and base coats
Applying a primer or base coat might take an hour or two, but drying time between coats can extend the process to a day or more.
Painting or Staining
Applying the main paint or stain can take a few hours, but multiple coats and drying times might spread this step over a couple of days.
Detailing
Distressing, stenciling, or other detailing could take several hours or even days, depending on the intricacy of the detailing and any added dry or set times.
Sealing and finishing
Applying a protective sealant or finish generally requires multiple coats and drying times. It can take several days to a week for the finish to fully cure.
Reassembly
It will take time to reassemble anything you took apart and reattach any hardware.
Ultimately, simple and smaller furniture pieces might be completed in a few days, while larger or more complex projects could take a week or more, especially if you’re working on it during your spare time.
It’s important to allocate enough time to each step of the refinishing process. Rushing through can leave you with a piece you don’t like, whereas patience will surely result in a beautiful furniture piece you’re proud to display in your newly transformed space.
Wrapping up the Art of Refinishing Furniture
Refinishing furniture is a creative, budget-friendly way to transform your space. So, what are you waiting for? Whether you’re a novice or have been refinishing furniture for decades, take the leap and tackle that piece you’ve been eyeing!
Check out all the tips and tricks we have for refinishing furniture!

I’ve been a professional painter for the last 20 years. That Sweet Tea Life is a place where I get to slow down and visit the craftier side of painting.
I’ll share with you everything I’ve learned painting hundreds of pieces of furniture and sets of kitchen cabinets.