Painting is one of the fastest ways to spruce up furniture, cabinets, and other projects around the home, but painting over stain can be a tricky process. Even though we’re leaving behind the deep wood grains and natural colors of the stain, we still want to have a great finish to our home decor.

There are a few steps involved in any paint over stain project. While you could just slap a coat of paint on, you’d be risking a less than professional finished project.
You can paint over stain, but it takes a little work. The first step is getting the stained surface ready for painting by sanding and priming the wood.
The Quick Answer
Here’s the lightning fast guide for painting over stained wood.
The first thing is to figure out what kind of paint you want to work with and what type of stain you’re painting over. Our guide goes over a few tips and tricks for this process. There’s even a secret DIY paint that can skip all the sanding and priming if you want fast results.
After that, prepare the wood. You’ll need to do some sanding, potentially use some solvents to remove the top coat, and then prime the wood.
Once this is done, you can paint and finish as you’d like.
Painting over stained wood is an easy process when you really get down to it. Now, let’s get into detail about how to paint over stain.
.
Painting Over Water-Based Stains
Water-based stains are much easier to paint over than oil-based stains. These stains work by sinking into the wood which means that the wood grain is still exposed on top of the furniture. This means that you do not typically need to use any solvents to get rid of them.
Here’s how you can paint over stains that are water-based.
Cleaning Before You Work
Before the brushes, the sanding, and the painting, we need to clean our furniture or other stained wood project.
Use warm soapy water to remove any dust, dirt, and cobwebs before we really get to work. Nothing ruins a paint job like accidentally painting over a cobweb or a grimy patch on the side of a new table.
Cleaning ensures you are working with the best piece of furniture you have to work with!
It can be tempting to skip this step, but take our word for it, cleaning is the most important step of painting over stained wood!
Once your project dries, you’re ready to move onto step two.
Sanding Down the Stain
You’ll need to sand the wood with a 150 grit sandpaper. This is how it’s done.
You’ll want to sand with the grain to avoid unpleasant crosshatched patterns on your finished piece of furniture. This sanding isn’t to get rid of the stain, but to give the wood some “bite.” This lets the paint stick to the wood and gives you the best results when you start painting.
Some paints, which we get to later, let you skip this step. However, even with those paints you can always benefit from a quick sanding.
Once that’s done, it’s time to handle repairs.
Do Any Repairs Now
Noticed a crack while you were cleaning? What about a stuck drawer while you were trying to sand?
Now is the best time to tackle these projects. Why’s that?
When you start painting the wood, you want to know that it’s ready. If you have to do some repairs after the fact, you run the risk of chipping or scratching your brand-new paint job. Before painting is the ideal time to work on any quick fixes or modifications you want to make to your project.
Apply Primer
Once the repairs are done, it’s time to add primer.
If you’ve been doing DIY or painting for a while, you’ve probably heard everyone talking about primers, but what do they do?
Primer coats not only get the wood ready for paint, they also help to protect it. These are also called undercoats as compared to the final “top” coat that people see every day. Adding primer makes paint stick better while also helping you to have a more durable finished project.
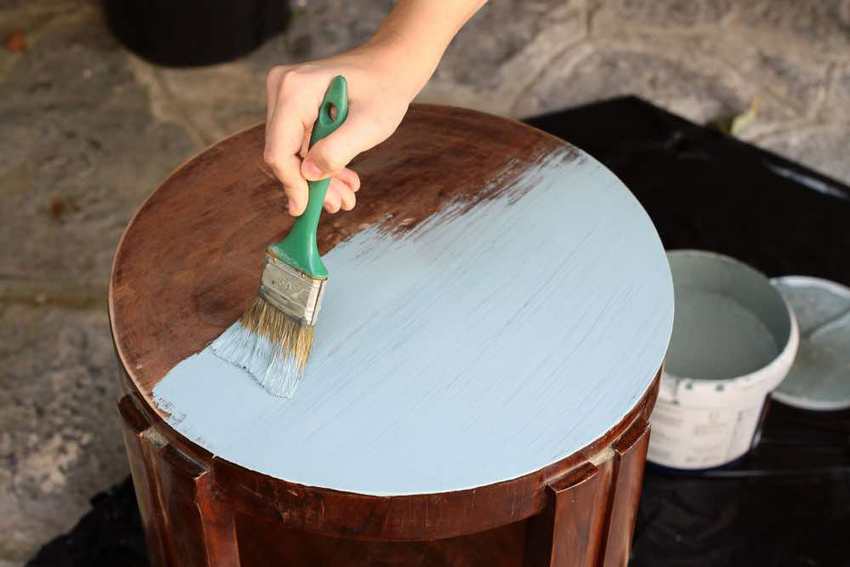
Once all this is done, it’s time to paint!
Have Fun Painting
When it comes time to paint, this work is best done in multiple coats.
You’ll want to make sure to always paint with the grain of the wood to give you the best final look for your project. This will also help you protect the wood when it comes time to remove the paint down the road for a refresh or a new look.
Remember to let the paint fully dry in between coats. This helps you to avoid fisheyes or bubbling as the layers of paint dry over each other. It also prevents cracks in your finished paint job.
Once all your coats are dry, you can add a top coat to protect the finished paint job or leave it bare. It all depends on the level of traffic your final piece is going to be exposed to.
If you’re going to paint over an oil-based stain, the steps you’ll take are mostly the same. There is, however, one big difference for paining over oil-based stains and that’s using solvents to remove the stain.
Painting Over Oil-Based Stains
Alight, this is where things get a little bit more tricky.
Oil-based stains are much harder to remove than water-based stains. They stay on top of the wood and create a protective coating that helps the wood to stay water tight and scuff resistant. These stains also create a bit of a problem when it comes to painting over them.
In order to paint over these stains, we’re going to need to fully remove that top coat of oil-based stain.
Clean Your Project
The first step is pretty much the same as with water-based stains.
You want to make sure that the piece of furniture you are going to paint is clean and ready to go. Make sure to look for those little hard to reach places that can have built up dust from the ages.
You don’t want to finish your project and realize that you painted over a huge section of cobwebs!
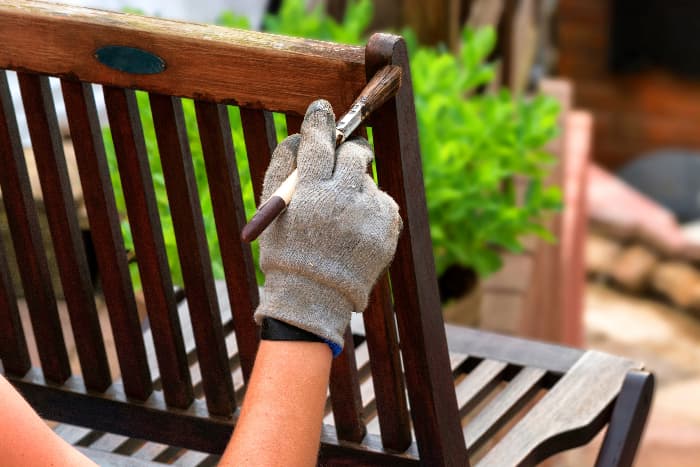
Get Ready to Work With Solvents
When working with solvents, you can do this in your garage or a community workspace with some high-powered ventilation. In any case, you want to make sure that the windows are open and the fans are going.
These solvents create volatile fumes that can be harmful to skin, eyes, and lungs. This is not the type of thing you want to try to power through or tough out. Ideally, you’ll have a ventilator or mask on hand for when you’re working with these solvents.
To apply the solvent, you’re going to want to follow the manufacturers’ directions on the packaging. This typically involves letting the solvent soak into the wood for a while before wiping it off and cleaning up any remaining solvent and stain.
Here’s a handy tip for working with solvents. Because they need to soak into the wood for a while, and you don’t really want these chemicals hanging around any longer than you need to, set a timer. Either use your smartphone, microwave, or oven to time however long these solvents need to work for. This way you won’t lose track of how long they’ve been working for.
The next step is to get the wood ready for paint.
Prime and Paint
Once the solvent has done it’s magic, you’ve got as close to bare wood as you’re going to get!
Apply your primer and let it work into the wood and then start with your base coat, top coat, and finish as desired.
Oil-based stains are much harder to remove and paint over than water-based stains, but it is totally possible to work with these stains. With the right equipment and a properly ventilated space, any piece of old furniture can be repainted to meet a more modern design sensibility.
How To Tell If You’re Dealing With Oil or Water-based Stain
Wow! The process of handling oil and water-based stains is totally different. What if you’ve got a piece of vintage furniture, and you can’t tell what it was stained with?
Here’s an easy test that you can do without any addition equipment. Just take a little bit of water and sprinkle it onto the surface of your furniture. If the water beads up, it’s an oil-based stain. If the water doesn’t, then it’s water-based. Keep in mind that this isn’t always 100% accurate and further testing with solvents like Goo Gone might be needed to get the most accurate results.
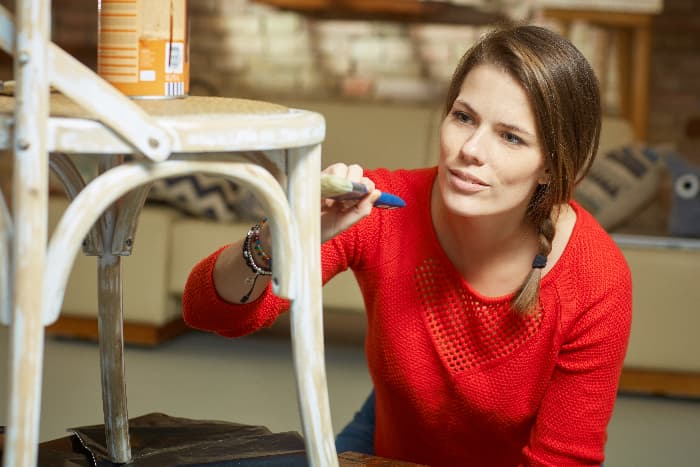
The Two-Step Shortcut to Paint Over Stains
Are you ready for the ultimate shortcut answer to the question “Can you paint over stain?” Here it is: Chalk paint.
Chalk paint is a retro type of paint that was largely forgotten when petroleum-based paints took over the market. However, the recent move away from petroleum products and a desire to explore vintage styles has brought chalk paint back into fashion.
These paints leave a matte finish if no top coat is applied. They also have a tactile touch that many people find pleasant. These paints slide into modern as well as farmhouse looks with ease.
The process here is much easier than with any of our other strategies. All you need to do is apply one to two coats of chalk paint, and you’re done. Really. It’s that easy!
Chalk paint can naturally adhere to pretty much any surface. You don’t even need to sand even though a quick sanding would help the paint to adhere properly. You can also experiment with either a pristine looking finish piece or wear it down a little for that farmyard salvaged look.
To finish your piece, you can either apply a topcoat of furniture wax or shellac to complete the rustic yet refined style.
Chalk paint is an amazing finish for coffee tables, kitchen cabinets and many other projects.
So, Can You Paint Over Stain?
Yes! Painting over stain is a great way to take that thrift store find and elevate it as a timeless piece of art. Painting over a piece of stained furniture is a one of the best ways to change up your current furniture for something a little more stylish.
If you’re sprucing up the furniture in your home, check out some of our other amazing furniture projects:
- How To Clean Furniture Before Painting
- Furniture Painting Guide
- Furniture Painting Products
- Painting White Furniture: The Best No Fail Method!
- How to Paint Wood Furniture in 6 Easy Steps

I’ve been a professional painter for the last 20 years. That Sweet Tea Life is a place where I get to slow down and visit the craftier side of painting.
I’ll share with you everything I’ve learned painting hundreds of pieces of furniture and sets of kitchen cabinets.