IT’S CRUNCH TIME!!!!! Christmas is just a few days away and you’ve just realized you need a little extra something for someone on your list. Or maybe you are wanting to make some little embellishments for the gifts you have wrapped. Or maybe you are looking for an easy craft for your kids to do this week, now that they are home on winter break.
If this is you, then I have an easy solution for you that won’t cost an arm and a leg to do. These adorable mini tumbling block ornaments are a simple dollar store craft you can do in no time at all. It is so quick and easy, you can knock it out in 1 afternoon while you are doing other things to get your home ready for holiday guests.
I have made these the last couple years to go on gifts gifts for family members. My kids have also made some for the mini Christmas trees they have in their bedrooms.
I’ll walk you through, step-by-step, how to make three different versions of these ornaments so you can round out Christmas gifting with a crafty bang this week.

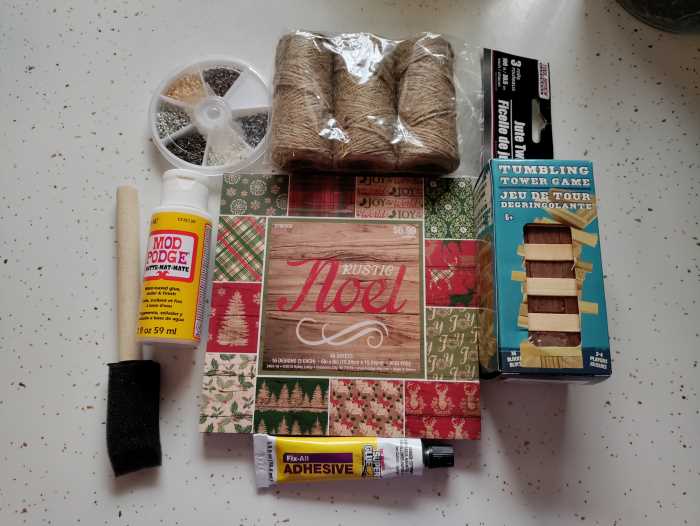
What You Will Need
I love crafting for as cheaply as possible. Finding items you can use for a steal and then creating something new with them is just so much fun. I think it feeds into the thrifter in me, and the thrill of the hunt. And this craft is no exception. Most of the supplies you will need can be found at your local Dollar Tree. What I didn’t find there, I picked up on sale at Hobby Lobby and JoAnn’s.
Since I will be showing you three different versions of this ornament, lets begin with the general supplies you’ll need for all three first. Then we’ll get into any additional supplies later. Some of these supplies you probably already have lying around your house
Supplies
- Tumbling Tower Game – this can be found in the toy aisle at Dollar Tree. You will find there are often two different options in two different sizes. I prefer to get the set that has two different colors of tiles because I like having both a natural wood look and a stained wood look for my ornaments.
- Scrapbook paper – I like to buy the small books with a collection of pages to use, especially the pages that have multiple little images on them. This particular set came from Hobby Lobby during a 50% off sale
- Fix It Adhesive – A friend turned me onto this in lieu of E6000. It can be found in the hardware aisle at Dollar Tree
- Jute Twine – Available in the hardware aisle at Dollar Tree
- Foam Brush – I picked up a multipack from the Dollar Tree Craft aisle
- Eyelet Hook Screws – I ordered these on Amazon two years ago and still haven’t ran out yet. Definitely worth the money spent, which still wasn’t much.
- Mod Podge – If you don’t already have some, you can get at any craft store, Dollar Tree, or Walmart
- Craft pliers (not pictured) – If you don’t have any, you can pick up a 3-pack from any craft store, or at Walmart.
1. How to Make Simple Tumbling Block Ornaments
For the basic tumbling block ornaments you’ll need all the supplies shown above.
You’ll want to begin by laying out a sheet of wax/parchment paper across your workspace. I do this to prevent any glue runoff from sticking to the surfaces of my workspace.
Open your pack of tumbling blocks and match them up in sets of three as best you can.
I try to match color and thickness together to create the best sets possible. Once you have matched up all of your blocks into groups of three, you can begin to glue each group together.
I personally prefer to pour my glue onto a paper plate and dip the edges of the blocks into it. I have found this to be a bit easier than squeezing just the right amount of glue across the blocks.
You will want to glue them together so that they create a square.
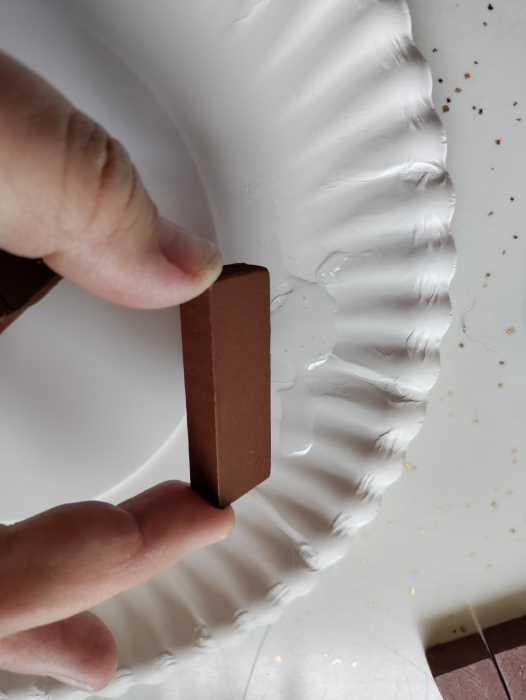
Once you have glued three bars together, set them aside to dry and move on to the next set together.
Be sure to allow plenty of time to dry. I personally like to do this step the night before, so they have time to dry before moving on to the next step in the morning.
This is also the one step I will do in advance for my kids. I prefer to not let them handle these types of glues just yet (they are 7 and 4) for obvious reasons.

Once they have had time to dry, you can peel away any excess glue that has leaked out from the seams.
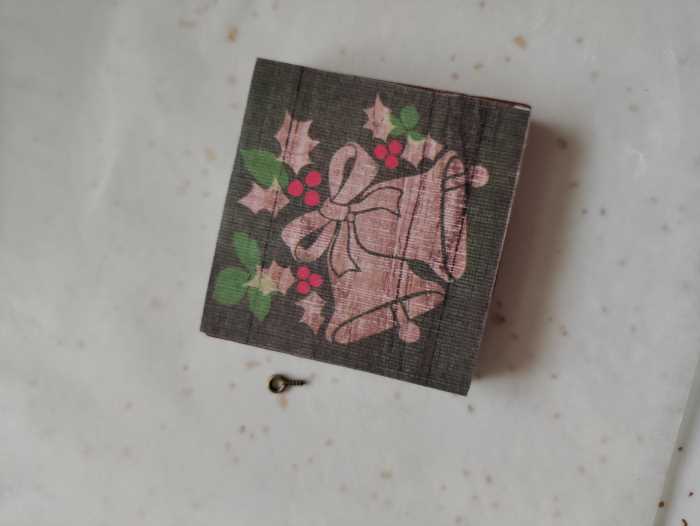
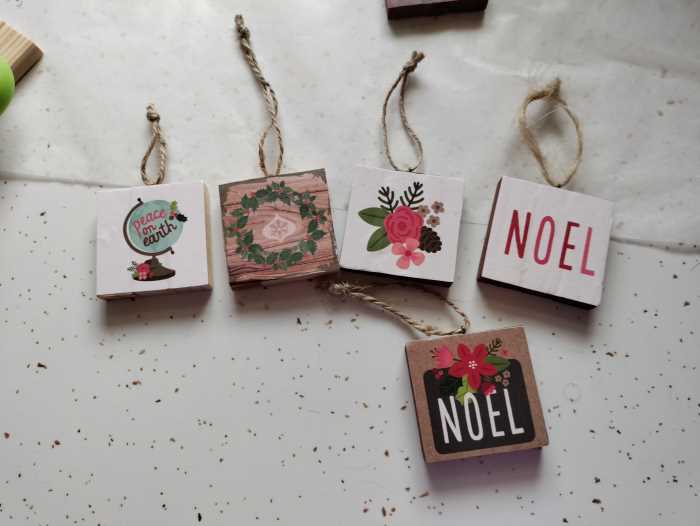
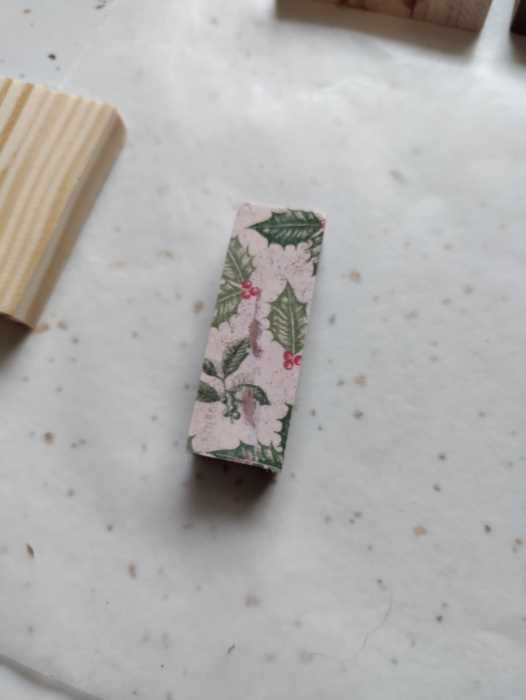
Next, you will want to take your scrapbook paper and cut it down to the size of your ornament square. The paper I like to use for these basic ones are sheets what is pictured below. The images are the perfect size for the squares and require little trimming.

Cut out each individual image, then trim it down to the size of your square. Once you have done this, you will take your Mod Podge and attach the picture to your square.
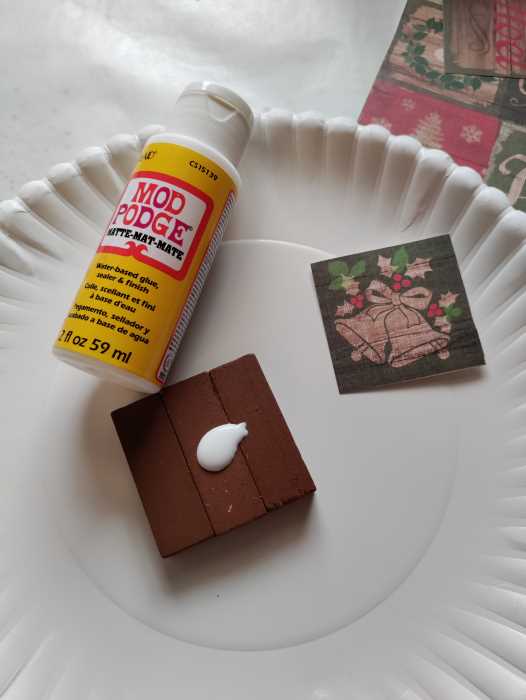
Using my foam brush, I first apply Mod Podge to the tumbling block ornaments, then lay my paper across, being sure to smooth out any wrinkles or bubbles. Then I apply a second layer of Mod Podge to the top side of the paper and spread it across. This gives it the best finish possible.
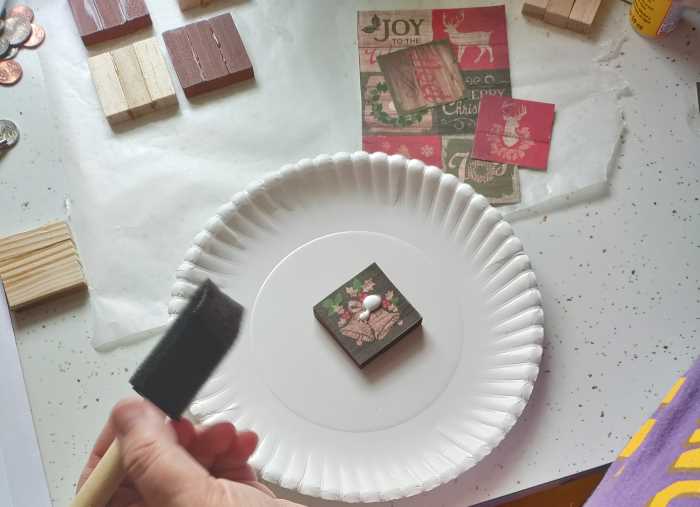
Once you have finished this step, set your ornament aside to dry before attaching the hook for your string.
Attaching the Hook
This will be a universal step you do with all the ornaments I am showing you today. Yo can opt to use a hot glue gun and glue the jute twine to the back of the ornament. But I personally prefer the look of the hook more.
Using a pair of pliers to hold the eye hooks securely, then screw the hooks into the top of your tumbling block ornaments until it is securely in place. Make sure when you are finished that the hook opening is parallel with the longer plain of the tumbling block ornaments.
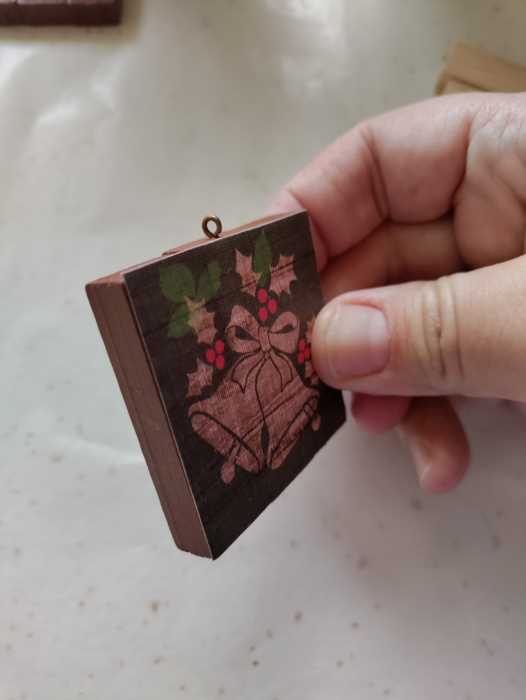
Ornament String
You don’t have to use jute twine to complete your ornaments. But because the scrapbook paper I chose for these ornaments has a rustic feel to it, jute works perfectly. You can always opt to use ribbon or string instead. Its really up to you and the finished look you want your ornament to have.
That being said, take your string – be it jute or ribbon or whatever – and cut it to the desired length you want.
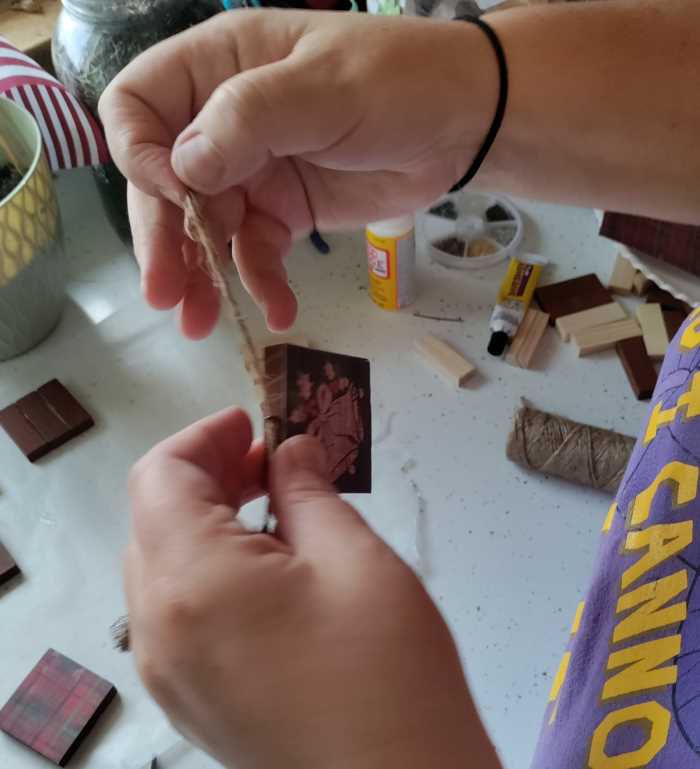
Feed the string through the eye hook and then tie it off. I sometimes like to add a bit of glue to the knot to make sure it is secure, then I trim away the excess string from the end of the knot and voilà , your tumbling block ornaments are complete.
2. How to Make Embellished Tumbling Block Ornaments
For these ornaments you will follow all of the same steps outlined above, with a couple exceptions.
First, you will want to use a simple patterned or solid piece of scrapbook paper, vs. a sheet like what I used for my first set. For these tumbling block ornaments, I went with a simple seasonal plaid design. You can use scrapbook paper you like.
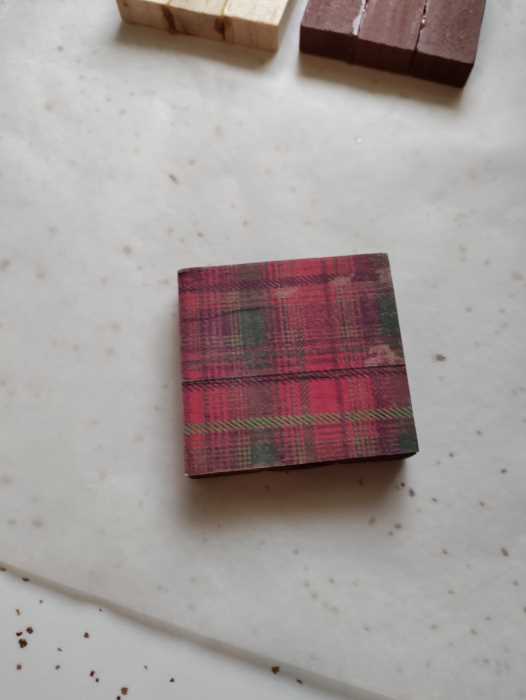
Once the paper has dried, then you can move onto the next step, which is what makes these unique from the other tumbling block ornaments – the flare.
For these, I used laser cut wooden snowflakes from Hobby Lobby. I picked these up during a 50% off sale on all holiday crafts.
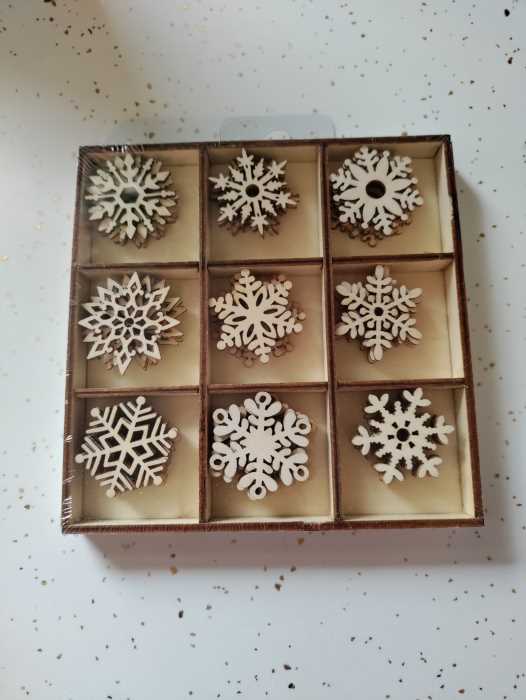
You can choose to paint these or leave them bare. I liked the way the natural wood color looked against the plaid paper, so I left these natural.
Taking your Fix-All adhesive, glue a wooden snowflake to the center of your tumbling block ornaments.
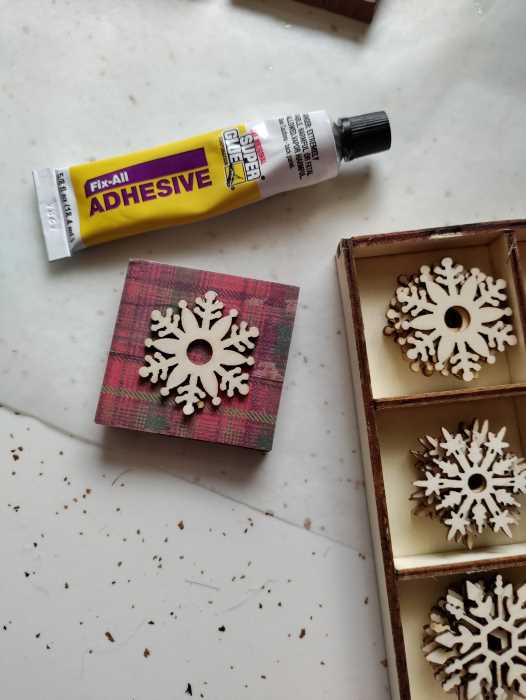
Once the glue has dried, attach your hook and twine and your embellished tumbling block ornaments are complete.
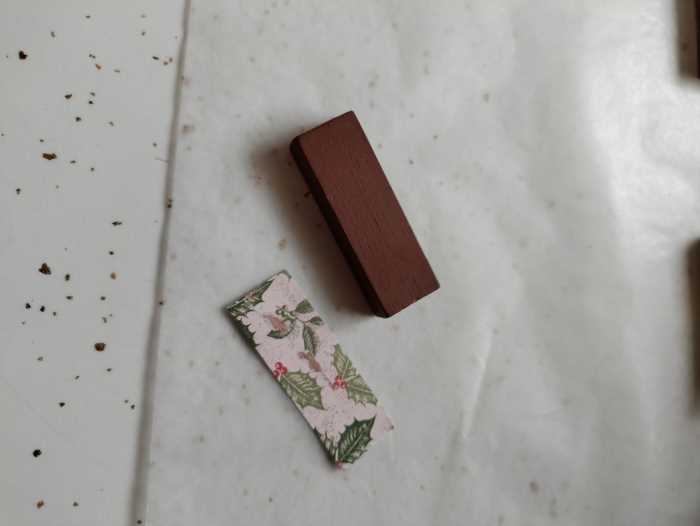
3. Single Bar Tumbling Block Ornament
These are perhaps the easiest of the tumbling block ornaments.
Take a single, solitary block and trim down your scrapbook paper to its size. Then use your Mod Podge to glue your scrapbook paper to it.
Once your ornament has dried, attach your hook and string and this ornament is complete.
More Options to Try
- If you have a Cricut or Silhouette, or are into Chalk Couture, you can take your simple tumbling block ornaments and add words or images to them with vinyl or ink.
- You can also opt to make larger ornaments by gluing 6 across instead of three. From there you can add detailing with your chalk couture or vinyl machines.
- You can also choose to make a cubed version of this ornament where all sides are decorated and embellished.
Final Thoughts
These adorable mini tumbling block ornaments are simple and easy to do. They make the perfect last minute gift idea, gift wrap embellishment, or simple holiday craft for the kids.
They are the perfect size to go on a mini or regular sized tree alike. You’ll find this could easily become a fun new holiday tradition for you and your family each year.
Have you tried this craft before? If you have, tell us what you thought about it in the comments below.


I’ve been a professional painter for the last 20 years. That Sweet Tea Life is a place where I get to slow down and visit the craftier side of painting.
I’ll share with you everything I’ve learned painting hundreds of pieces of furniture and sets of kitchen cabinets.