Homemade decorations are always a fun way to spend time together while preparing for the upcoming holidays, especially when it’s simple enough to give as a gift to someone special!
Coming up with a creative way to make your very own painted wood slice ornaments doesn’t need to be a daunting task! Continue reading to find out how you can make these wood-slice ornaments a part of your holiday tradition.

DIY Painted Wood Slice Ornaments
Creating a painted wood slice ornament is quick and easy. With just a little bit of preparation and some time, you’ll have gorgeous decorations to hang around your house or to give as gifts!
Supplies Needed for Your Painted Wood Slice Ornaments
There are only a few necessary items needed to make painted wood slice ornaments. A few other supplies are optional. It will be up to you whether you use them or not.
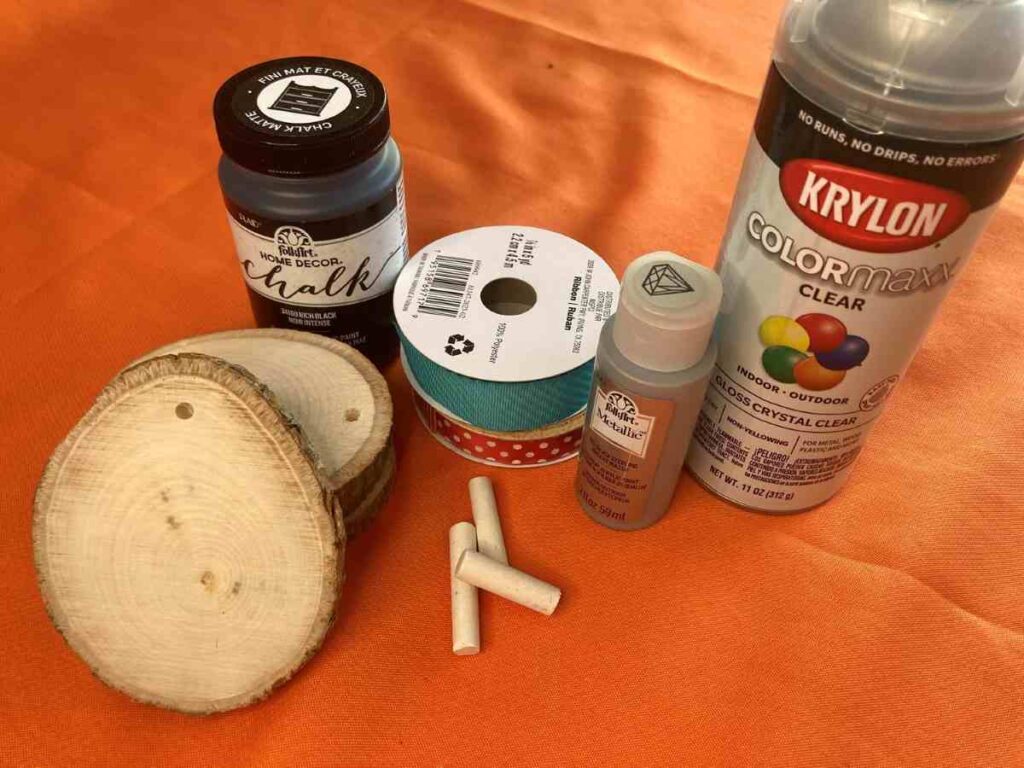
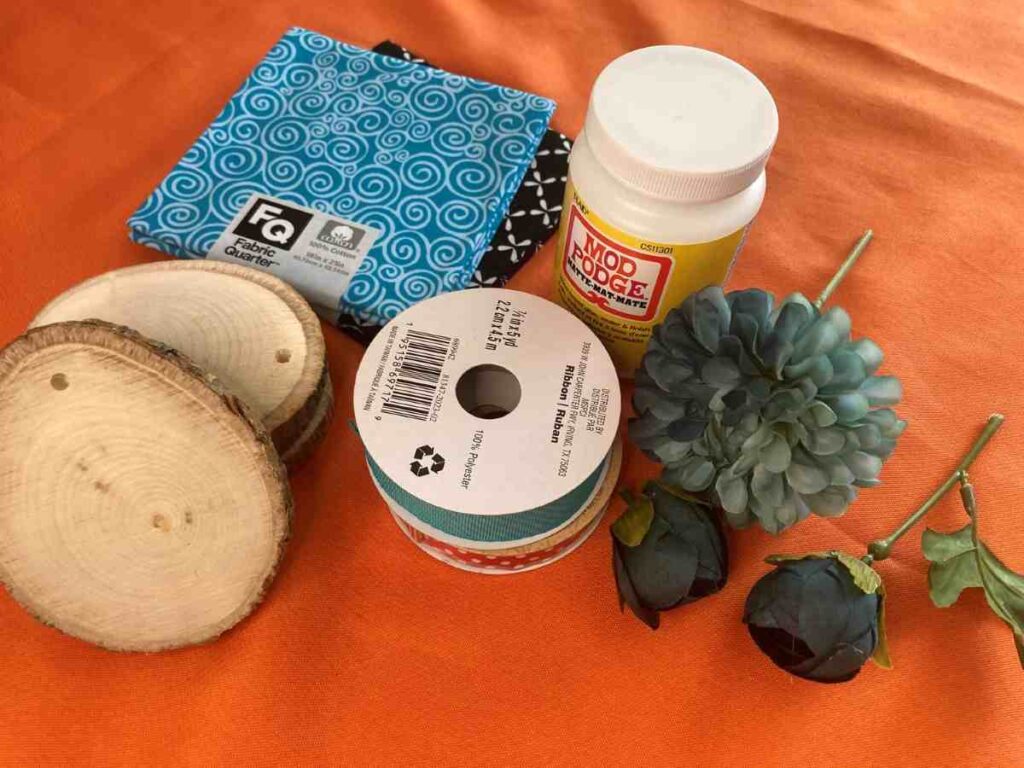
First off, you’ll need to purchase wood slices. If you can buy wood slices that already have a hole drilled in the top, it will save you time down the road.
You’ll also need to purchase chalkboard paint or acrylic paint, paint brushes, chalk or paint pens, sealant (optional), and ribbon.
How to Make Your Painted Wood Slice Ornaments
Step 1: Paint the wood slice
Find a clean space where you can paint your wood slices.
Although some paint instructions will suggest that you sand the wood first, this isn’t necessary with raw wood slices.
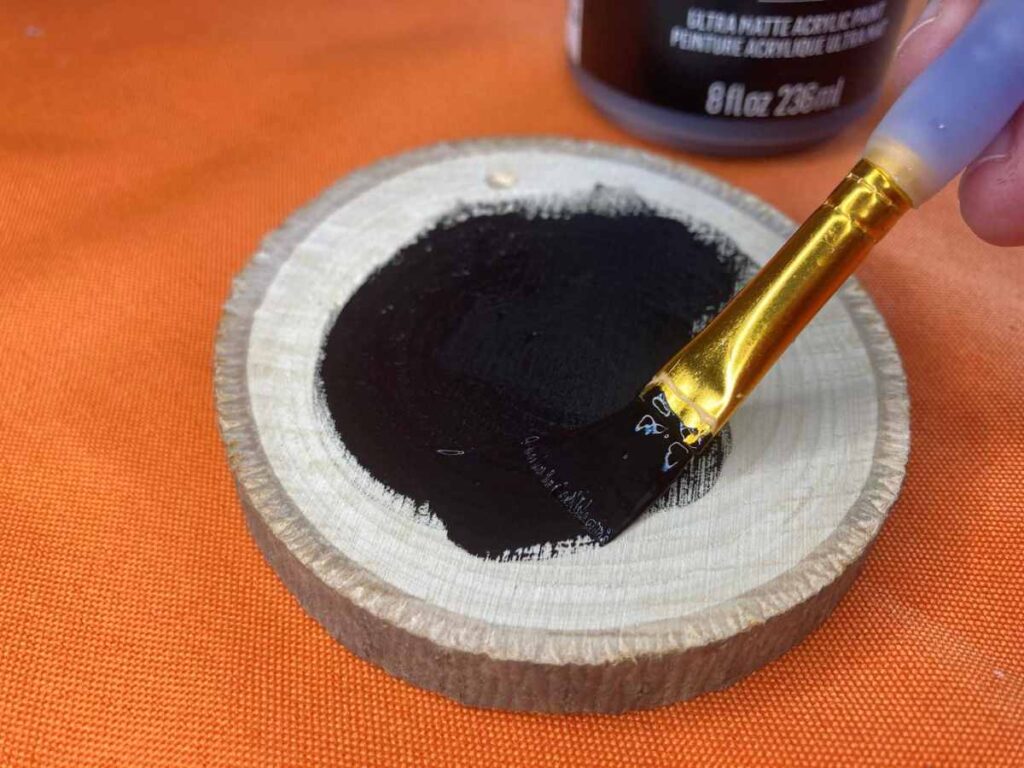
Grab a paintbrush and paint a solid coat of chalkboard paint onto the front of the wood slice. It’s up to you if you want to take the paint all the way out to the edges of the wood slice, or if you want to keep a ¼” border, so you can see the natural wood. Once the paint has dried, paint 1-2 more coats so it’s evenly covered.
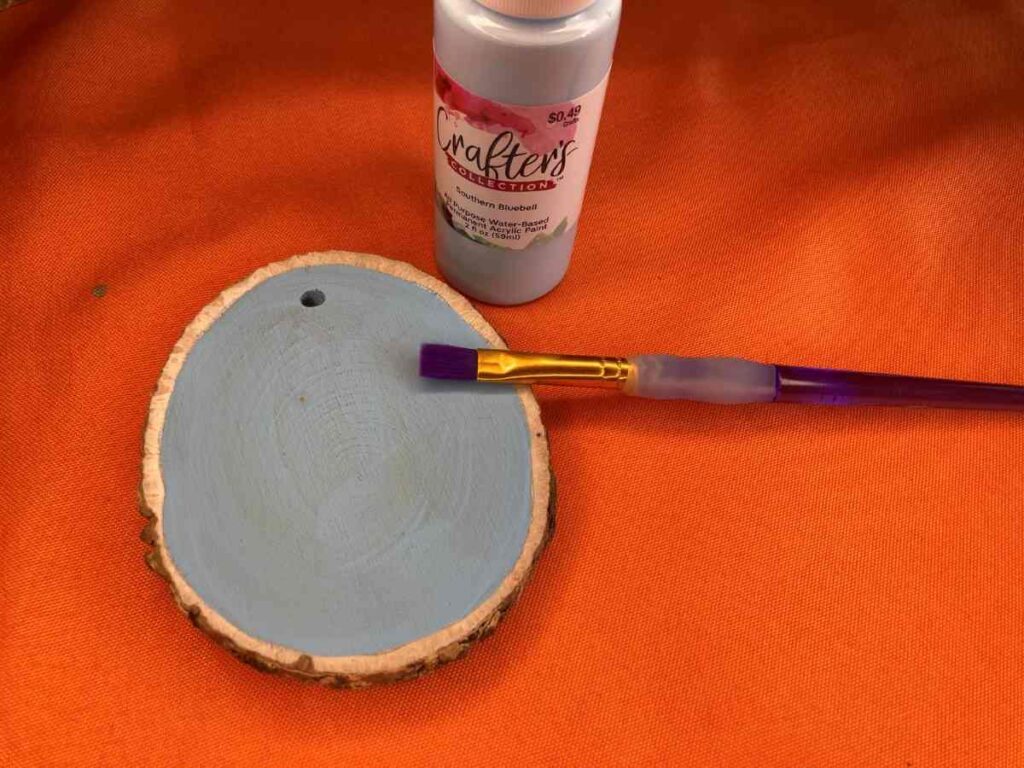
Don’t have any chalkboard paint on hand? This works great with acrylic paint, as well! Choose your desired color and paint 2-3 coats the same way you would chalkboard paint.
Step 2: Create your design
Once the paint is completely dry, use regular chalk to write words or to draw a simple picture on your wood slice ornament. The chalk should wipe off easily with a damp cloth so the design can be changed every year, or if you make a mistake you’d like to cover!
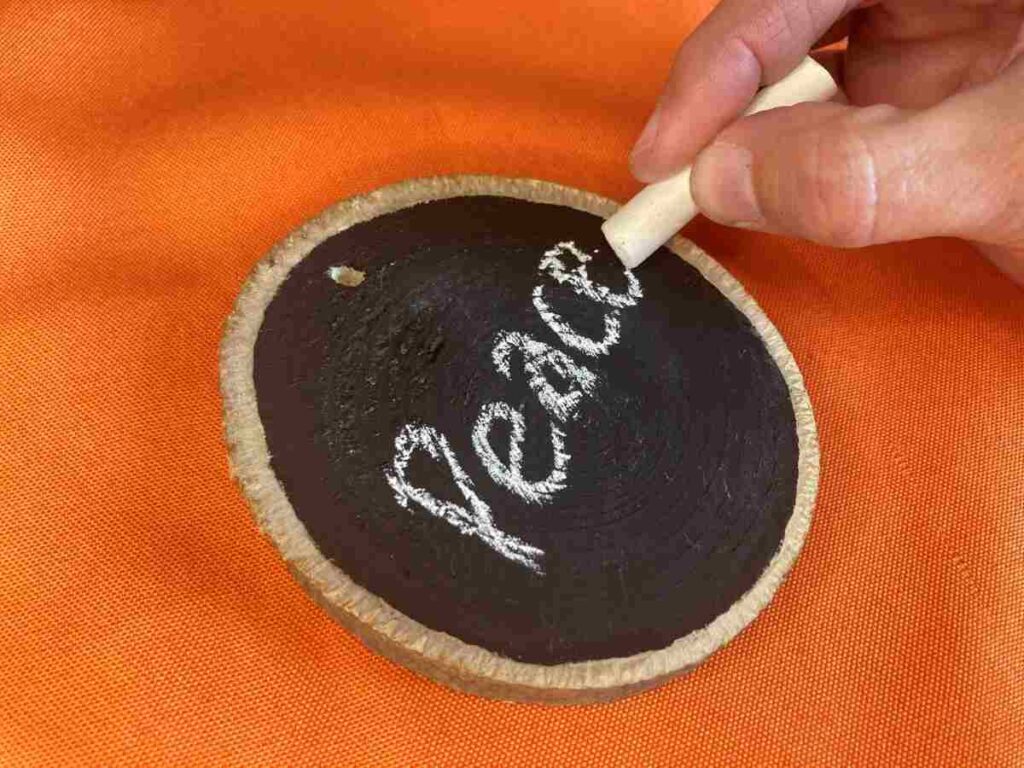
Pro tip: Don’t use a chalkboard paint pen, as the paint tends to be harder to wipe off and may end up being permanent.
Did you use the acrylic paint method? Allow the paint to completely dry. Use a paint pen in your desired color to write a word or to draw a picture on the wood slice!
Step 3: For acrylic paint option – Seal your design
To ensure the paint doesn’t smudge, apply a thin layer of sealant to your acrylic project once the paint has dried. It’s suggested to put 2-3 coats of sealant to be sure it’s protected.
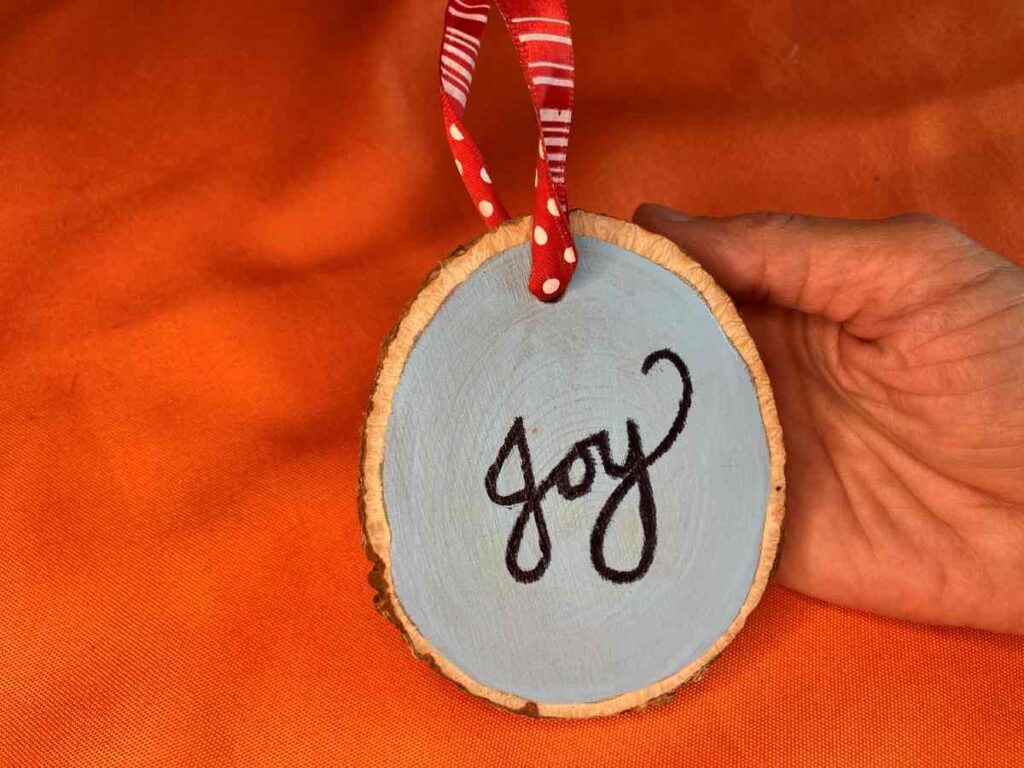
Step 4: Finishing Touches
Once the wood slice is completely dry, thread a piece of ribbon through the hole. To make it easier, twist the ribbon tightly around itself so it will fit through. Tie a knot at the end of the ribbon so there’s enough room to hang on a tree or on a hook. Cut both ends at an angle to cut off any loose threads.
Pro tip: Use wired ribbon to make it easier to thread through the wood slice!
Variation DIY Wood Slice Ornaments
Interested in taking your wood slice ornaments a step further? Why not try using fabric to decorate your ornaments?
Supplies Needed for Your Wood Slice Ornament Variation
Once more, you’ll need your wood slices, fabric scraps, Mod Podge, tagboard or paper, scissors, ruler or measuring tape, pencil, smaller scissors, faux flowers, hot glue gun and glue, and ribbon.
How to Make Your Variation DIY Wood Slice Ornaments
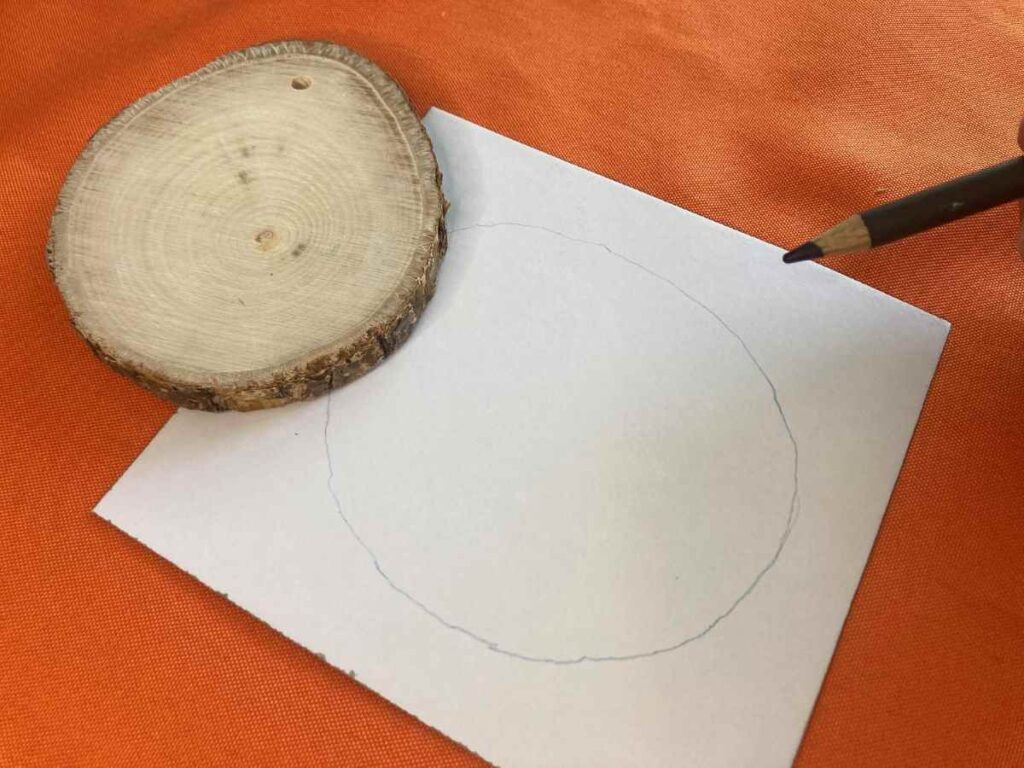
Step 1: Prep the wood slice
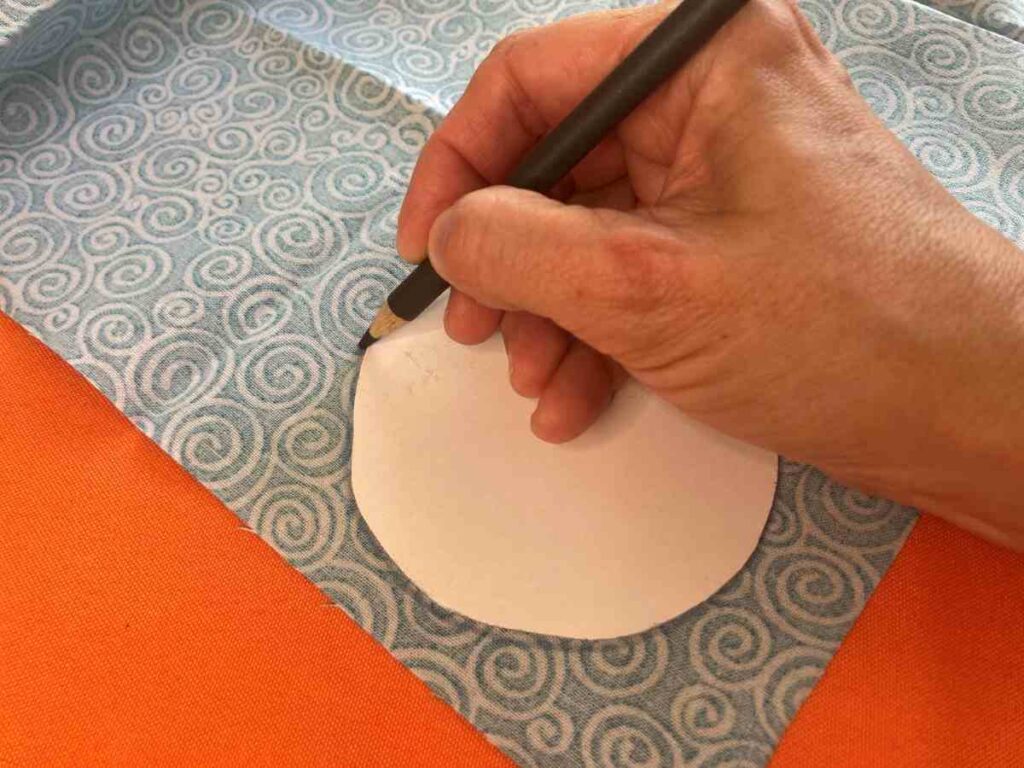
Using a piece of tagboard or paper, trace the outside of the wood slice.
Next, use a tape measure or ruler to measure ¼” in from the outer circle on the tagboard.
Mark several dots all around the inside of the circle.
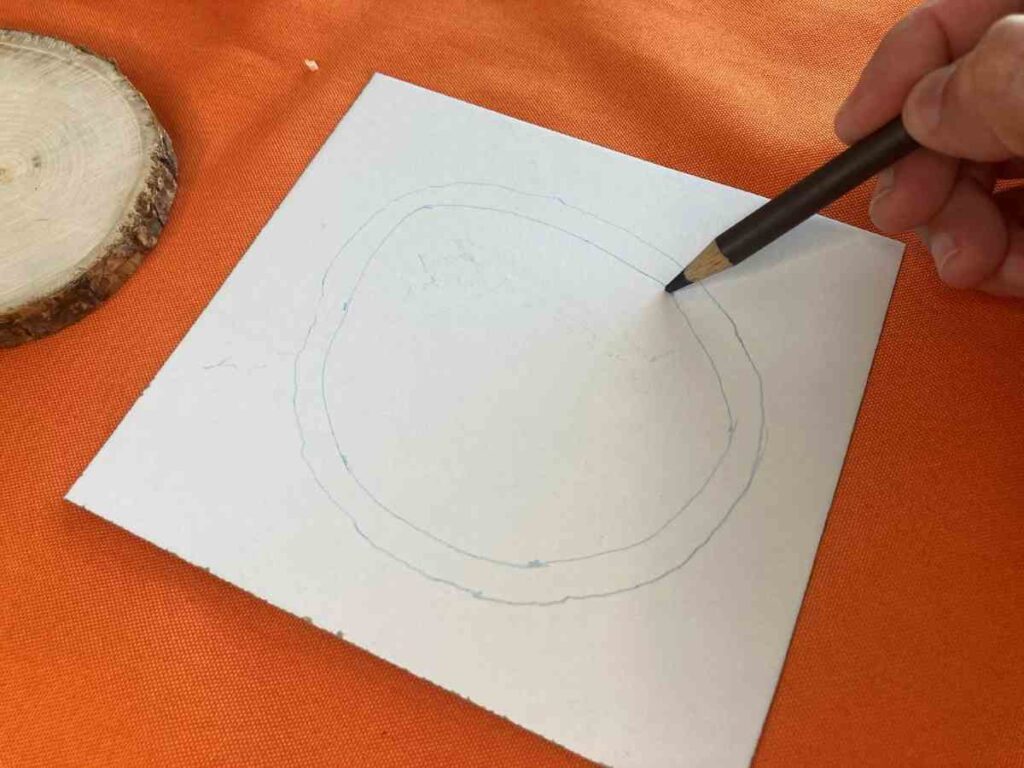
Draw a line that connects the dots, so a smaller circle is drawn on the inside of the outer circle on the tagboard.
Cut out the inside circle.
Step 2: Prep the fabric
Lay the tagboard circle onto the wrong side of the fabric and trace around it using a fabric pen.
Be sure to flip the cut out upside down, since you’re tracing on the wrong side of the fabric. This way, the fabric will have the correct shape when it’s flipped right side up and ready to be placed on the wood slice.
Cut out the fabric circle.
Step 3: Decoupage the fabric

Using Mod Podge, paint a thin coat on the top of the wood slice. Be careful not to allow too much Mod Podge to collect inside the hole.
Step 4: Place the fabric on the wood slice
Lay the fabric circle on the wood slice, smoothing the fabric over the Mod Podge. Press firmly so no bubbles are caught under the fabric.

Using a small pair of scissors, cut a hole where the hole in the wood slice is. This way, it won’t be so hard to create the hole once the Mod Podge is dry.
Paint another layer of Mod Podge over the top of the fabric.
Step 5: Add decorations
This step is up to you! Choose to get creative and find your own add-ons, or go with one of these examples.
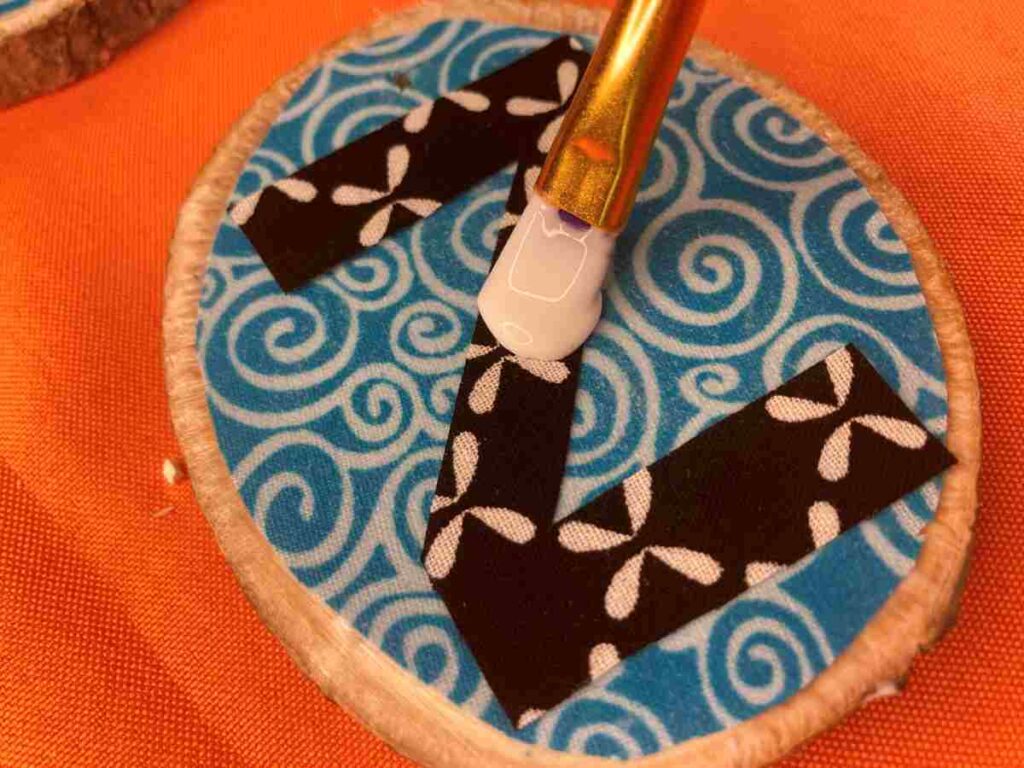
Cut out the first letter of your last name from a different fabric. Lay this on top of the wet Mod Podge and paint another layer of Mod Podge over top of the letter. Allow it to dry completely.
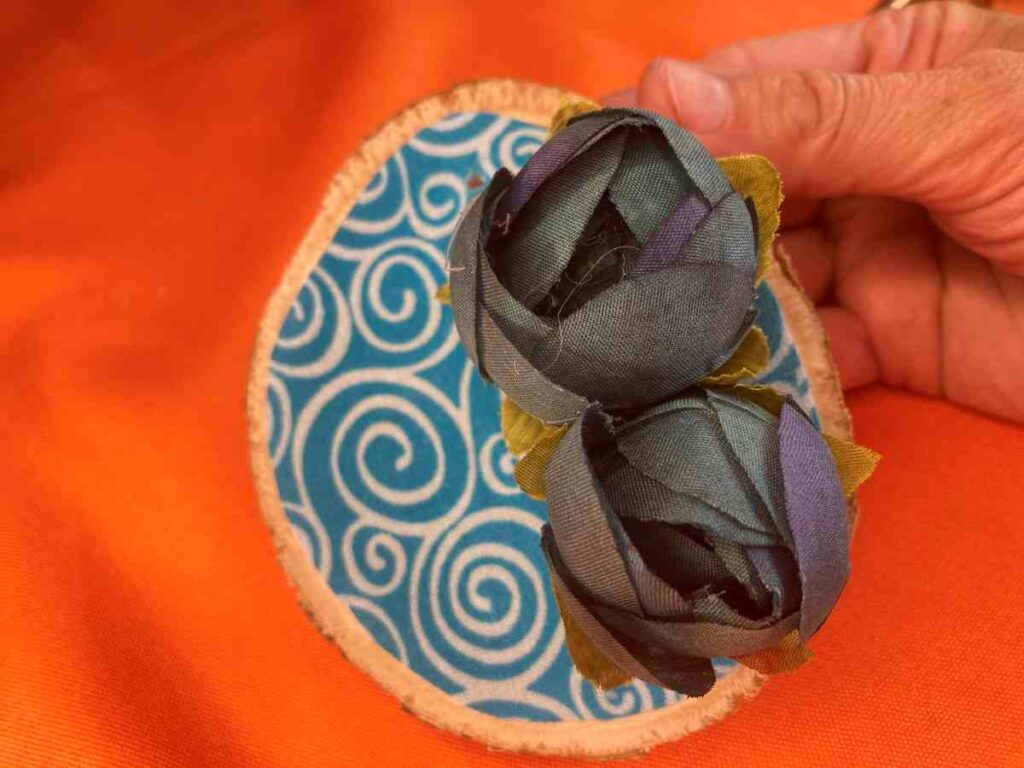
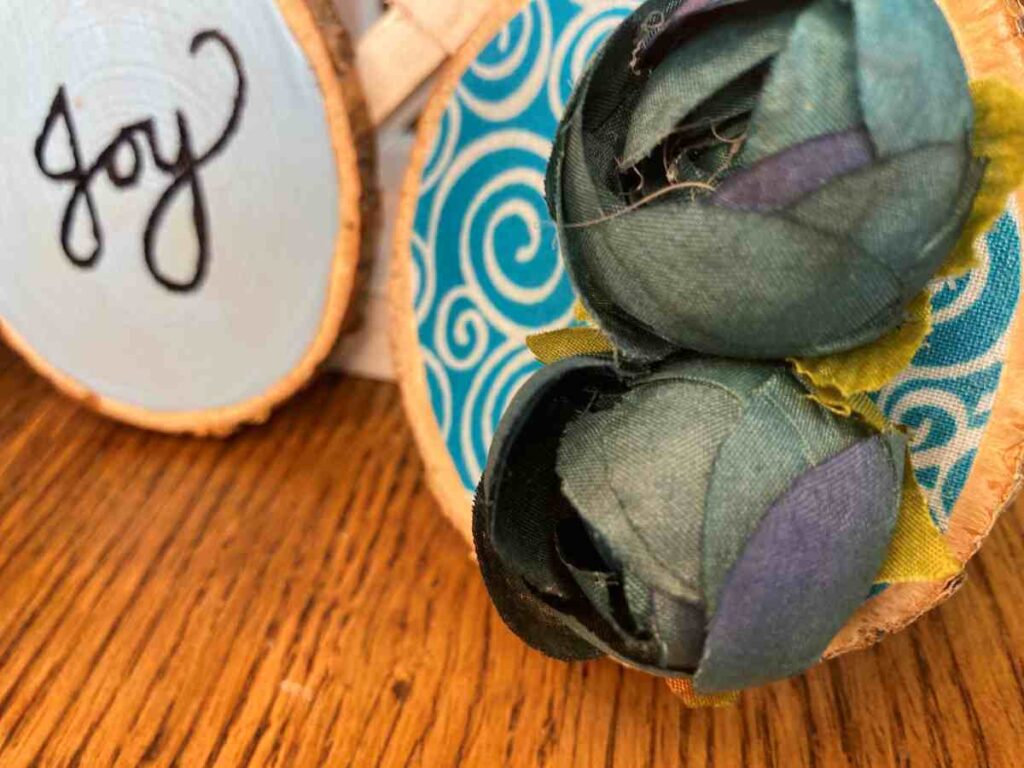
Or, cut off a few faux flowers at the back of the petals. Once the Mod Podged fabric is dry, apply a medium-sized dot of hot glue onto the back of the faux flower. Press the flower firmly onto the wood slice. Apply as many flowers as you desire.
Or get creative and find your own special touches to add to the colorful fabric wood slice ornament!
No sealant is needed for this project since the Mod Podge acts as a protectant for the wood slice.
Step 5: Finishing touches
Insert a piece of ribbon through the hole. Tie a knot at the end of the ribbon. Your ornament is ready to hang!
Enjoy Your Painted Wood Slice Ornaments!
That’s everything you need to know about how to make painted wood slice ornaments, along with a varied decorated version, as well! With so many possibilities, you can make a tradition of creating these simple and easy ornaments every year! And be sure to make a few extras to give away as gifts!
Are you looking for more inspiration for making ornaments? Then visit our post on How to Make 3 Adorable Mini Tumbling Block Ornaments!

Laura L. Zimmerman is an author of both indie and traditionally published books. She lives in a tiny rural town in south-central Pennsylvania with her husband, daughters, four adorable kitties, and one energetic puppy!
After earning a BMUS with a Certification in Music Therapy, she decided to homeschool her children. Here she discovered a passion for learning and teaching, which led her to make writing a priority. She currently enjoys reading and writing YA sci-fi and fantasy, as well as middle-grade mysteries.
Her hobbies include sewing, crafting, jewelry making, learning languages, and doing yoga. You can find her drinking coffee, singing loudly, or consuming another Jane Austen novel.
Laura can be reached at [email protected]