Stenciling offers a unique and customizable way to decorate walls, allowing you to easily add intricate designs and patterns that mimic wallpaper. With the right preparation, including choosing suitable stencils and paint, even beginners can achieve a polished look. The key to success lies in careful stencil alignment and applying paint with precision to ensure a seamless and lasting finish.
Looking to elevate your home’s decor with a personal touch? Dive deeper into mastering the art of wall stenciling and discover how to bring your creative visions to life. Keep reading to learn more about how to paint stencils on walls!
Key Takeaways
- Stencil painting is a method to personalize and pattern walls with precision.
- Preparation, including stencil and paint selection, is fundamental for success.
- Proper post-painting techniques protect and preserve the stenciled design.
Preparing Your Workspace
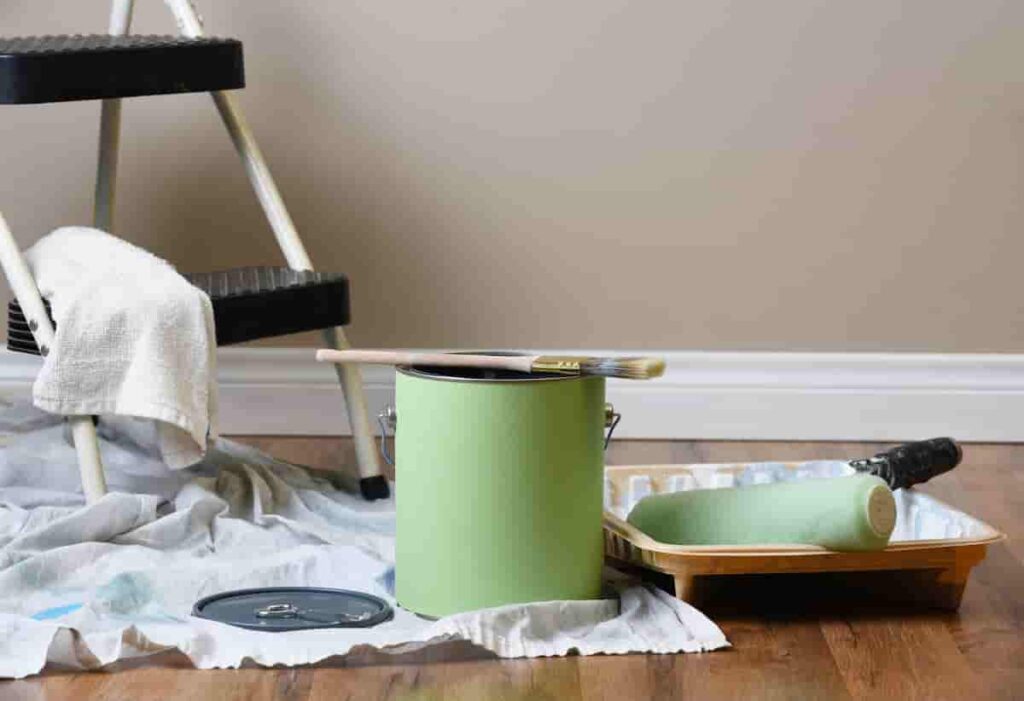
Before one begins stenciling, preparing the workspace is crucial for a smooth and successful DIY project. This involves collecting the necessary supplies and ensuring the area is set up properly to avoid paint spills and ensure ease of access.
Gathering Supplies
The first step is to accumulate all necessary supplies to avoid disruptions once the painting process starts.
- Paint Tray: Select a sturdy paint tray, which will be used to pour and roll out paint.
- Painter’s Tape: High-quality painter’s tape is essential for securing stencils and protecting adjacent wall areas.
- Paper Towels or Rags: Keep these on hand for wiping excess paint and immediate clean up of any spills.
- Supplies Table: Supply Item Purpose Paint Tray To hold and roll out paint Painter’s Tape For securing stencils, protect areas Paper Towels To clean brushes or wipe excess paint Drop Cloth To protect the floor from spills Ladder To reach higher sections of the wall
Setting Up The Area
Once supplies are in place, setting up the area is next. This includes:
- Drop Cloth: Spread a drop cloth or old sheets to cover the flooring and any furniture in the vicinity to protect from paint splatters.
- Ladder: If the designated wall is tall, position a ladder to safely reach the upper areas. Make sure it is stable and locked in place.
- Tape Application: Apply painter’s tape to the edges of the work area, including baseboards, ceiling lines, and adjacent walls to prevent unwanted paint marks.
- Ventilation: Ensure good airflow in the painting area by opening windows or using fans, as it helps in faster drying and reduces paint fumes.
Choosing Your Stencil and Paint
Before embarking on a wall stencil project, one must be methodical in selecting the right stencil and paint. The choice of stencil pattern and paint colors can drastically affect the aesthetics and longevity of the finished product.
Selecting the Right Stencil
One should choose a wall stencil that complements the room’s existing decor and personal style. Stencils come in a variety of designs such as geometric patterns, floral and abstract. Companies like Royal Design Studio, Amazon, and Etsy provide an extensive range of options. Durability is also key – a sturdy stencil allows for cleaner lines and multiple uses.
- Materials: Plastic stencils are preferable for their durability and reusability.
- Size: Ensure the stencil size is proportional to the wall space.
- Pattern Complexity: Simpler patterns may be easier for beginners, while intricate designs may require more advanced techniques.
Picking the Paint Colors
The paint chosen must be suitable for the room’s lighting and existing color scheme. Acrylic paint and craft paint are commonly used due to their quick-drying properties and rich pigmentation. For a high-quality finish, consider using paints like Behr Marquee which offer a one-coat coverage guarantee.
- Paint Type: Flat or matte paints are often used for stenciling to reduce glare and highlight details.
- Colors: Select colors that provide a contrast to the wall base color or complement it subtly.
- Tools: Utilize stencil brushes or foam rollers designed for stenciling to achieve a crisp, professional look.
By considering these factors during the selection process, one can ensure their stencil painting project has a solid foundation for success.

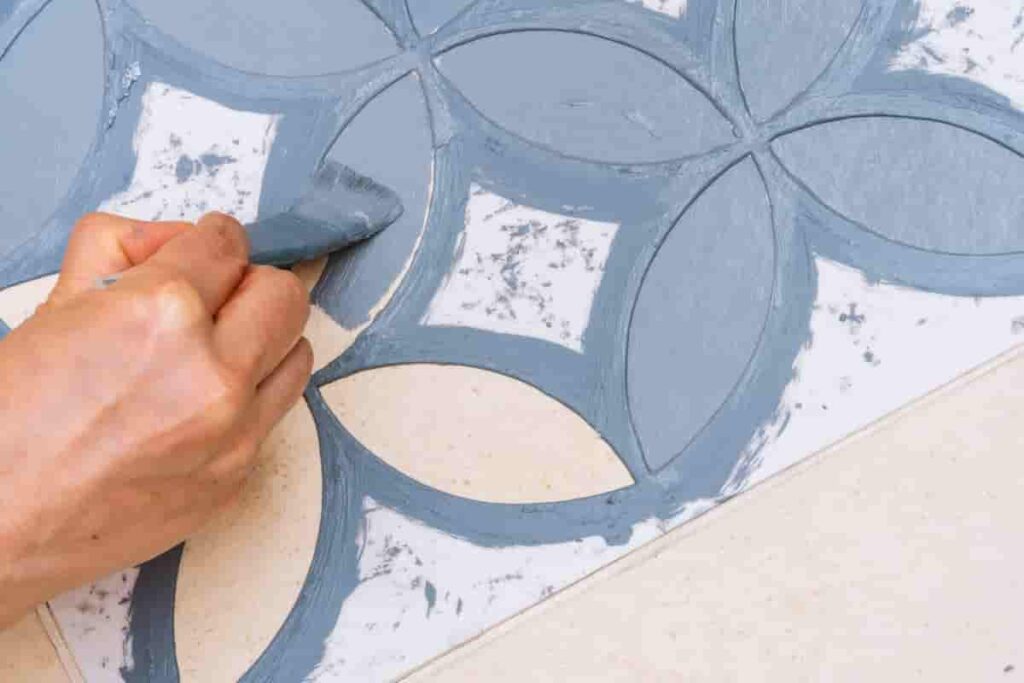
Stenciling The Wall
When stenciling a wall, one should focus on securing the pattern precisely, applying paint correctly to avoid bleeds, and making careful finishing touches.
Securing the Stencil
To begin with, one must attach the stencil to the wall, ensuring it is flat and has no gaps that could cause paint to seep underneath. For a perfect fit, painter’s tape is commonly used for its easy removal and strong hold. One should start from the top of the wall, such as just below the ceiling for a ceiling stencil, and make sure the stencil is level. For larger patterns, alignment is usually guided by registration marks that maintain the pattern continuity as one repositions the stencil across the wall.
- Materials Needed:
- Stencil
- Painter’s tape or spray adhesive
- Level
Applying Paint
After securing the stencil, it’s time to apply paint. For best results, one should use a stencil brush or a foam roller, applying thin coats of paint to avoid paint bleed. A dabbing motion is recommended when using a brush, while light, even rolls are ideal with a roller. If using multiple colors, they must ensure that each color is dry before repositioning the stencil to continue the pattern.
- Painting Steps:
- Pour paint into the tray.
- Coat the brush or roller lightly.
- Dab or roll off excess paint.
- Apply paint with a dabbing or rolling motion.
- Allow paint to dry before moving the stencil.
Finishing Touches
Once the wall stenciling is complete, touch ups may be necessary where paint bleed has occurred. This is done using a small paint brush to carefully correct any imperfections. As for the edges and areas where stencils cannot reach, additional manual painting might be required. After achieving the desired look, remove the stencil slowly and gently to ensure the pattern remains intact.
Post-Painting Procedures
After the paint has been carefully applied, a few steps are needed to ensure the final aesthetics are as desired, and the tools used are preserved for future projects.
Removing the Stencil
Once the paint has dried to the touch, they can gently peel the stencil away from the wall. This should be done with care to avoid smudging the design. During removal, one should start from a corner and pull at a 45-degree angle to maintain the integrity of the pattern stencil.
Cleaning and Storage
Paint Brushes and Rollers: They should be cleaned immediately after use with soapy water for acrylic paints or the appropriate solvent for oil-based paints. Brushes should be rinsed until the water runs clear, then reshaped and allowed to dry. Rollers need to be rinsed and then removed from their frames to dry thoroughly, preventing rust.
Stencil Care: The stencil should be cleaned with warm water and a gentle dabbing motion, especially if using a detailed or intricate pattern stencil. For a paint brush or a sponge used in shading techniques, a more thorough cleaning may be required to remove all traces of paint.
Storage: Dry stencils should be stored flat or rolled in a tube, away from direct sunlight and heat sources. Brushes and rollers should be hung or laid flat to prevent the bristles or foam from becoming misshapen.
The use of affordable materials like DIY stencils and proper post-painting procedures can keep tools in good working condition and ensure a crisp, clean result on the wall pattern.
Frequently Asked Questions
What are the best practices for stenciling a wall without paint bleed?
To prevent paint bleed, one should use painter’s tape to secure the stencil edges flat against the wall and apply a modest amount of paint to the brush or roller. Using a stencil brush with a tapping motion helps in applying paint cleanly.
Which type of paint yields the best results when stenciling walls?
Acrylic craft paints or latex paints are preferred for their quick-drying nature and crisp finish. The choice between the two often depends on the size of the project and the desired durability of the stencil work.
What techniques should be used for successfully stenciling words onto a wall?
When stenciling words, a laser level can ensure text alignment. Applying paint to letter edges with a small stencil brush can define crisp lines, and practicing on a similar surface beforehand helps to perfect the technique.
Can you provide guidance on using spray paint for wall stenciling, especially on textured surfaces?
Spray paint can be effectively used for wall stenciling on textured surfaces by choosing a spray with fine mist, spraying from the appropriate distance to avoid runs, and taking care to mask the surrounding area thoroughly to prevent over-spray.
Conclusion
Stenciling walls allows individuals to add a personal touch and design flair to their spaces without incurring the cost of wallpaper. With the right tools and some practice, they can achieve professional-looking patterns that enhance the aesthetics of any room.