Say you’re a burgeoning artist looking for a leg into painting or drawing but aren’t sure where to start.
Why not try craft stenciling?
With simple, low-cost materials and endless creativity, you can create almost any kind of design you can dream of with craft stenciling!
Keep reading to learn more about craft stenciling, what you need, and how to start.
All About Craft Stenciling
What is Craft Stenciling
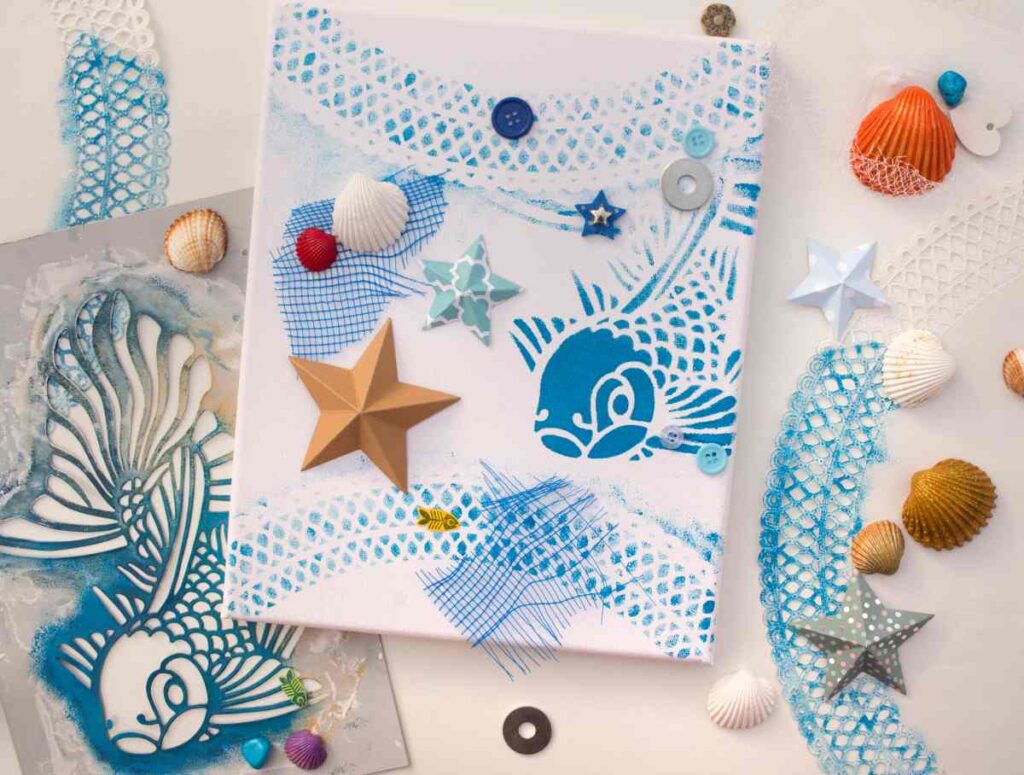
Craft stenciling is the simple yet very fulfilling project of creating arts and crafts using stencils!
To put it simply, craft stenciling is the art of creating beautiful, colorful designs by applying a pigment to a medium by way of a cut-out stencil.
And yes, it really is that straightforward! Craft stenciling is a very versatile and accessible art form that helps to lessen the learning curve in learning to paint.
Or, you could be interested in craft stenciling as a way to ensure neat and precise designs, especially for interior decorating, logos, or messaging.
Craft stenciling is also a perfect way to branch out and add something new to your artistic wheelhouse.
Regardless of your reasons for getting started, craft stenciling is a fun, easy activity to try out!
It’s not very time or labor-intensive and doesn’t require a bunch of equipment, making it as suitable for professional artists as it is for young children.
Different Kinds of Craft Stencils
When it comes to picking out your craft stencil, the world is your oyster!
Common craft stencil designs include letters and numbers, flowers, borders, animals, and holiday images. But you can find a craft stencil somewhere out there for any design you can imagine.
You can even create your own stencils using vinyl, stencil sheets, and a craft knife. That way, your options for craft stenciling designs really are endless.
Craft stencils also come in different sizes and shapes depending on the project you want to undertake.
Decorating a kitchen backsplash is a typical application of craft stenciling and would likely require a larger stencil than creating a birthday card would.
Different Application Methods
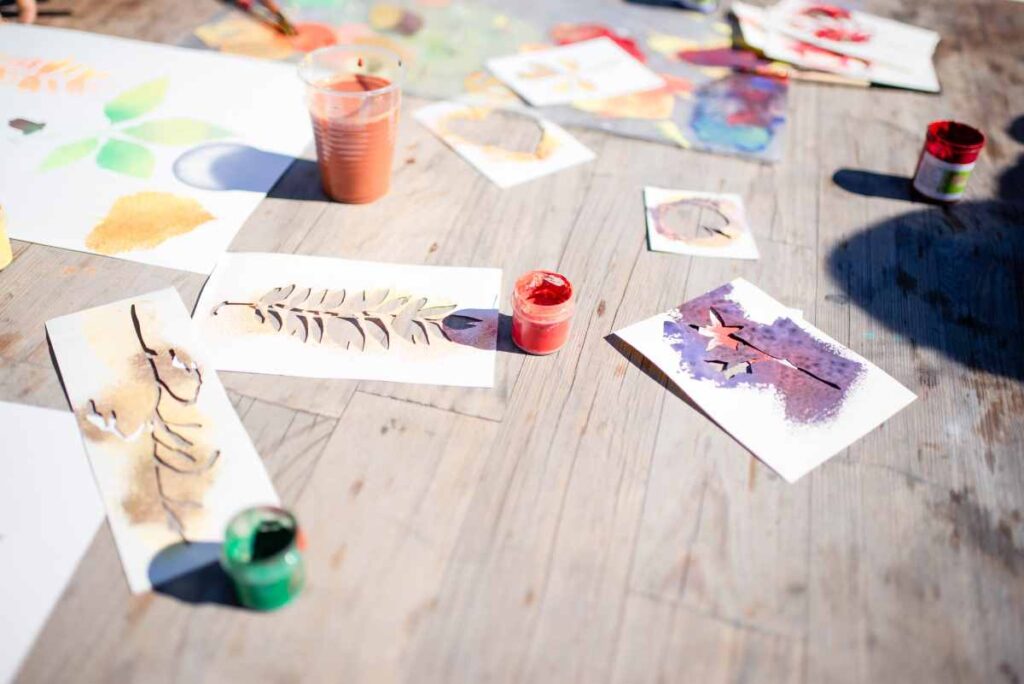
To add some unique flairs to your craft stenciling projects, there are a few different ways to apply craft stencils beyond your basic monochrome stencil paintings.
For a more distressed effect, you can try flicking your brush instead of painting the stencil opaquely.
This way, your art comes out speckled and splattered, looking almost grainy and weathered. Depending on your intended outcome, this could be a really cool effect!
Another interesting application technique to try is dabbing your brush instead of even, solid strokes.
This technique will add texture and dimension to your work without having to purchase additional textured paints.
You can add some heat to your craft stencil design for a more sophisticated look!
Covering the design with clear embossing ink and then sealing it with a hair dryer creates a glossy, foiled appearance, perfect for wedding invites.
What You Need to Get Started
You’ll need a few basic materials to get started with craft stenciling.
If you’re an avid crafter, you’ll likely have most of these things lying around. But if not, your shopping list for a craft stenciling project should include the following:
- A flat surface or silicone mat
- Your chosen medium (paint, ink, pencils, pens, markets, etc.)
- Base material (paper, card, fabric, tile, wood, etc.)
- Low tack tape or stencil tape
- Your stencil!
How to Use a Stencil
Create Your Base
First, you need to decide what medium you want to use for your stenciling.
Craft stenciling is an excellent method to decorate nearly every kind of surface you can think of.
Whatever you choose, make sure it’s laid down as flat as possible, either on a table or mat. You can also secure the base material with tape if need be.
Choose and Secure Your Stencil
Once your base is nice and flat, choose your desired stencil template and position it as desired.
For the cleanest, most precise outcome, taping the stencil taut against your base material is a great idea.
That way, the stencil itself is secured and won’t move around during application, potentially disturbing your design.
Select Your Colors
Now for the fun part: painting your stencil!
Depending on the material that you’re painting, the medium you can use will differ.
For instance, if you want to stencil on a T-shirt, you’ll need fabric paint. However, paper and card take to most craft stenciling mediums, so that’s a great place to start.

You can start painting once you’ve chosen all your materials and laid out your colors.
The possibilities are truly endless for what you can create!
Let Dry
Though you’re excited to remove the stencil and reveal your beautiful artwork, you’ll need to pump the brakes for a moment.
It’s important to let your paint dry, but not completely, before you take off the stencil so that your lines and details stay sharp and crisp.
If you start moving the stencil around too early, the wet paint might bleed and smear outside the lines of the stencil.
Remember that the drying time might differ depending on what material and type of paint you used. Usually, about a half hour is sufficient.
Remove the Stencil and Voila!
Once enough time has passed, and your craft stencil art is mostly dry, remove your stencil and reveal your completed design!
Craft Stenciling Techniques
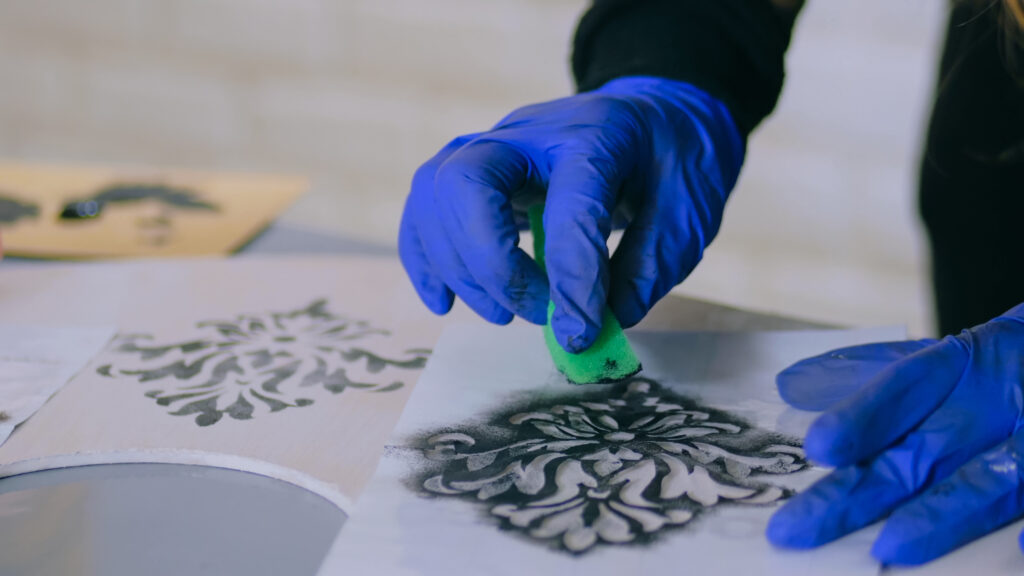
Applying your colors and executing your craft stenciling project can incorporate many different techniques to achieve different ends, depending on your intention.
You can use and apply the same techniques you might use when painting a landscape or still life to your craft stenciling.
To add depth and complexity to your stencil design, try applying your colors in layers or a gradient. Stencil designs don’t have to be block colors – you can play with your tones and shades, too!
Similarly, using textured paints or pastes in varied strokes and patterns can add so much dimension to even the most simple of stencils.
If you’re aiming for clean, crisp lines, apply your color in thin layers and build them up.
This creates a more uniform look and leaves little room for smudging, bleeding, or dripping. No big globs of paint or ink, no worries!
On that same note, if you want to use multiple colors but want clear contrast, you can use low-tack tape or a piece of paper to block off the areas where you don’t want the color.
Craft Stenciling Tips and Tricks
Caring for Your Stencil
In order to get the most use out of your craft stencils, you’ll want to make sure they are kept in pristine condition!
To do so, clean your stencil after every use to avoid any product transfer.
However, you don’t want to scrub too hard with a harsh product. Many craft stencils feature intricate details that rough handling could easily damage.
It’s also important to keep your stencils as flat as possible. Any kind of bending or buckling could impact your designs, which you don’t want.
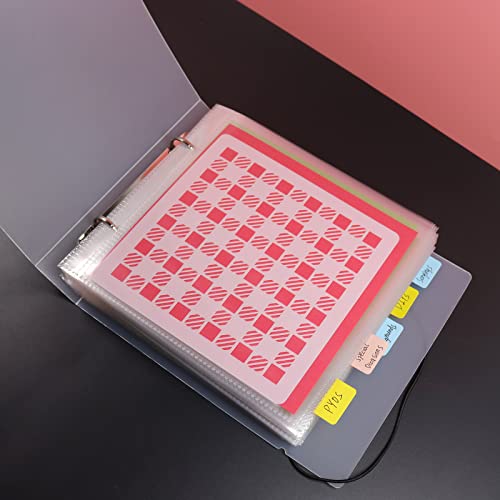
As such, storing your craft stencils in a binder or between two pieces of cardstock is an effective solution to this problem, ensuring your stencils stay as nice and neat as when you bought them.
Choosing Your Material
While you can apply a craft stencil to most surfaces, there are a few you should be wary of.
Surfaces and materials with a lot of texture are often difficult to apply a stencil to cleanly.
Though the grain may look really cool, like a textured paint would, the pigment application is uneven and difficult to get right.
Certain types of paper, wood, textiles, or stone could potentially pose this issue. This is not to say you can’t use them for craft stenciling – you definitely can! Just lower your expectations a bit in terms of perfection, symmetry, and crisp detail.
Along those lines, if you are using an organic material, you’ll probably want to clean and prep your surface first so you don’t trap loose dirt or sediment underneath your pigment.
Fixes and Touch Ups
If you follow the steps carefully and with patience, you should come out with a nice, complete, smudge-free design.
However, things happen, and you might find yourself with some pigment that has bled out of the borders of the craft stencil.
Worry not – there is a fix!
Once your initial design has dried, take the tiniest paint brush you can find and a paint color closest to that of your base material and get to work!
This a great technique to touch up any craft stenciling designs, and no one will be the wiser.
The same goes for any gaps in your stencil design, except you use your craft stenciling pigment to fill in any holes or bridges in your design.
Craft Stenciling: FAQ
What can I use stenciling for?
You can use craft stenciling techniques for anything you can think of!
From art you hang onto your wall to textile decoration to homemade cards, the creative uses and applications of craft stenciling are vast and varied.
As long as you have a stencil, some material you’d like to decorate, and some sort of pigment, you can stencil away to your heart’s desire!
What medium can I use for craft stenciling?
The medium you use depends more on the material you want to stencil than anything else.
If you want to decorate some T-shirts, you’ll want to use some kind of fabric paint that you’ll need to heat seal.
For tiling and backsplashes, you’ll want specific interior paints, likely acrylic-based, that can withstand years of use.
However, if you’re stenciling onto paper, card, or any other more universal material, you can use almost anything!
Crayons, paint, marker, spray paint, and glitter glue are all valid options for craft stenciling mediums.
Can I reuse craft stencils?
If you care for them correctly, then yes, you can certainly reuse craft stencils!
But to really get some life out of your stencils, you’ll want to clean them regularly and store them carefully and correctly to keep them as close to pristine as possible.
Wrapping up the Guide to Craft Stenciling
Now that you have a complete guide to craft stenciling, you’re ready to get started!
Grab your stencil and your pigments and get designing. You might just be surprised by the beautiful art you create!
For even more inspiration, check out these wall stenciling ideas!

Leah is a writer for That Sweet Tea Life and is passionate about learning and trying new things.
She has a master’s degree in English and loves to write about and share her colorful & crafty DIY experiences!
Leah can be reached at [email protected]