What comes to mind when you think of jewelry? You’re probably thinking about diamonds, jewels, gold, silver, and other solid pieces. But you can use plenty of other materials to make jewelry, including soft things like fabric!
Textiles can make beautiful fabric jewelry pieces with their patterns, varying textures, and general versatility.
Creating fabric jewelry can be easy, as you probably have some old clothes lying around your home. It’s the perfect upcycling opportunity! Or you can, of course, buy new fabric if you don’t like what you have.
Regardless of the route you choose, keep reading to learn how you can turn these textiles into stunning wearable accessories!
Materials You’ll Need to Create Fabric Jewelry
Before starting your new jewelry project, you should ensure you have all your supplies. You may have some of these jewelry materials already, but it’s always a good idea to double-check. There’s nothing worse than being in the middle of a project and realizing you’re missing something.
Here are some things you’ll need when making a beaded fabric necklace and fabric earrings.
Fabric
You can’t have fabric jewelry without the textiles themselves! This should be an easy thing to find. Look around your house to see if you have clothes, blankets, tablecloths, and other fabrics you don’t use anymore.
You probably have at least one usable textile available. But if you don’t, a pack of fabric squares will do just the trick!
A mixed pack of cotton fabric squares offers you plenty of variety in regards to patterns. You’ll get multiple pieces of jewelry out of these packs as well. Another option would be to take a trip to your local craft store to pick out some fabric.
Keep in mind that synthetic textiles can cause skin irritation. And they can exacerbate skin conditions like atopic dermatitis, which causes chronic skin inflammation. Cotton is usually easier on the skin.
Wooden Beads
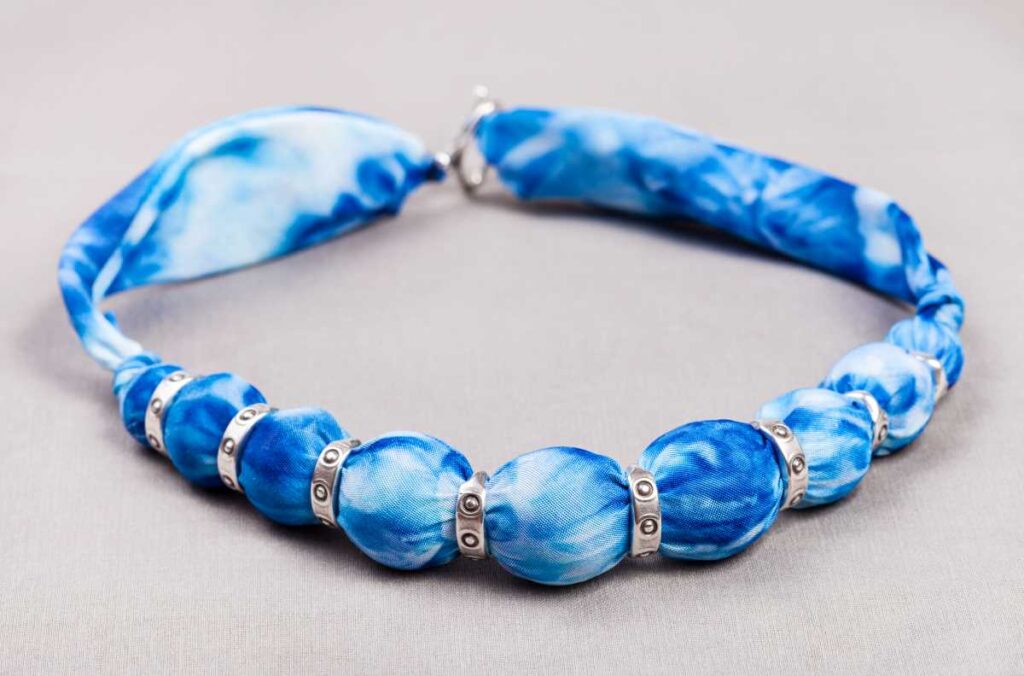
When making a fabric and beaded necklace or bracelet, you’ll need 30mm wooden beads. You’ll initially make a jewelry sleeve with the fabric you choose and sewing thread.
The wooden beads will go inside your fabric sleeve to create the look of fabric-covered spheres.
Jewelry Chain
You’ll need some jewelry chain to finish your fabric and beaded necklace or bracelet. It’ll help you attach your clasps, allowing you to wear your masterpiece. Using chains will also help you adjust the length of your jewelry piece if it’s too short.
Beading Hoops
If you want to make fabric earrings, you’ll need something to attach the textile pieces. The best option for this is to grab some beading hoops. These are large enough to hold multiple pieces of fabric. And they’re specifically for earring-making.
Jewelry-Making Kit
Another vital material for fabric jewelry is a jewelry-making kit. Something like this comes with all the necessary tools and jewelry pieces.
It’s much easier to get a kit instead of purchasing everything separately. You might even save some money, as individually packaged pieces can get expensive.
Sewing Kit
A sewing kit is an excellent thing to have on hand, especially when making a fabric and beaded necklace. This will help you sew your raw fabric into a sleeve for the beads.
There’s also the option of using a sewing machine if you have one and know how to use it.
If you’re making fabric jewelry such as earrings, a sewing kit can help you make loops in your fabric. This will allow you to slide the fabric pieces onto your beading hoops. However, this isn’t necessary. You can simply tie the fabric strips to your earrings if sewing isn’t your thing.
Fabric Scissors
Don’t use the scissors you keep in your kitchen for jewelry making! Contamination is possible, as you may have small bits of food on the scissors. You don’t want any gross germs or food particles clinging to your fabric. Not only this, but regular scissors don’t usually cut through fabric. They can fray it and make a mess of your carefully-picked textile pieces.
Instead, you should opt for fabric scissors.
How to Make a Fabric and Beaded Necklace or Bracelet
There’s a long list of ways to make fabric jewelry. But some of the most common options are necklaces, bracelets, and earrings. Follow these steps to make each of these beautiful accessories at home!
Creating a fabric and beaded necklace or bracelet requires the same steps. The only difference is the length of your fabric sleeve. Simply customize the length to the accessory you’re making.
1. Cut Your Fabric
To start your necklace or bracelet, you’ll need to cut a strip of fabric. The measurements for a necklace should be 20 inches long and about three inches wide. And the measurements for a bracelet need to be around 12 inches long and three inches wide.
Try to make your strips as straight as possible with even edges. It’ll make the sewing process much easier.
From here, you can fold your fabric strip in half. Then move on to the next step in making this type of fabric jewelry.
2. Sew Your Fabric
After folding your textile strip, you can begin pinning the two sides together with the pins in your sewing kit. Doing this will keep the fabric in place while you sew it. When you have your pins in place, it’s time to start the sewing process!
Start by choosing a sewing needle and looping the thread through the hole. It’s best to use a thread color that your fabric uses to keep everything cohesive. Tie a knot at the other end of your thread and cut the excess that hangs from the knot.
You can start sewing about ½” inward from the non-folded side of the fabric. Straight stitches are typically the easiest way to sew fabric jewelry. But you can use zigzag stitches, backstitches, or other stitching styles you feel comfortable with.
Sew a straight line all the way to the other end of your folded fabric strip. Marking a straight line with a pen can help create a sewing guide.
When you reach the end of your fabric, tie the thread off to keep your stitching secure. And cut the excess fabric on the other side of your stitching line.
3. Add Your Beads
Now you can grab your wooden beads. You’ll need to clip one of the openings in your fabric sleeve to prevent the beads from falling out.
Gently push one bead into the fabric jewelry sleeve. Try to get it down to about an inch away from the opening. With the bead secured, you can clamp it off with the wire or jump rings in your jewelry-making kit.
The jump rings are best for thinner fabrics, while the wire will work for thicker ones. If you use wire, you’ll need to wrap it around a few times.
Then you can insert your next bead into the sleeve and repeat the process. Continue until you get to about an inch away from the other opening.
4. Attach Ribbon Clamps, Chains, and Clasps
Your jewelry kit should come with some ribbon clamps or ends. You’ll need two for your necklace or bracelet project. They’ll help clamp off each end to keep the beads inside and provide loops to attach your chain.
With this in mind, you can now attach a ribbon clamp to each end of your fabric jewelry. After you secure it, you can attach a jump ring to each clamp. Then you can attach about 4-5 inches of chain to each jump ring on your necklace. It’ll be about 1-2 inches for a bracelet.
Leave one chain end as is and attach a jump ring to the end of the other chain. Now you can add a clasp to this jump ring and close the ring to secure it. After securing your clasp, your necklace or bracelet is ready for wearing!
5. Wear, Sell, or Gift Your Necklace or Bracelet
Fabric jewelry like your newly-made necklace or bracelet can make a great compliment to your outfits. But if this new piece isn’t necessarily your style, you can give it to someone else! It can make a stunning gift for a friend or family member. Or you can sell it. Who knows? Maybe this is a jewelry business in the making!
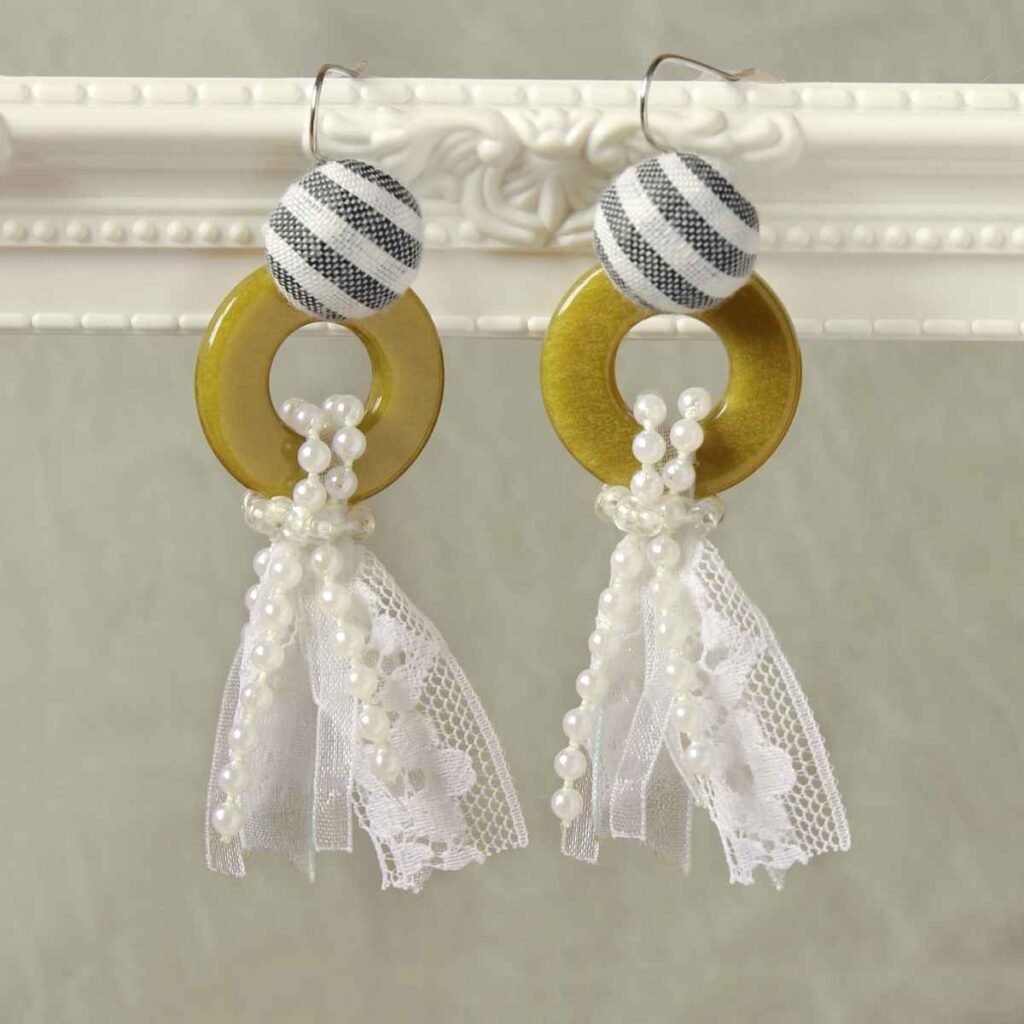
How to Make Fabric Earrings
A new set of earrings is an excellent way to dress up your outfit. But don’t go with plain studs! Fabric earrings are a bold and fashionable choice that everyone will love.
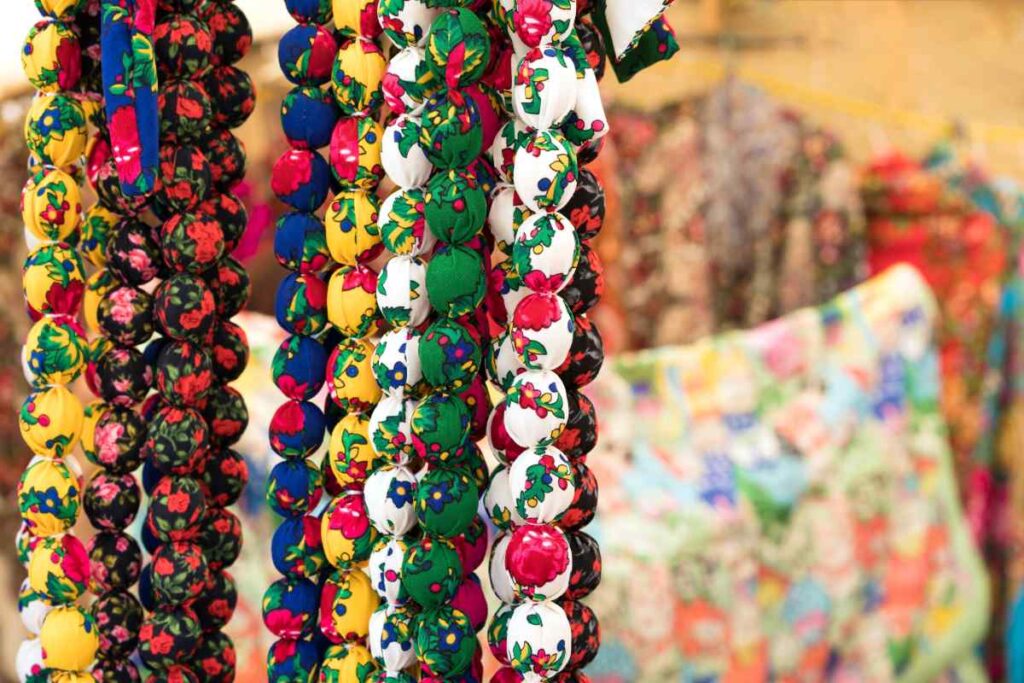
Follow these steps to create some dangling fabric earrings. While the image may be of keyrings, the earring-creation process is similar.
1. Cut Fabric Pieces
Your first step is to cut strips of fabric that are about 10-12 inches long and one inch wide. It might be a good idea to use multiple types of patterns. This will create some beautiful contrast. A minimum of five fabric strips should do the trick for this type of fabric jewelry. Be sure to use your fabric scissors to cut the textiles.
2. Attach the Fabric to Your Beading Hoops
Now it’s time to grab your beading hoops. Bunch your fabric strips together and drape them evenly over the bottoms of your hoops. You should have 5-6 inches of length on each side.
Get some wire from your jewelry-making kit and wrap it around your fabric just below the hoop. This will create a secured loop to keep your fabric in place on the earrings. Wrapping the wire around 5-8 times should be enough. Be sure to tuck in the sharp sides of the wire to prevent injuries.
3. Attach Your Earring Hooks
Gather two jump rings and two earring hooks for your earrings. From here, you can attach a jump ring to each hoop. Then you’ll attach the earring hooks to the jump rings and close them. And just like that, your earrings are ready for wearing!
4. Wear, Sell, or Gift Your Earrings
Try your new beautiful earrings on for size! They provide a gorgeous boho-chic look that you’re sure to love. Fabric jewelry like these earrings will also make an eye-catching handmade gift or sellable product. Anyone would love to have a set of one-of-a-kind handmade earrings!
Fabric Jewelry Frequently Asked Questions
What type of fabric is best for fabric jewelry?
The overall best type of fabric for this type of jewelry is cotton. It’s a material that typically won’t cause any irritation, as it’s very soft and natural.
Cotton is easily accessible, as many clothing pieces use it, and craft stores readily sell it by the yard. You’ll also notice that the patterns on cotton are clearer and more detailed due to the tight weaves.
How do you make stiffened fabric for jewelry-making?
Fabric, especially cotton, is soft and easily movable. This can sometimes make it challenging to manipulate. A fabric stiffener will work perfectly if you want your fabric to hold a specific shape.
Just keep in mind that stiffened fabric can feel very rough against the skin. If you have sensitive skin, it may cause some irritation.
What is the easiest type of fabric jewelry to make?
The answer to this question depends on your jewelry-making method! Concerning the jewelry pieces above, the earrings are easier to make. This is because the steps are simpler, and no sewing is involved. Sewing can take patience and precision, causing the necklace or bracelet to take slightly longer.
Generally, if the jewelry you’re making involves sewing, it’s a little more challenging and time-consuming.
Create Some of These Beautiful Fabric Jewelry Designs!
Fabric jewelry can provide uniquely styled accessories that are sure to catch some attention. It allows you to showcase your personality and offer soft, wearable pieces that won’t irritate your skin.
The creation process is also fun, and you’ll be proud of yourself once you see the final product. So, grab your favorite fabrics and start making some handcrafted jewelry for stunning accessories!
Do you need more jewelry-making ideas? Check out How To Make Clay Earrings for more crafting fun!

Ashley Masiello is a crafting fanatic, video editor, artist, general freelance writer, and a writer for That Sweet Tea Life. She has a bachelor’s degree in film/media and two minors in writing and art.
She loves to try out crafts, projects, and recipes in her free time. And she enjoys sharing fun and interesting artistic knowledge with others. Whether you like scrapbooking or cooking, there’s a fun learning process for everything!
Ashely can be reached at [email protected]