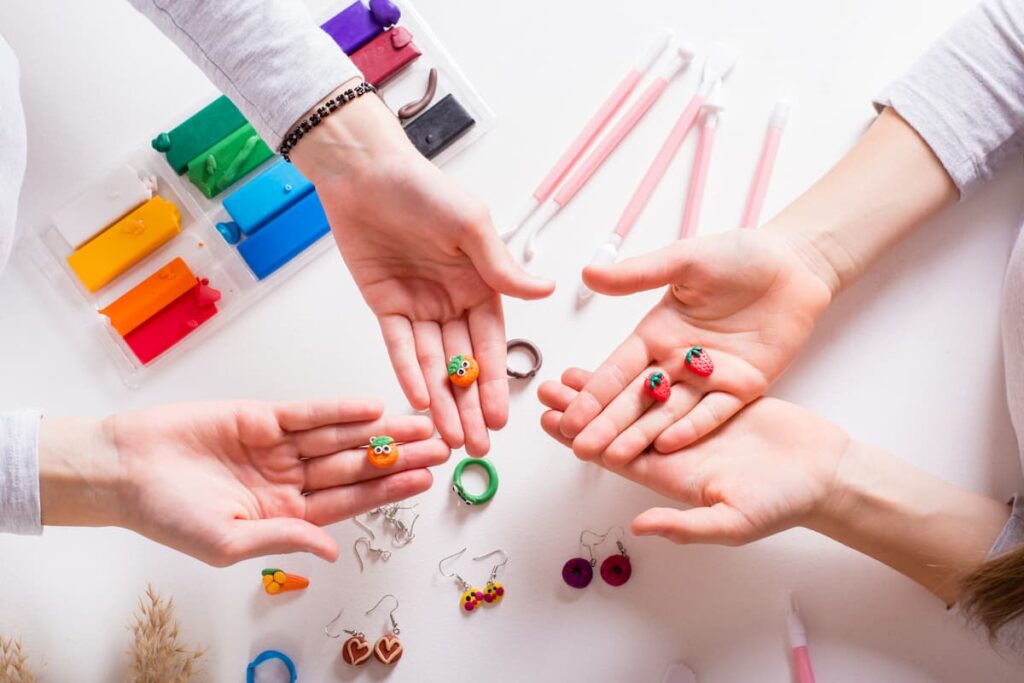
There’s something so satisfying about crafting your own handmade earrings. When you’re in charge of fabrication, you can create one-of-a-kind pieces with the exact aesthetic you envision.
Polymer clay is among the more popular materials that creators use to make earrings. Polymer clay is extremely durable, which ensures it’ll last through years of wear.
Interested in making your own clay earrings from scratch? Keep reading for our guide on how to make clay earrings.
Materials You’ll Need
- Polymer clay in the colors of your choice
- Glass clay cutting mat
- Clay cutters
- Clay rolling pin
- Micro drill
- Clay shape cutters
- Jewelry pliers
- Jump rings
- Gorilla Super Glue Gel XL
- Earring backs, posts, or hooks
- Baking sheet
- Parchment paper
- Jewelry charms (optional)
- Wax (optional)
Material Pro Tips
If you don’t have all these materials on hand, it’s possible to improvise. If you don’t have a clay cutter, you can use an X-Acto knife instead. If you don’t have an acrylic plastic board, you can use a simple cutting board instead.
Making Your Own Clay Earrings: A Step-By-Step Guide
Ready to get started on making clay earrings? Here’s how.
1. Prepare your work surface.
Before you get started, you’ll want to set up a flat, hard, and stable work surface. Make sure that you have all your materials handy and readily accessible.
It’s recommended that you use a glass clay cutting mat to work on. This surface is double-sided and has several built-in rulers to help you with the cutting process.
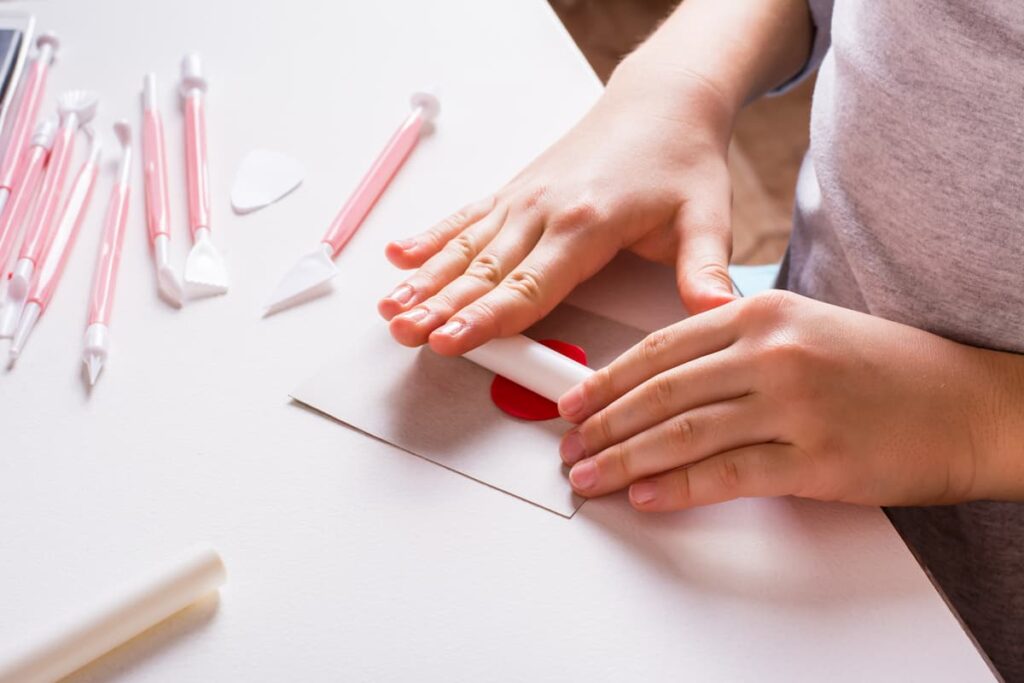
2. Condition the clay.
In this step, you’ll prepare the polymer clay for use. The benefits of using polymer clay is that it’s malleable, versatile, and easy to work with. You can also use natural cold porcelain clay as an alternative, which allows for slightly more finite detailing when molding.
Polymer clay has a hard consistency when you first remove it from the packaging. To make it more malleable, you’ll need to warm it up with your hands.
Be sure to wash your hands before you work the clay. If you overlook this step, it’s possible to contaminate the clay and compromise its texture. You should wash your hands whenever you change over to a different clay color.
Work the clay with your fingers by squeezing, pressing, and pulling on it. Once the clay is warm enough, it’ll be soft enough for you to use the rolling pin.
3. Roll out the clay.
Use the clay rolling pin to roll out your clay until it reaches your desired width. If you plan to create flat shapes, roll out the clay to be slightly thicker than one-eighth of an inch.
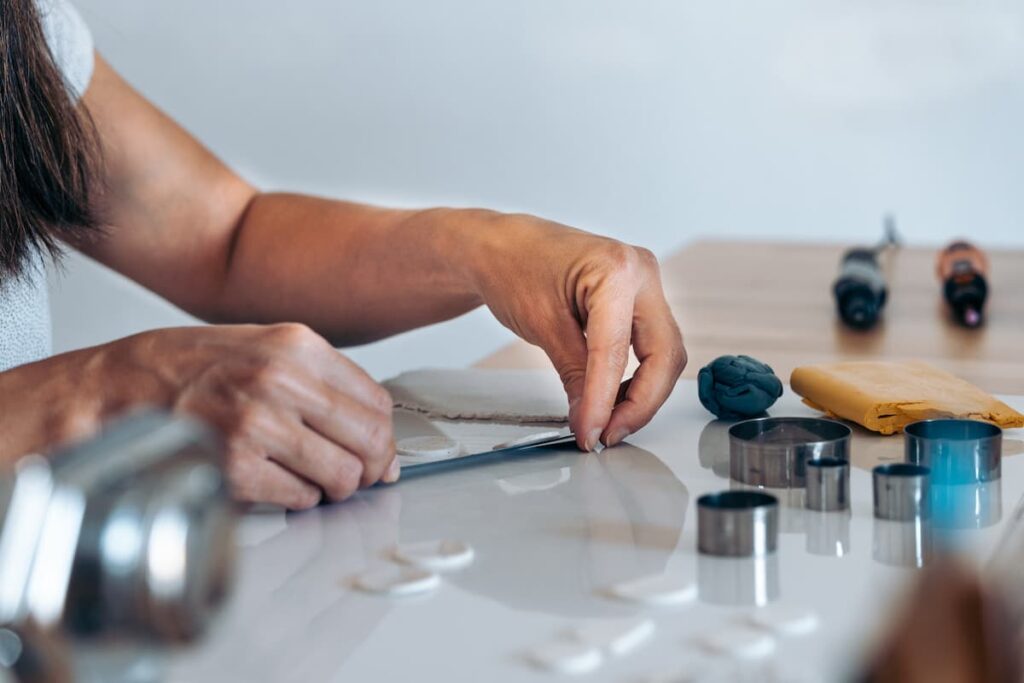
4. Cut out shapes.
Prepare to get creative! For this step, you’ll use your clay shape cutters to manipulate your rolled-out clay into shapes. In the final steps, you’ll use these shapes to put together your clay earrings.
Depending on the final look you wish to achieve, you can cut both large and small shapes. Later in the steps, you’ll have the option to use jump rings to attach these shapes together for a dynamic look.
As you cut out the shapes, try your best not to get fingerprints on the clay. Aim to apply pressure on the shape cutters themselves as you cut down through the clay.
5. Bake the clay.
Once you’ve finished cutting shapes in the sizes and colors of your choosing, it’s time to bake the clay. Unlike other types of clay, polymer clay does not achieve a rock-hard consistency once it’s baked. Thinner pieces of clay will still remain flexible.
When you’re making artistic pieces that you intend to be long-lasting, such as handmade earrings, baking the clay is critical. Polymer clay will not harden or dry when exposed to air. Baking, or “curing,” the clay will allow it to retain its shape and ensure that it’s wearable.
To prepare, cover a baking sheet with a piece of parchment paper. Lay the clay shapes on the parchment paper. Leave enough space between the clay pieces so they will not touch while baking.
For specific information on the baking temperature and time, refer to the instructions on the clay’s packaging. Requirements differ slightly for different polymer clay brands.
6. Let the clay cool.
After the polymer clay is finished baking, let it cool for at least two hours. The clay will harden more as it cools, allowing you to begin the final touches on your handmade earrings.
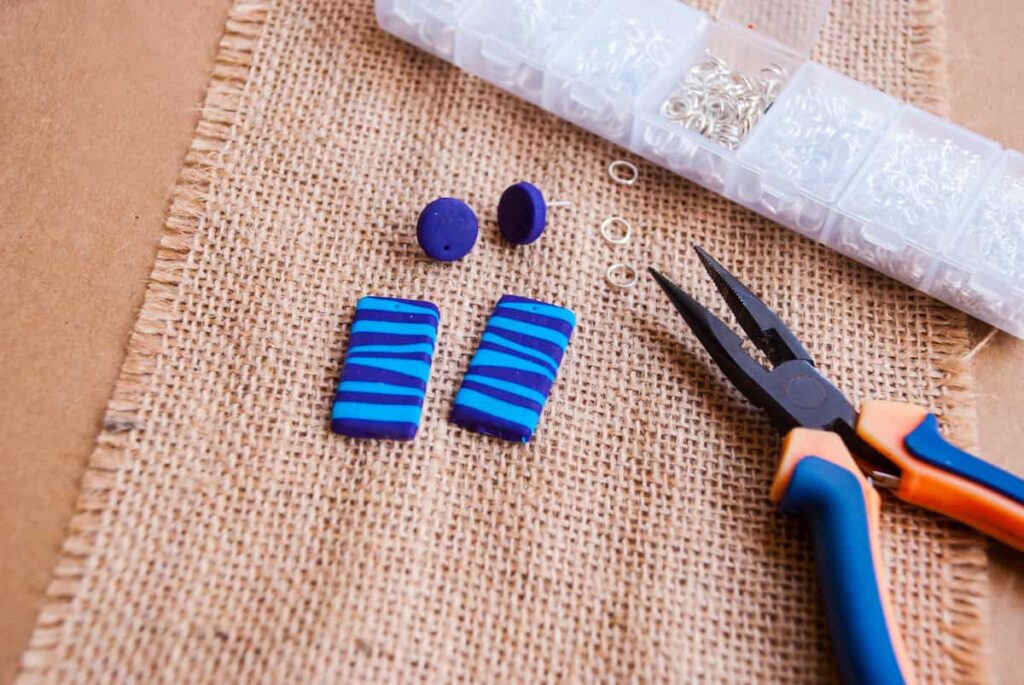
7. Make holes in the clay for jewelry hardware.
This step is optional, depending on your design. If your vision is to create dynamic handmade earrings that integrate more than one shape, then you’ll need to drill holes for jump rings. The jump rings will allow you to attach the different-sized pieces together.
To create holes in the jewelry, you’ll need to use a micro drill. Creating holes in the jewelry after it has already baked allows for a cleaner result.
8. Put the clay pieces together.
During this step, you’ll use jewelry pliers to add jump rings to the clay pieces. Once the jump rings are attached, you’ll join the pieces together as desired.
Next, use the Gorilla Super Glue Gel XL to attach the earring backs or posts to the back of the earrings. If you prefer to use earring hooks for this step, you’ll need to drill holes in the earrings to feed the hooks through.
9. Add your jewelry charms (optional).
Adding jewelry charms is an optional step, albeit a fun one. Depending on how detailed you’d like your earrings to be, you may need to add another jump ring onto the bottom of the earrings. Jewelry charms, tassels, and other accents are a fun way to make a statement–but remember, less is more.
10. Add a sheen (optional).
If you want your handmade earrings to have a matte finish, then leave them as is. However, if you want them to have a bit of a sheen, you can use glaze to coat your earrings. Use a glaze brush to apply the glaze to the earrings.
Experimenting with Color
Although you can certainly use polymer clay in the same colors as you purchase them, you also have the option to experiment with different colors and color variations. Keep reading to learn about how to combine existing colors to create new colors.
Combining Colors to Create a New Color
Creating your own polymer clay colors is simple and easy. It’s also a fun way to experiment with the colors you have available on hand.
Even if you don’t initially plan to combine colors, it’s recommended that you take a small piece of two clay colors–such as red and yellow–and combine them. Who knows, you might like the outcome!
Aside from mixing primary colors to make orange, green, and purple, here are some other ideas:
- Mix red and green to make brown
- Mix red and white to make magenta
- Have white on hand to lighten up colors, including colors that you’ve already mixed
Mixing the Colors
To mix two colors together, work the clay with your hands. Use your fingers to manipulate the clay until it achieves a consistent color.
Marbling
Marbling your clay is a way to create an interesting finish that incorporates several colors into one piece.
To marble your clay, begin by working each color in your hands separately. Then, roll each color into small logs or “snakes.”
Once the snakes are rolled out thin, position them together in a roll. Allow the snakes to mesh together to form one large log.
Now, roll out the large log, making it long and thin. Then, fold the log into itself and twist it around. Next, roll the colorful clay into a ball.
Continue to manipulate the clay until you achieve your desired look. Don’t overwork the clay to the point that you lose the individual colors. Throughout this process, you can also add small pieces of specific colors to create a more dramatic effect.
Terrazzo Mosaic Effect
A sure way to grab the attention is to create handmade earrings that feature a terrazzo/mosaic effect.
To do so, you’ll need to choose a base color. You’ll use your base color more than any other color. Black or white work great for an added pop, but you can use any color for this.
Begin by rolling out your base color. Then, cut pieces of different polymer clay colors and roll out these pieces too.
Once you’ve achieved your desired consistency, use your clay shape cutters to cut shapes into the clay colors. You can make circles, triangles, squares, or haphazard shapes; the choice is yours!
Be sure to cut your shapes into smaller pieces than you intend to feature on your handmade earrings. The pieces will appear larger after they are pushed and blended into the base color.
Press your cut-out shapes into your base color. Be careful not to allow the base color to mix-in with these colors. Use the roller or a clay press to press them gently into the base color.
Now, use your clay cutters to cut out the shape that will become your finished earrings–and voila!
Transitional Blends
With a transition blend, you can achieve a balayage-like finish with your polymer clay. Create earrings in color schemes that look like fiery sunsets or tropical oceans with ease!
You’ll achieve this look best by using a clay press. The clay press will allow the colors to blend into each other better for a truly seamless finish. However, if you don’t have a clay press, a clay rolling pin will work just fine.
To create this look, choose two polymer clay colors, such as pink and yellow. Then, cut a piece of each clay color into a triangle shape. Use a rolling pin to join the colors together. Now, feed the combined polymer clay into the clay press to continue blending the colors. Continue doing so until you achieve your desired look.
Making Clay Earrings: Frequently Asked Questions
Do you paint clay earrings before or after baking?
Painting clay earrings is another way to add your own unique finishing touches to a DIY jewelry piece. If you decide to paint your earrings, you’ll need acrylic paint and paintbrushes, and you’ll apply the paint after it bakes and fully cools. If you do so beforehand, the paint may change the color of your clay or prevent it from hardening completely.
Can I get clay earrings wet?
Though clay earrings are heavy-duty once baked, it’s best to avoid submerging them in water. It’s also best to avoid spraying perfumes or using chemicals or aerosols around clay earrings, as this can cause deterioration. If your clay earrings are exposed to these elements, it’s best to clean the earrings immediately with a damp cloth or wet wipes.
Wrapping up on How to Make Clay Earrings
It’s always super satisfying to make your own handmade earrings, especially when you’re given the freedom to design it precisely to your liking. Now that you know how to make clay earrings, you’ll be able to present one-of-a-kind gifts to your friends and family–just to let them know that you’re thinking of them.
Interested in learning how to make handmade jewelry in a different style? Check out our page, How to Make a Macrame Necklace, to learn more!

I’ve been a professional painter for the last 20 years. That Sweet Tea Life is a place where I get to slow down and visit the craftier side of painting.
I’ll share with you everything I’ve learned painting hundreds of pieces of furniture and sets of kitchen cabinets.