If you have ever looked at online tutorials for making your own coasters, there are some great ideas! However, a lot of them are pretty complicated and can take a lot of time and materials to accomplish. But don’t worry, we have three simple tutorials for coasters you can make in less than an hour. Most of these use materials you might even already have laying around.
1. Pom-Pom Coasters
Pom-pom coasters are a fun and simple way to make your own coaster with common materials you might even have in a craft box or sewing kit. You can make them as elaborate and refined or simple and fun as you prefer.
I went for a simple version with my rainbow coasters. If you want to make things a little fancier, try making your own felt balls from natural wool yarn.
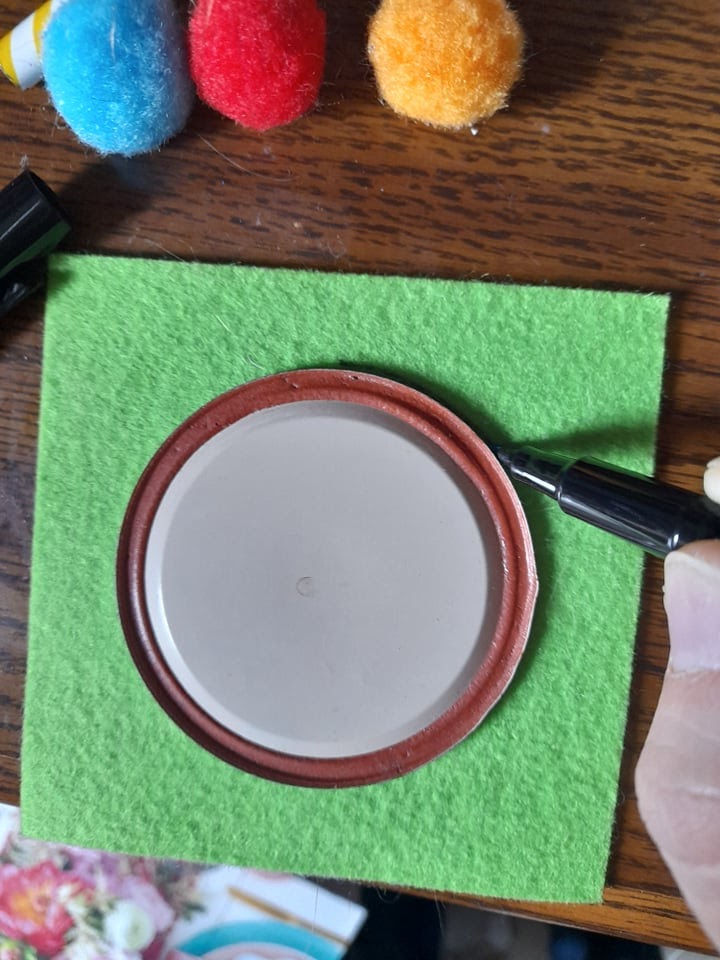
I used a mason jar lid, but you can use any circular object for your base. To start, lay it on top of a piece of felt and trace the outline with a marker. This will provide the bottom part of your coaster and give some grip so that your glass doesn’t go sliding.
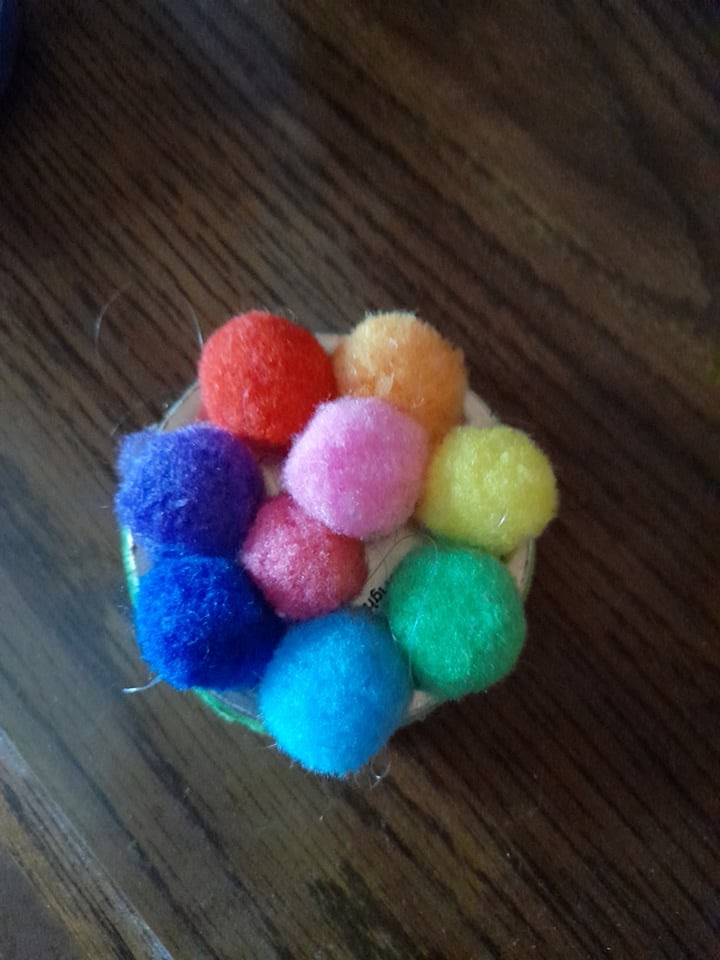
Use a hot glue gun to secure the felt to the bottom of the coaster, then flip it over. Now it is time to arrange your pom-poms.
I chose a very simple rainbow theme for mine and used a drop of hot glue for every pom-pom. You can see how quickly it comes together!
My version is very simple, but this is a fun craft because it’s extremely easy to take in any direction you want. You can make an easy version like I did or make it much more chic by using smaller pom-poms or a different color scheme.
2. God’s Eye/Yarn Coasters
If you’ve ever made a God’s Eye, you’ll have the hang of these simple coasters in no time! The principle is pretty similar, though not exactly the same. This coaster variation is also great because it doesn’t rely on glue to hold itself together, just the natural wrapping of the yarn.
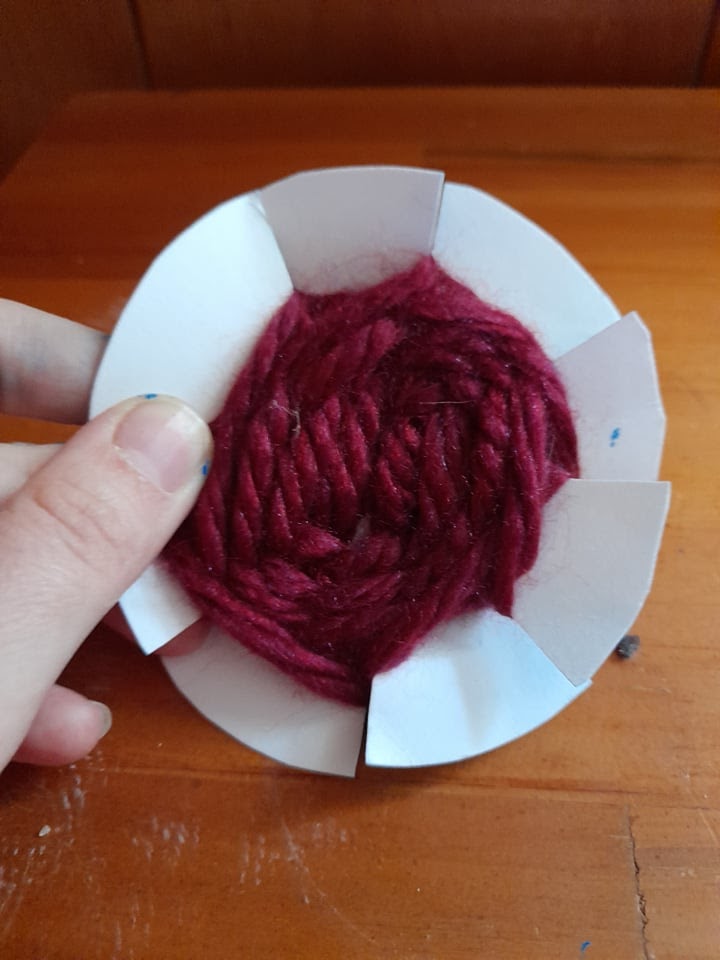
To start out, grab a standard paper plate and cut it down to the size you prefer. Then cut eight notches in it, each one opposite another. Hook the yarn into one notch (it doesn’t matter which) and start wrapping.

The basic pattern goes like this: two forward, one back. In other words, you are bringing the yarn ahead two notches, skipping one in the middle, then going back to the one you skipped and repeating the pattern.
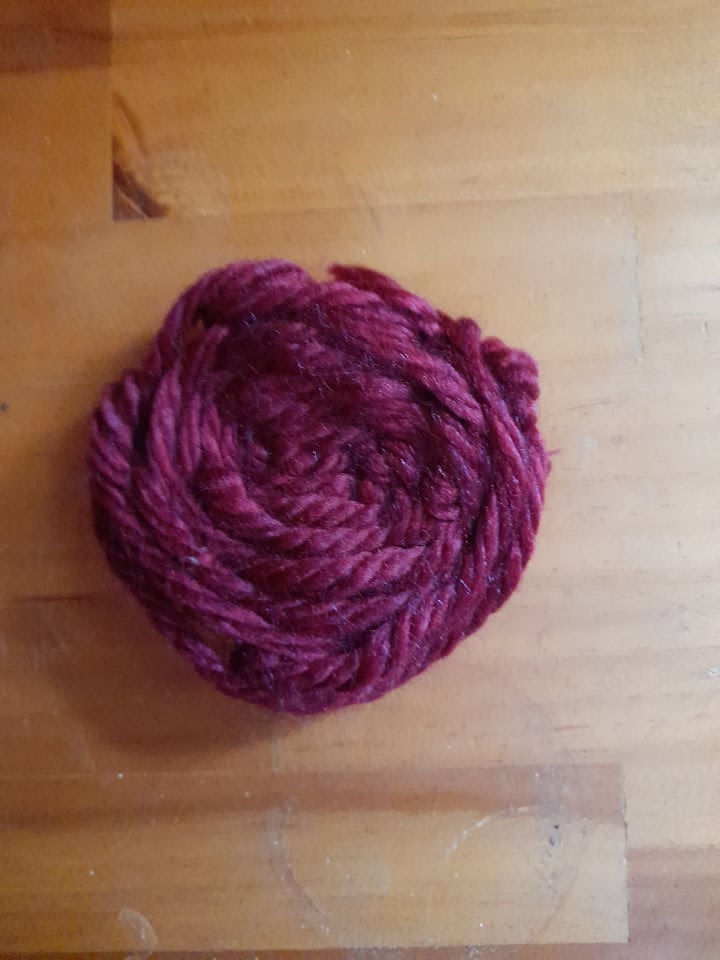
Eventually the coaster will start to look like this:
Don’t worry if the paper plate base starts bending as you go. This won’t affect the look of the final product, which will be stretched out by the winding of the yarn.
If you reach the end of your yarn, simply tuck it into the other pieces. Then resume the pattern where you left off with a new piece of yarn.
Feel free to use multiple colors of yarn or even switch back and forth as you go to make a pattern. I decided to use a single color, but it is fun to switch things up!
Once you get close to the edge of the paper plate pieces, simply tuck them back into the yarn. If you need to, secure the edge with hot glue to seal them.
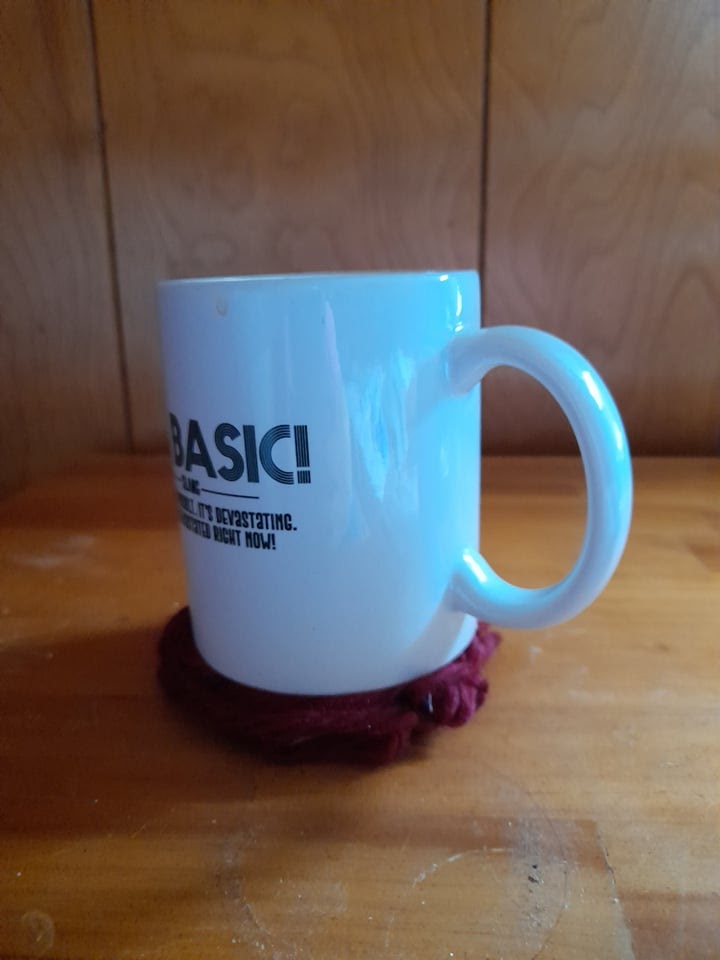
Your final product will look something like this. As you can imagine, it looks even more interesting if you use several colors or a yarn that changes color as it goes. There are lots of ways to make this coaster unique!
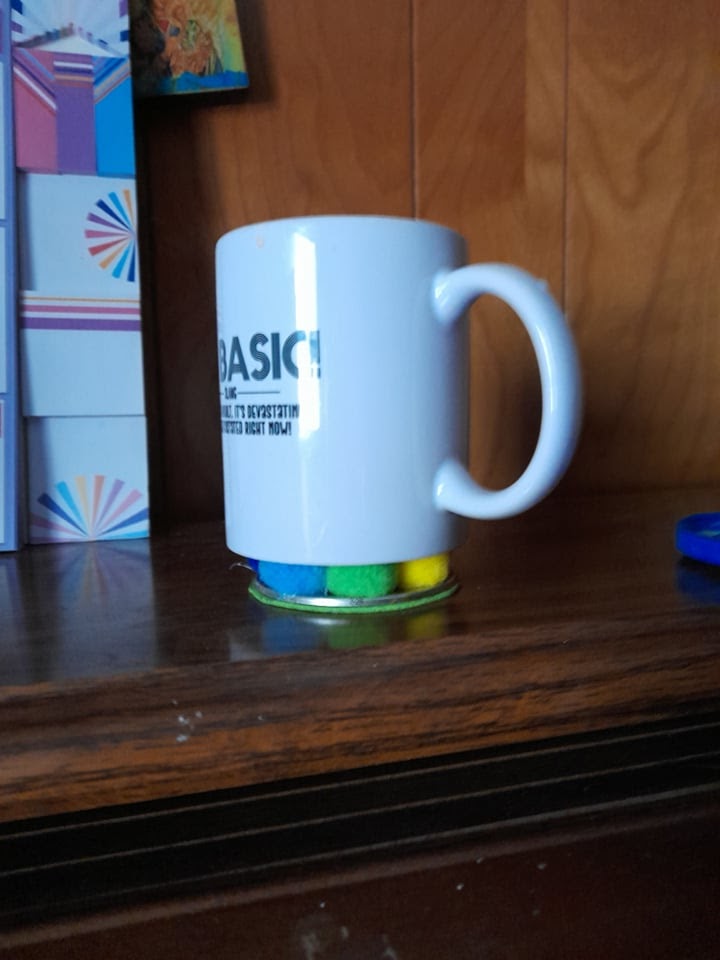
It’s also a great coaster to use for hot drinks, since the yarn insulates your mug and acts as a kind of tea cozy.
3. Jar Coasters
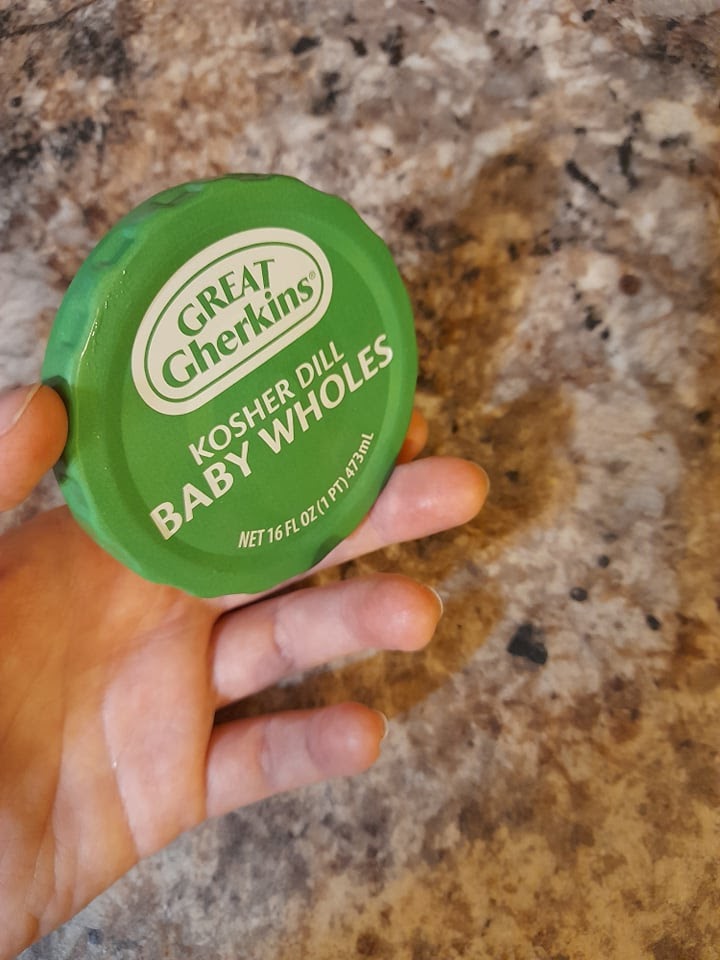
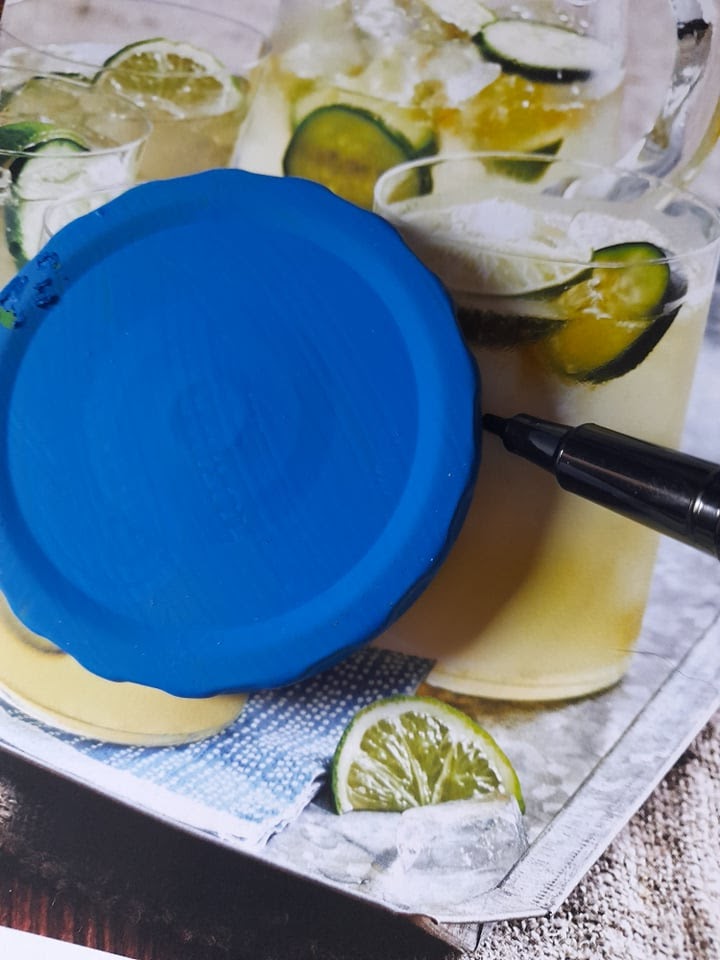
Mason jars are a popular way of making your own coasters. But you can use any type of jar lid as long as it fits your drink glasses! For my version, I used the lid from a pickle jar.
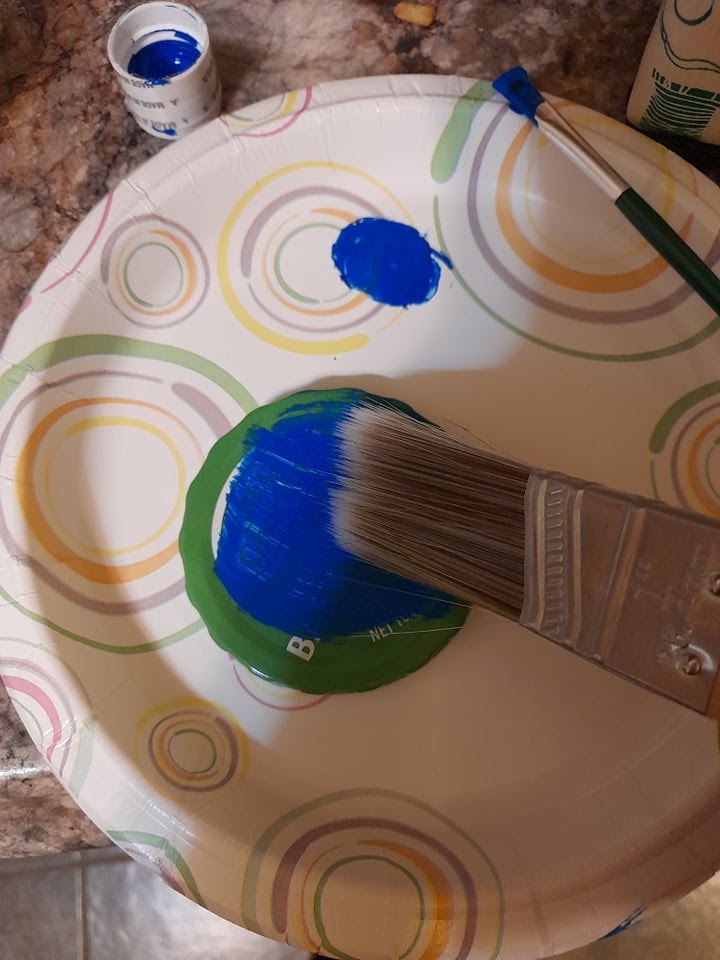
To start, apply a base coat of acrylic paint in any color you like. If you prefer, add several coats. This won’t be the main focus of the final coaster — the goal is just to cover up the original jar lid design.
I used simple Apple Barn acrylic craft paint, but you can use anything you prefer. If you want a more polished look, choose a paint that has something other than a flat or matte finish. However, this type of craft paint is good to have on hand and can be used for many different projects!
Once you have added one to two coats of paint, let it sit until it is completely dry. Now it is time to look for a picture insert for the bottom of the coaster.
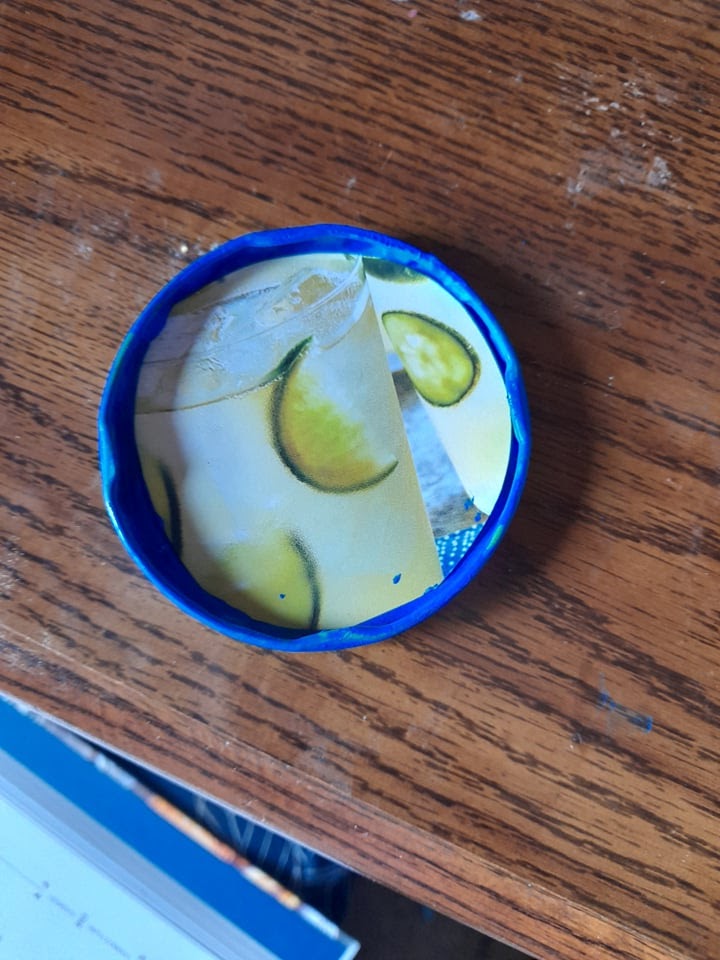
This is a fun process because it’s your chance to customize the style and make it unique. You can use any picture for your insert. Feel free to use family photos or magazine clippings. The goal is to find a picture that looks nice and has a nice finish so that it doesn’t get soaked when you set your glass down.
If you can’t find a photo with the right finish or want to add a better seal, use a paintbrush to add shellac over the top. This will seal the photo or picture and protect it from condensation on glass.
I chose a pretty photo from a magazine with enough of a glossy finish to withstand a glass. Use the jar lid as a guide to cut out the right size, then glue it into the inside of the jar lid.
Lastly, use a hot glue gun to add a few drops on the other side of the coaster. This will give it some grip and make sure your drink doesn’t slide all over the table.
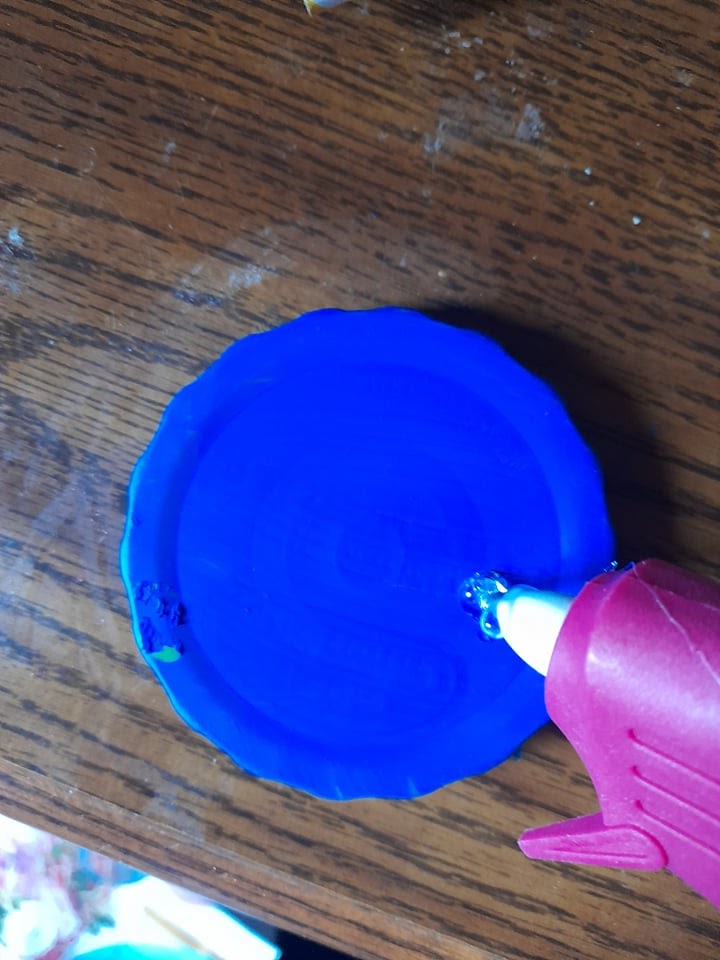
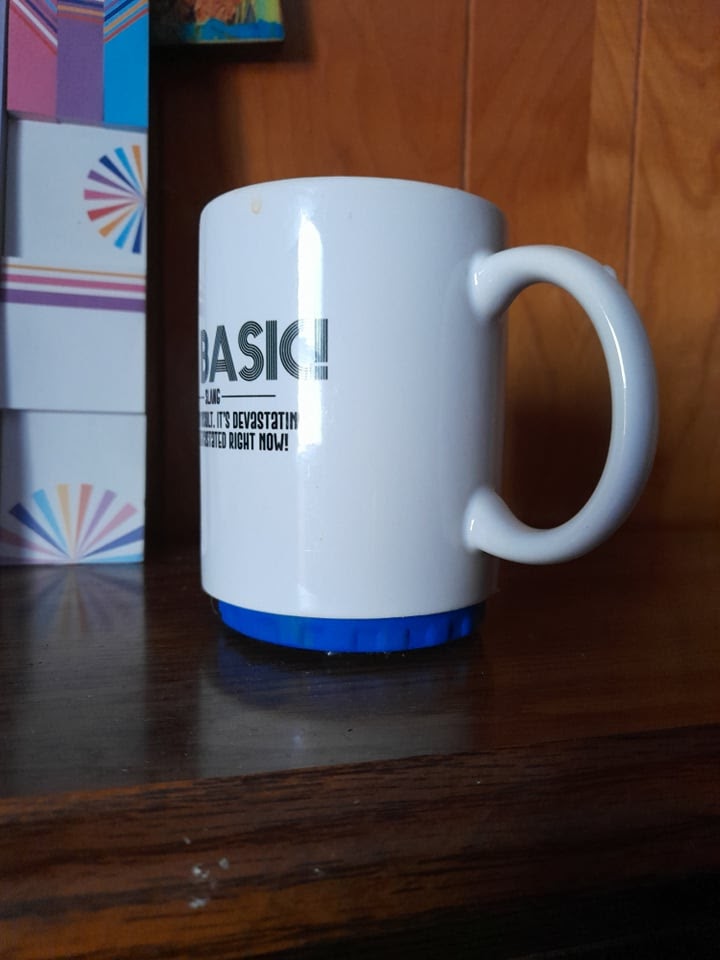
Here’s the final result: a simple coaster that came together in just a few minutes.
FAQ
What Recycled Materials Can I Use To Make DIY Coasters?
The sky is the limit when it comes to DIY projects. You can make your own coasters out of almost anything you want, including things you already have around your house. The main things that you need are something to help secure the bottom of the coaster, like felt or hot glue, and something to keep water condensation from soaking into the top part of the coaster.
How Do You Make Coasters Waterproof?
There are lots of ways to make coasters waterproof, keeping water condensation from your glass from soaking into the material and ruining it. You can buy sealants like epoxy, shellac, and resin in most craft stores. These go on with a paintbrush and help seal the project against water. Alternatively, you can keep things ultra simple and just use waterproof materials from the get-go, such as tile, felt, or pictures and paper with wax coatings.
How Do You Make Fabric Coasters Without Sewing?
Sewing isn’t the only way to seal fabric coasters! You can also use hot glue or fabric glue, which is specially made to seal cloth and other textiles. This is often the simplest way to make fabric coasters without picking up a needle.
Making Your Own DIY Coasters
DIY projects are great because you can take them in so many different directions. Even with a simple template like the ones we have provided here, there are so many ways to make them unique and add your own final touches. Whether you want to make something rustic and fun or chic and unique, it is easy to do it all with a little bit of time and effort. Have you ever made your own coasters? Tell us how you did it in the comments!

I’ve been a professional painter for the last 20 years. That Sweet Tea Life is a place where I get to slow down and visit the craftier side of painting.
I’ll share with you everything I’ve learned painting hundreds of pieces of furniture and sets of kitchen cabinets.