How to make a photography studio
A DIY Photo Studio may seem completely impossible, especially for someone just beginning a home based business. I’m here to tell you though its not as difficult as you may think! Two key factors you have to keep in mind are having ideal lighting as well as a backdrop that is versatile. Im going to show you how I used some creative thinking to make my small space perfect for a photo studio furniture would show well in.
What will I need to make my photo studio?
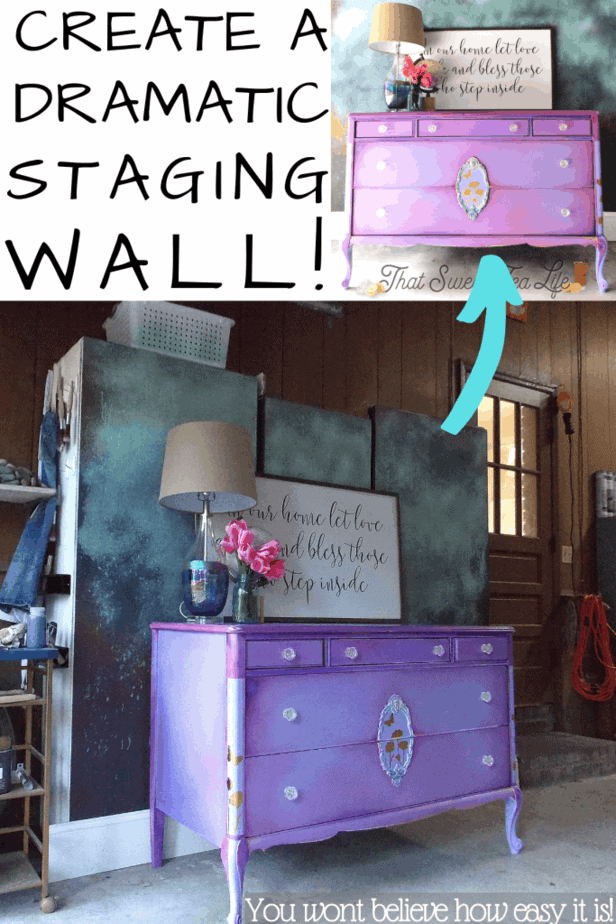
Here is the thing, my photo studio is in my garage. I knew the lighting would be perfect since all the light is indirect, yet abundant. I also have electricity which means using light kits when needed. (You can find the light kit I use HERE for less than $60) BUT I DON’T HAVE ANY AVAILABLE WALLS! The one large wall that allows the perfect amount of light in, has a big Electric Panel Box which is super unattractive! PLUS, That is a valuable storage area that I would hate to lose! So,.. what if I took some tall cabinets or bookcases and turned them into staging wall panels?? If you think you don’t have a staging wall, think outside the box! You just never know! Soon after getting this idea stuck in my mind, these awesome cabinets fell into my lap for just $40!
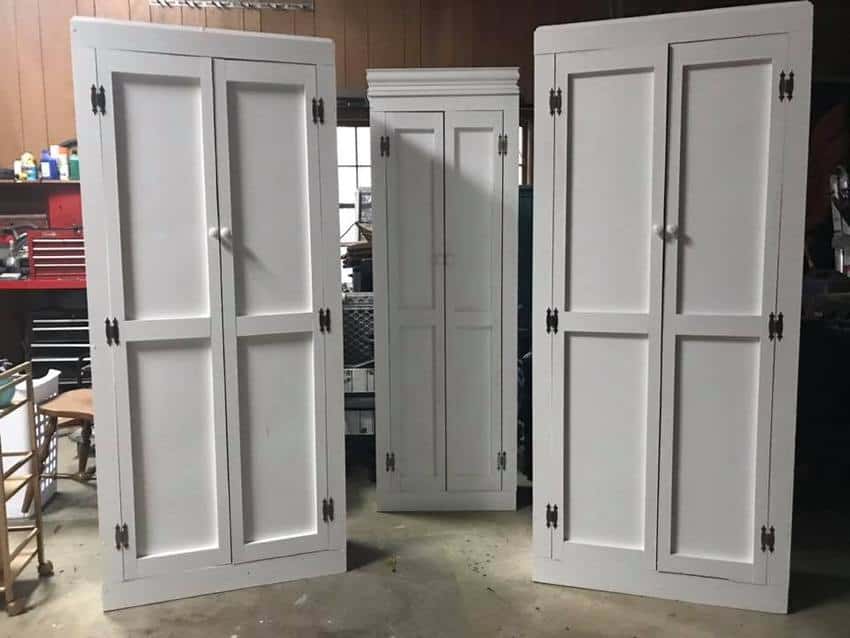
These cabinets would work perfectly!! They came from a home where a gentleman had build them from solid wood panels. I knew they would be sturdy and last a long long time. But, for staging? I decided I would leave the front of the cabinets white and add a slightly more farmhouse touch to them with new hardware. (If you want to know more about painting your cabinets white check out Painting White furniture) Then I would also add wheels. By adding wheels not only were they movable for more versatile storage, BUT I could also turn them around and use the backside as a staging wall! That side could provide a more dramatic impression for a different style of staging. To create this staging wall I decided I would need: (Links are provided for your convenience. If you decide to shop through these links I may earn a small commission)
| Tall Bookcases/Cabinets |
| Baseboard |
| Wheels |
| Screen Door Handles |
| Base Color Paint |
| Patina Paint |
| Patina Paint Activator Spray |
| Water Bottles |
Adding hardware to cabinets for my DIY Photo Studio
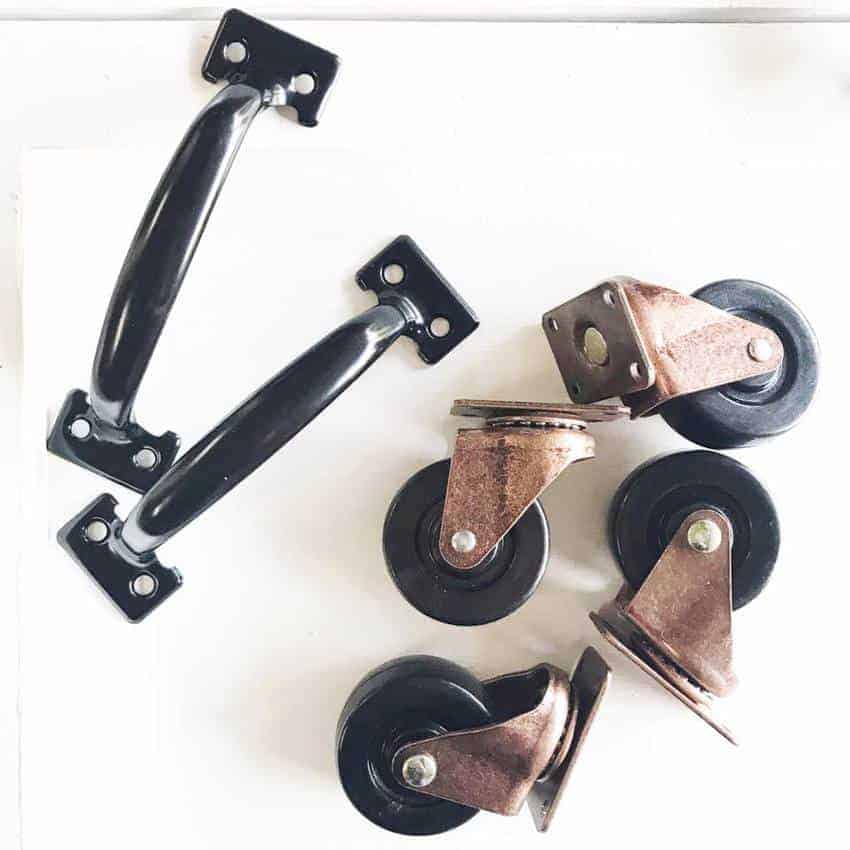
I replaced the existing knobs and added these Farmhouse style handles. Then I added casters to the bottom of each them! I wont get deep into those details since you will likely begin with bookcases or cabinets that are quite different from mine. But just be sure your wheels are attached at the widest points you can place them for stability.
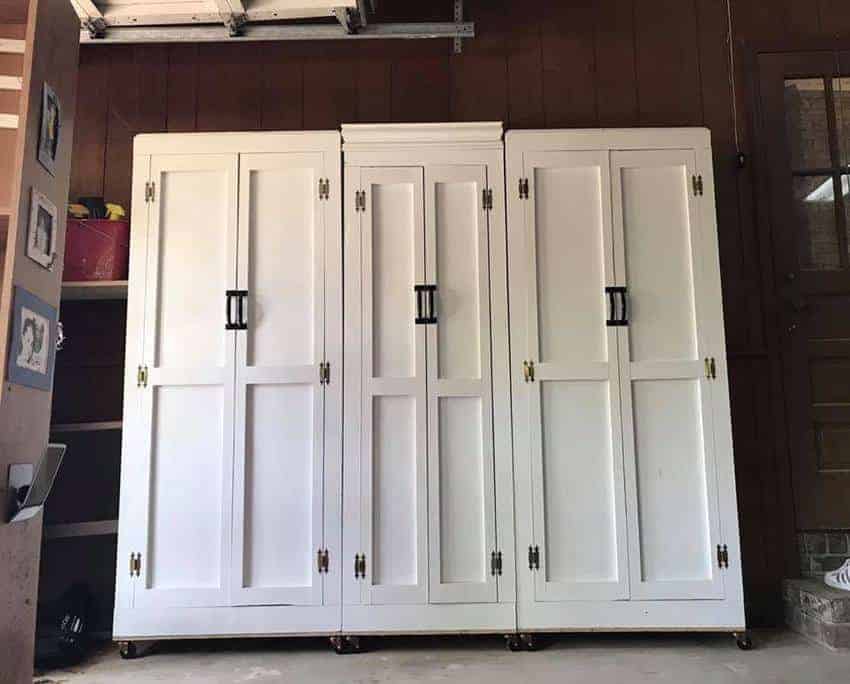
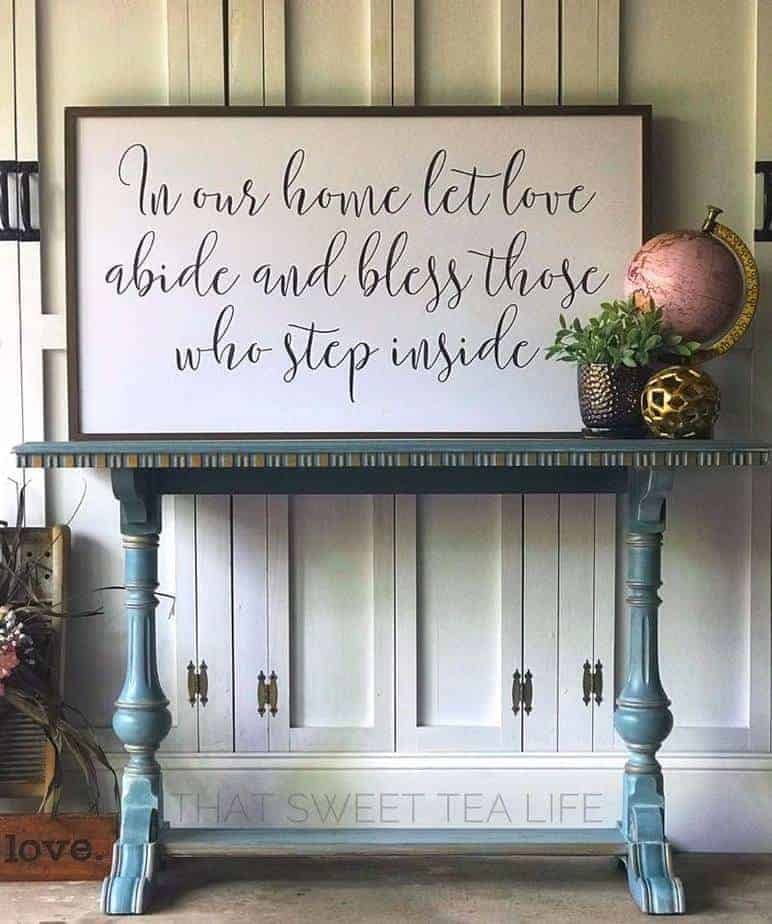
Now that I have them in place and functional I could do some light and bright staging for my furniture using a chunky baseboard down at the bottom to cover the wheel base. All the vertical lines from the doors just lend a farmhouse feel.
How to make your photography studio area more versatile!
I LOVE how it turned out! But, what about when I want a slightly more moody feel? White is lovely but I need more versatility. Its time to flip them around and begin painting the back side in a base coat of Dixie Belles Gravel Road. My littlest partner was all too happy to help! Of course the entire thing had already been cleaned and scuffed. I didn’t feel there was any need for priming. So, on to the paint. (If you want to learn more about prepping furniture for painting be sure to check out Prep: Everything You Need to Know!)

One coat was more than enough to give me the coverage I needed. Also, we were sure to paint the corner and around the edge of the inside areas so that they would be more camouflaged if shown in photography. Once everything had a good base coat it was time to begin applying the Patina Paint. With the deep base coat I knew I wouldn’t need too much for the effect, and I kind of wanted the different Patina Paints to play and meld together. So, to move the process along I decided to create a spray!
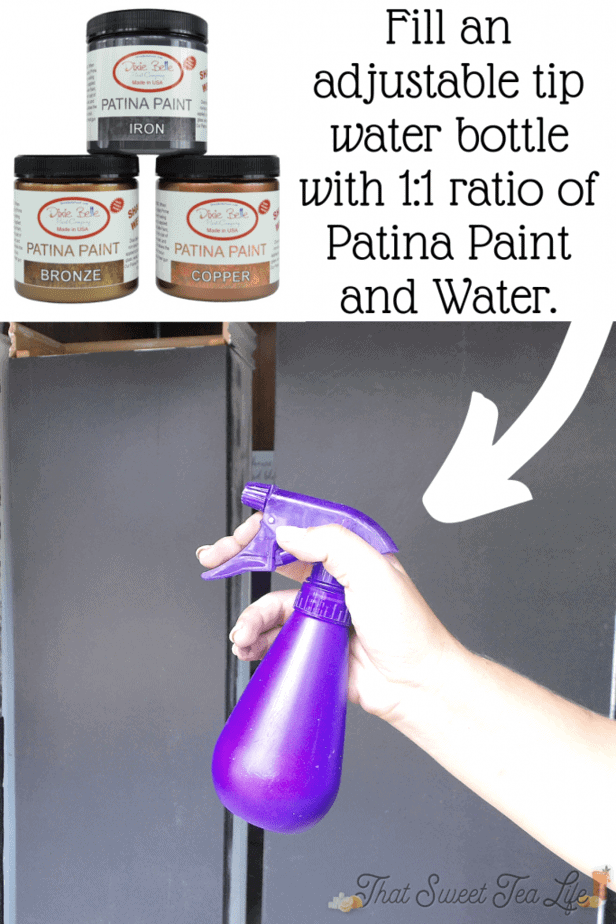
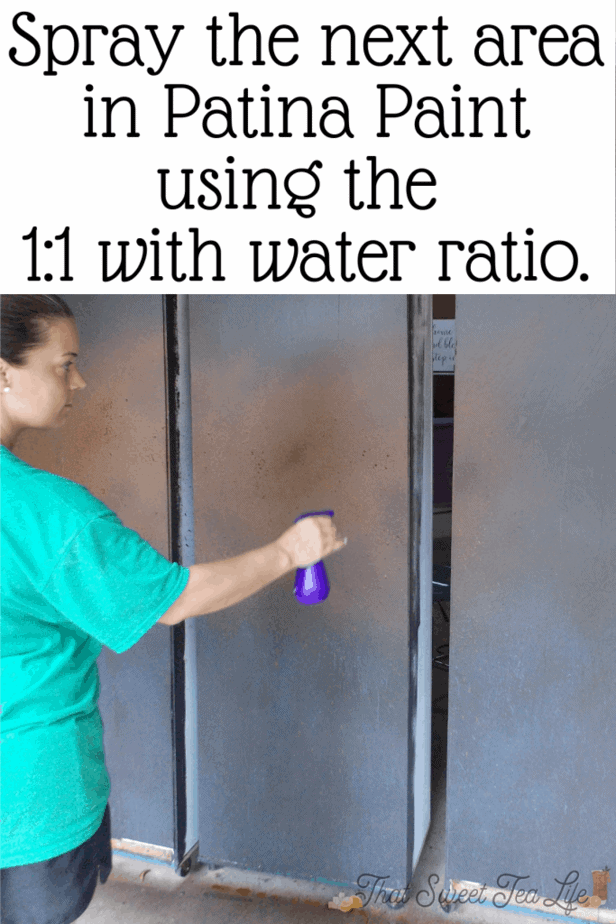
I only used maybe 1/4th of the Patina Paint and added an equal amount of water to the bottle. (I was SO happy to have such a large amount left over to play with on other projects!) For my cabinets I decided to use Iron on the bottom, then Bronze above that, then Copper.
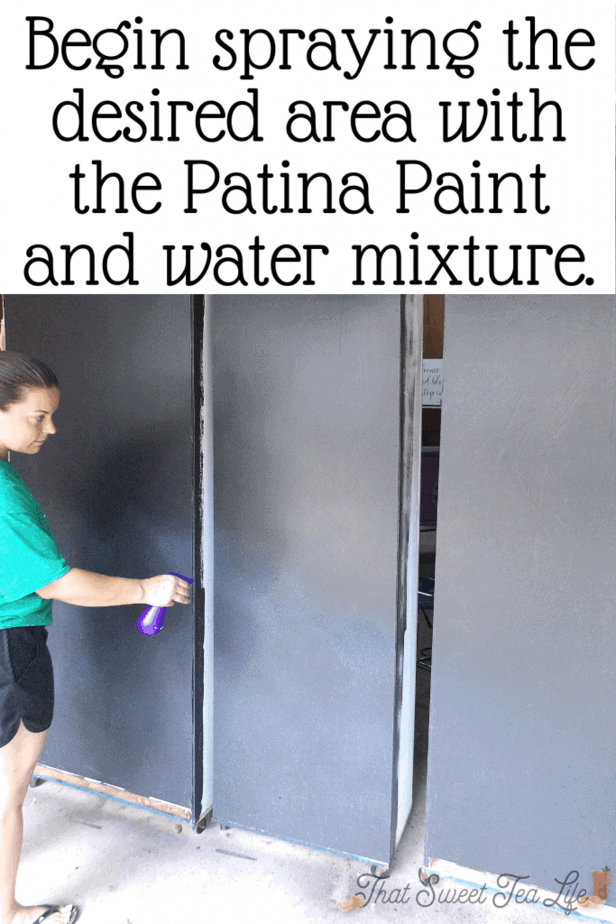
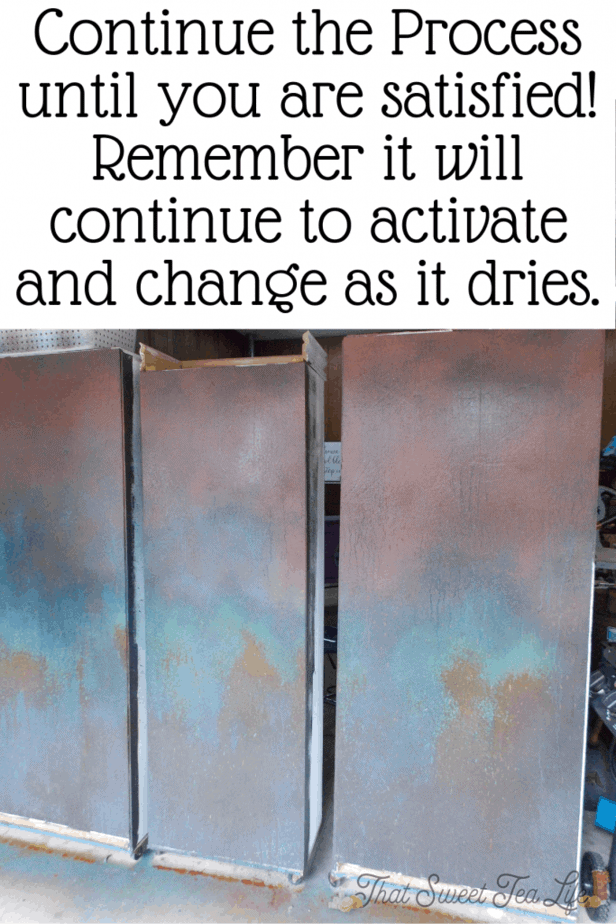
I began spraying the bottom third of the cabinets with the “Iron Spray”. By spraying I may get some dripping, but definitely wanted to limit how much dripping I would get. Also, I was careful to work fast, and keep a moist surface as the activator on works over wet Patina Paint. So…, Fast, Moist, but not too Moist. Then pick my activator. Depending on the Metal in the Patina Paint Spray, each activator gives a different effect. I actually used some of both of them on each Patina Paint I used.
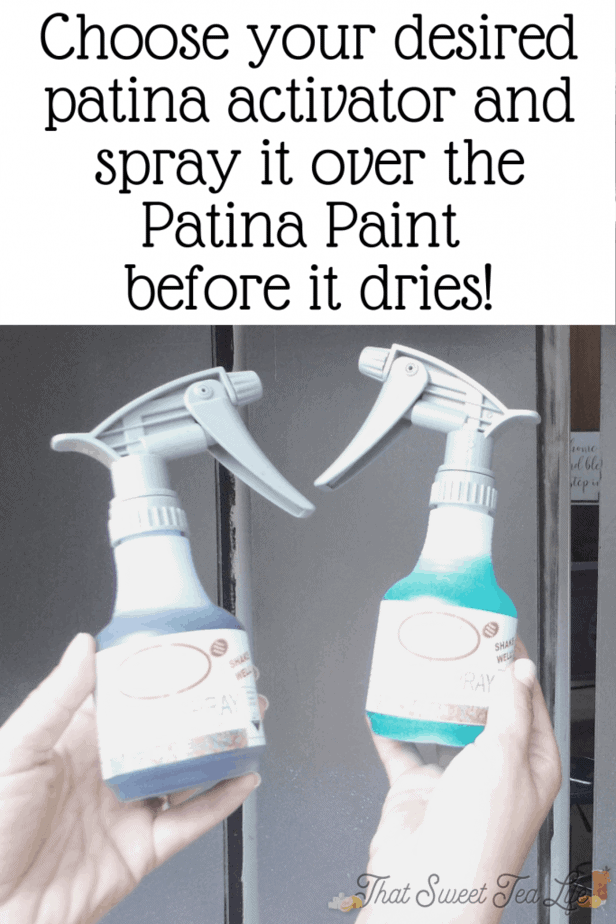
After I finish applying the Patina Activator sprays, I went on to spray the second third of the cabinets with the Bronze Patina Paint Spray. (Once again in the spray bottle with 1:1 water ratio)
I continued the process on to the Bronze Patina Paint and each of the Activator Sprays,.. I was able to begin seeing the activation as I continued to work,…
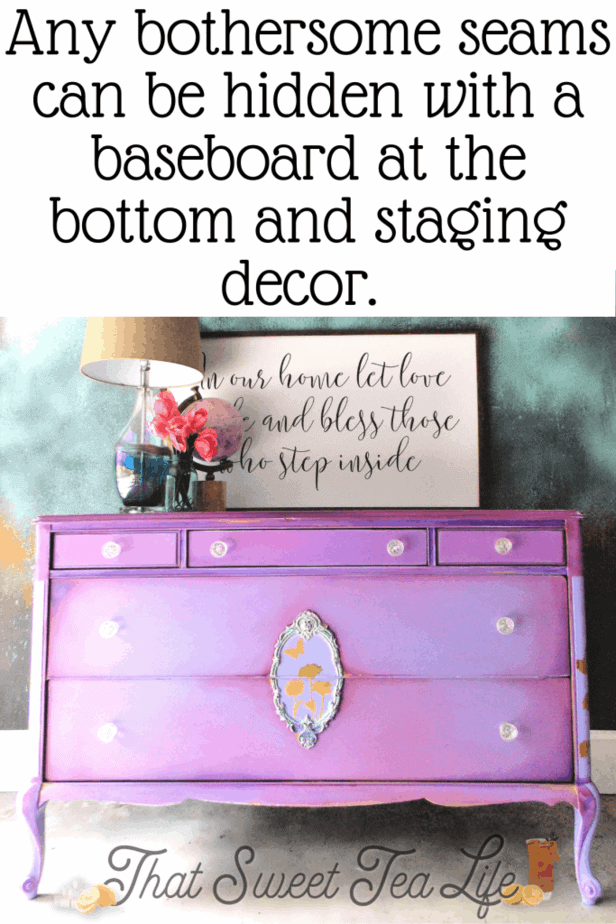
In the end, if you have seams that bother you, you can cover them with staging and even fix them using a sort of “photo shopping”. Since the paint finish is so varied, photo shopping is very easy! Again the baseboard is placed at the bottom to finish the “wall” we have created.
Whats even better is since they are on wheels I can move the entire set-up wherever I need to in order to change the lighting as needed! Would you like to learn more about staging your decor for photography? Check out Staging Furniture To Sell for Maximum $$$ Profit
Thea Osborne is a celebrated blogger renowned for her expertise in DIY and paint techniques. With a keen understanding of Southern culture, Thea’s commitment to producing engaging and informative content, coupled with her detailed tutorials, inspire her readers to embrace their own creative pursuits.
Thea’s passion and creativity have left a lasting impact in the DIY community, transforming “That Sweet Tea Life” into a thriving and cherished resource.
Betsy
Sunday 28th of July 2019
This is genius Thea... I was literally coming over to see how you photographed all your pretty pieces since mine always have horrible backdrops. I bet I can create something like this... love it!