Lots of DIYers enjoy customizing furniture to suit their own unique style. Adding details and designs is all part of the fun!
But what if you aren’t confident in your freehand painting skills? Enter furniture stencils, a DIY painter’s best friend.
With these handy tools, you don’t have to be an artist to create custom designs on your furniture. If you can fill in a coloring book, you can stencil furniture.
Reusable furniture stencils are cost-effective and available in a wide range of styles. If you love the elegant look of inlays, there are plenty of stencils that can help you achieve that look. If vintage treasures are more your vibe, you can stencil timeworn silhouettes and even old antique signs. The only limit is your imagination.
Read on for step-by-step details on how to use furniture stencils to create your own one-of-a-kind pieces.
1. Look for Inspiration
Furniture stencils have come a long way! With so many options on the market today, the biggest hurdle is narrowing down your choices.
Look in furniture catalogs, home and garden magazines, and DIY websites for inspiration. Once you’ve decided on the look you want to achieve, it will be easier to choose your furniture stencils.
Need some examples to get started? Check out 10 Creative Furniture Painting Techniques to Transform Your Home Decor. Number Four is an example of intricate, all-over stenciling that creates a stunning piece!
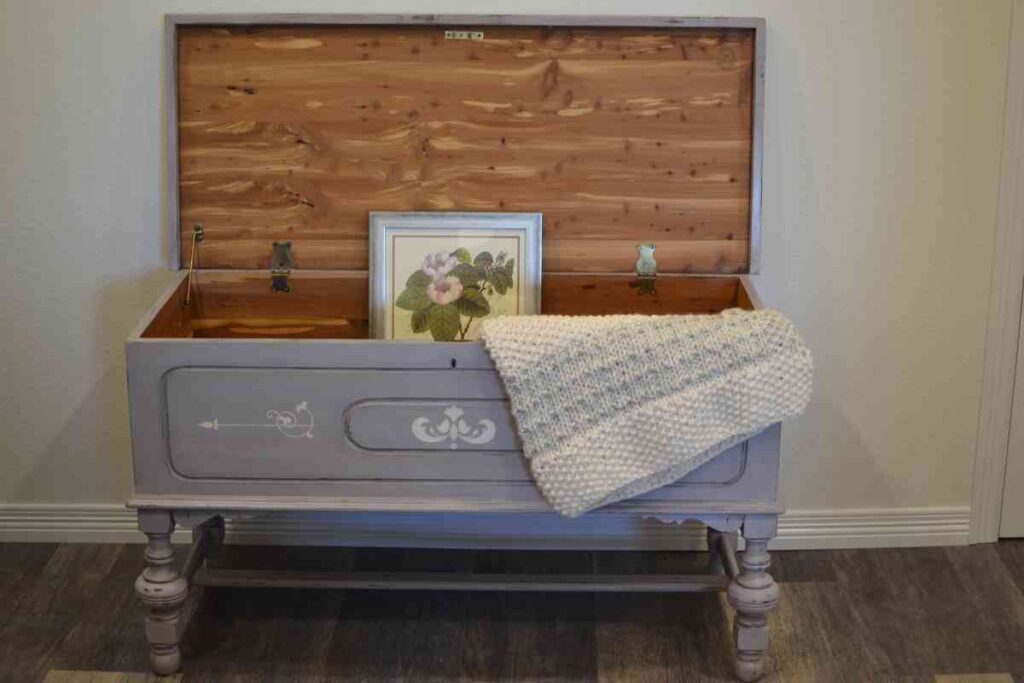
If you lean toward a more rustic style, look at How to Embellish Painted Furniture: 4 Inspiring Ideas. The pictured bench shows how furniture stencils and chalk paint can make a piece look antique!
2. Choose Stencils and Supplies
Once you have your vision, you’re ready to choose your furniture stencils. You’ll also need to have a few simple supplies on hand.
Furniture stencils can be filled in using a stippling brush, sponge, or paint roller. The best tool for the job depends on the overall effect you want to achieve.
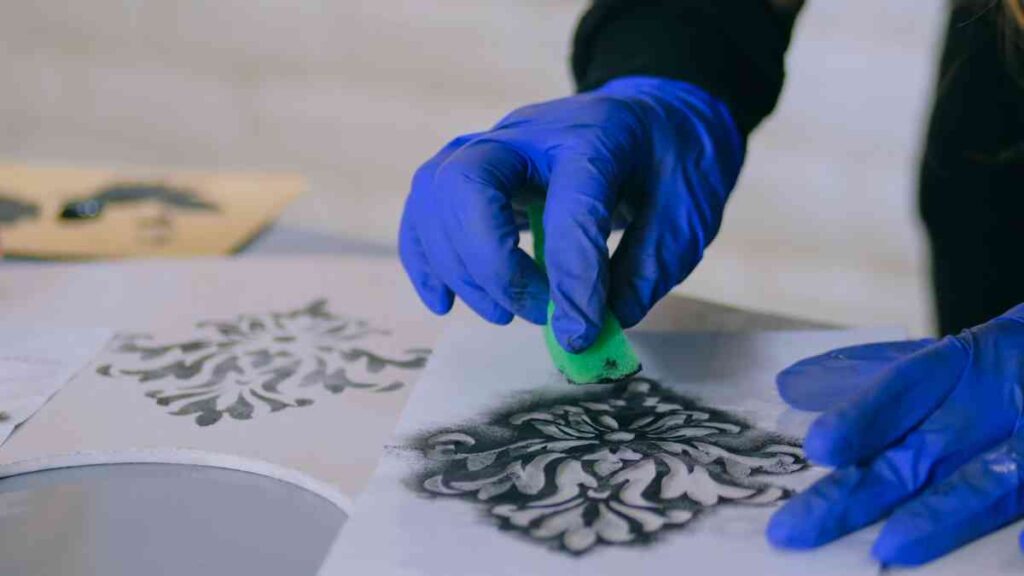
Stippling brush
The best paintbrush for furniture stenciling is round and has a completely flat top across the bristles. This will help you blot paint up and down over the stencil cutouts. The rounded shape allows you to easily rotate the bristles to fill small areas. Choose a stippling brush to fill an intricate design with crisp, clean details.
Sponge
If you want to add texture or an aged look to your stenciled design, sponges are the way to go. Use a large, porous sea sponge for the most texture. If you like a less crisp, more worn finish to your stenciled design, use a denser sponge. A craft sponge or even a makeup sponge is perfect for this look.
Paint roller
If you’re filling in a large, all-over pattern with one color, a paint roller is the way to go. Don’t use the same heavy-nap paint roller you’d use for walls, though. Use a dense foam paint roller with rounded edges. This will distribute the paint evenly over your furniture stencil.
Finally, you’ll need a few things to make painting and cleanup as easy as possible. Keep some scrap paper or cardboard on hand to blot your brush, sponge, or roller as needed. You’ll also want to keep mild soap and water or baby wipes nearby. This makes it easy to clean your furniture stencils and tools periodically and avoid smearing or smudging.
3. Clean, Prime, and Paint Base Layer
The base of your furniture should be clean and already primed and painted. You can hold off on sealing the base layer and seal or varnish the furniture after stenciling.
Pro tip: make sure your base layer is completely dry before you begin stenciling. If the surface is still tacky, the stencil could remove some base layer paint! Leave plenty of time for your base coat to cure before taping down the furniture stencil.
4. Place and Secure the Stencil
If you’re doing an all-over design, measure before taping anything down. Measure to find the exact center of your stencil and mark it with a small dot or x shape.
Then, measure to find the exact center of the area where you’d like your stenciled design. Line up the center of your stencil with the center of your piece and square up the edges.
If you’re trying to create a vintage or boho look, you can eyeball the placement of your furniture stencils. Simply place the stencil where it looks best on the piece.
Once you have your stencil in place, use painter’s tape to secure it. Make sure the stencil is perfectly flat against the surface. Then, secure all corners and sides with your tape.
Alternatively, you can use a temporary adhesive spray to secure the furniture stencil. This is especially helpful to prevent seeping if your stencil has lots of small cutouts. We still recommend using painter’s tape to hold down the outer edges of the stencil. The temporary adhesive may not have a strong enough bond to secure the entire stencil.
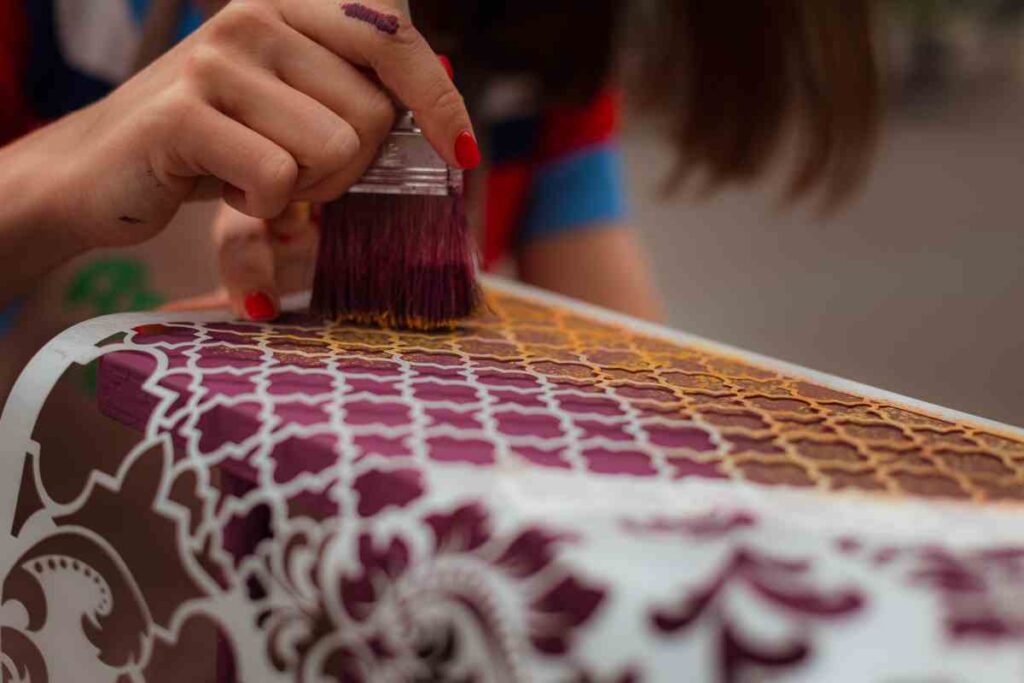
5. Dab on Paint
When stenciling furniture, you want to fill in each cutout completely without allowing the paint to seep under the edges. This is easiest to achieve when your tool is saturated with paint but not dripping.
Fill your brush, roller, or sponge with paint. Then, dab or roll on a practice sheet of cardboard. Finally, dab your paint onto the furniture stencil with a firm up-and-down motion. Continue until you’re satisfied that the design is completely filled in.
If you are using a roller, simply roll straight over the cutouts several times. This is a much easier method for a simple, monochromatic design. However, you still need to work carefully. Be sure not to let your roller go past the edges of your taped-down furniture stencil!
6. Remove Stencil and Clean
Gently remove your painter’s tape and lift the stencil without smudging the paint. Try to keep the stencil as still as possible while you remove the tape. If you can, lift the stencil straight up to avoid smudging your wet paint.
If you used temporary adhesive to secure your stencil, loosen and lift one corner first. Then gently peel the stencil back from the surface.
Removing the stencil is the most tedious part of the process, especially when the paint is still wet. However, we don’t recommend waiting for the paint to dry completely. This could cause some paint to lift or chip when removing the stencil.
If you notice some smudged areas, use a small, fine-tipped paintbrush to correct the design before it dries.
Finally, use baby wipes or soap and water to clean the stencil completely. Remove all the paint and any residue from tape or adhesive. Your furniture stencil can be reused several times if you take good care of it.
7. Repeat
If you are stenciling an all-over design, you can continue laying down and painting over your stencil right away.
Line up the stencil for the next area you want to cover and secure it, just as you did in Step Four.
Do not apply tape over a newly stenciled area–it may pull up fresh paint! Stagger your stencil if necessary so the freshly painted areas have time to dry. If you choose this method, measure carefully to be sure your stenciled pattern will line up on completion.
Repeat steps four through six until you’ve finished stenciling your design!
Frequently Asked Questions
How Can I Use Multiple Colors on a Furniture Stencil?
Creating a multi-colored design with stencils is completely doable. It just takes a little extra time and patience.
Set out each of your paint colors and designate a different paintbrush for each color. This is the easiest way to ensure your colors won’t mix as you work!
You can also use a sheet of plain paper or cardboard to temporarily cover areas you don’t want to paint. This is another easy way to prevent filling in a section with the wrong color.
Finally, make sure you’ve filled your design completely before removing the furniture stencil. It can be very hard to realign a stencil once it’s lifted. Ensure you’ve used each color in the correct areas before moving on.
What Kind of Paint Should I Use for Furniture Stenciling?
Nearly any type of paint can be used for furniture stenciling, but there are benefits and drawbacks to each. Here’s the breakdown for using acrylics, oil, latex, and chalk paint:
Acrylic
Often the best paint for stenciling on wood furniture. Water-based acrylics are available in a wide variety of colors, shades, and sheens. Plus, acrylics are durable enough to resist scratches and fading.
Oil
Adding a painted design on top of non-wood surfaces, such as glass or ceramic, often calls for oil paints. Metal or pressed tin surfaces can also benefit from oil paints, although acrylics can be used here, too.
Latex
Stenciling with latex paint is another great option, especially if you’re making your design on a wood surface. Keep in mind that it will take longer to cure than acrylic paints. However, if you have leftover latex paint in your desired colors, feel free to use what you have!
Chalk
Chalk painting is a popular way to refinish furniture. This extremely matte paint can be used for furniture stencils, too. While you won’t need to do much to prepare your surface before chalk painting, you will need to seal the design with wax.
How Can I Protect My Stenciled Surface?
After putting so much work into your furniture stenciling, you’ll want to protect the finished product! Consider using an extra-durable sealant for areas that will see lots of wear, such as a tabletop. If your piece will be in direct sunlight, look for a protective topcoat with UV protection.
There are many different types of sealer. Polycrylic, polyurethane, and finishing wax are just some of the possibilities! Choosing the best sealer for your project depends on many factors, such as material, color, and durability. For all the details on choosing the right sealer, check out How to Seal Painted Furniture for Long-Term Protection.
All About Stenciling Furniture
Using furniture stencils allows you to customize your furniture without paying for a unique, hand-painted piece. Even better, you don’t need to be artistically inclined to create the look you love. Furniture stenciling offers a cost-effective, relatively easy way to personalize your piece.
While the process takes time and a little practice, the result will reflect your unique style. Take your time finding your inspiration and choosing your furniture stencils. Be methodical about your stenciling process and keeping your tools clean. If you put in the time and effort upfront, you’ll be able to enjoy your beautiful stenciled furniture for many years to come.
Customizing your furniture is a rewarding project for many DIYers. Check out our Painting Furniture page for more ideas and inspiration!

As a novelist, special educator, and freelance writer, Ellen enjoys unwinding with a variety of crafts. Whether it’s a quick sewing project or a long-term dollhouse remodel, Ellen loves to be creative whenever she has down time.
Ellen holds a bachelor’s degree in creative writing and psychology and a master’s in early childhood education. She enjoys learning new things, which is why she dabbles in many types of needlework and yarn crafts. With so many new techniques to try, Ellen rarely makes the same thing twice!
Originally from Virginia, Ellen can often be found with a glass of homemade sweet tea while she ponders her next project.
Ellen can be reached at [email protected]