Are you looking for a fun and easy art project to do in your free time? Stenciling on canvas is an excellent technique to try out and produces beautiful results!
Painting projects can be enjoyable and even relaxing. But not everyone is highly artistic, making your options seem limited. Luckily, stencils can help you create stunning pieces of art no matter what your artistic abilities are! All it takes is a bit of patience and focus.
Keep reading to learn how you can create a beautiful stenciled canvas at home!
What You’ll Need When Stenciling On Canvas
When stenciling on canvas, you’ll only need a few painting essentials. You might even have some of these things already lying around your house!
Stencils
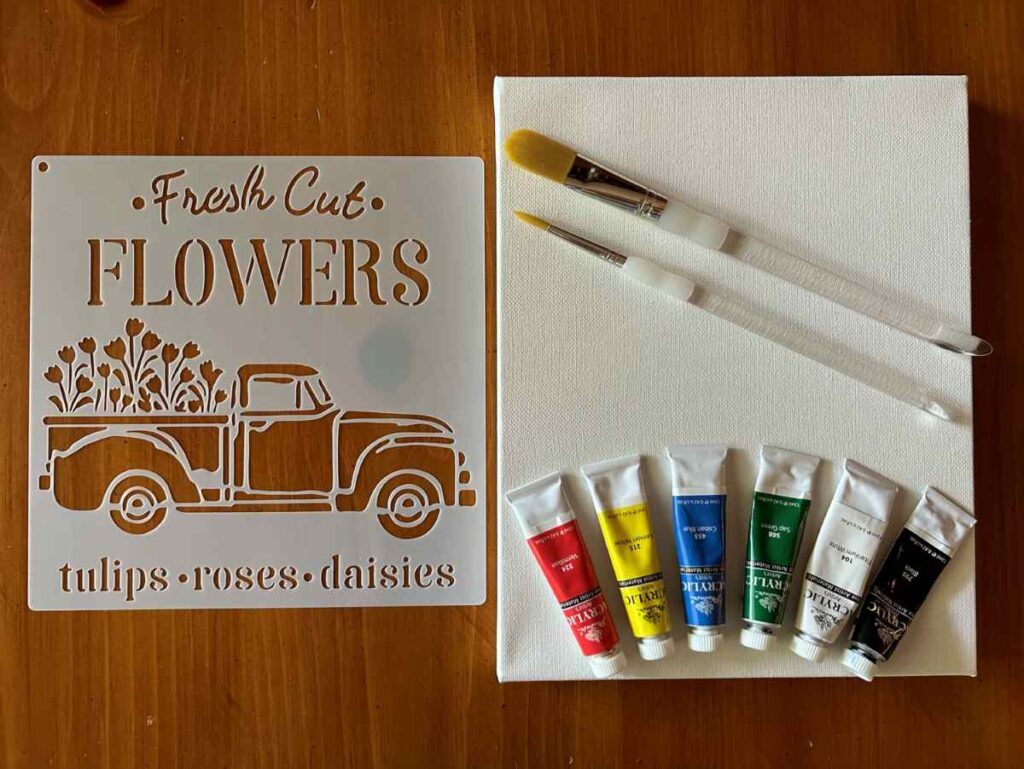
You can’t try out stenciling on canvas without stencils! The key is to find thin stencils, which will give the paint a flatter look. Less paint will pool at the stencil edges due to their thin design.
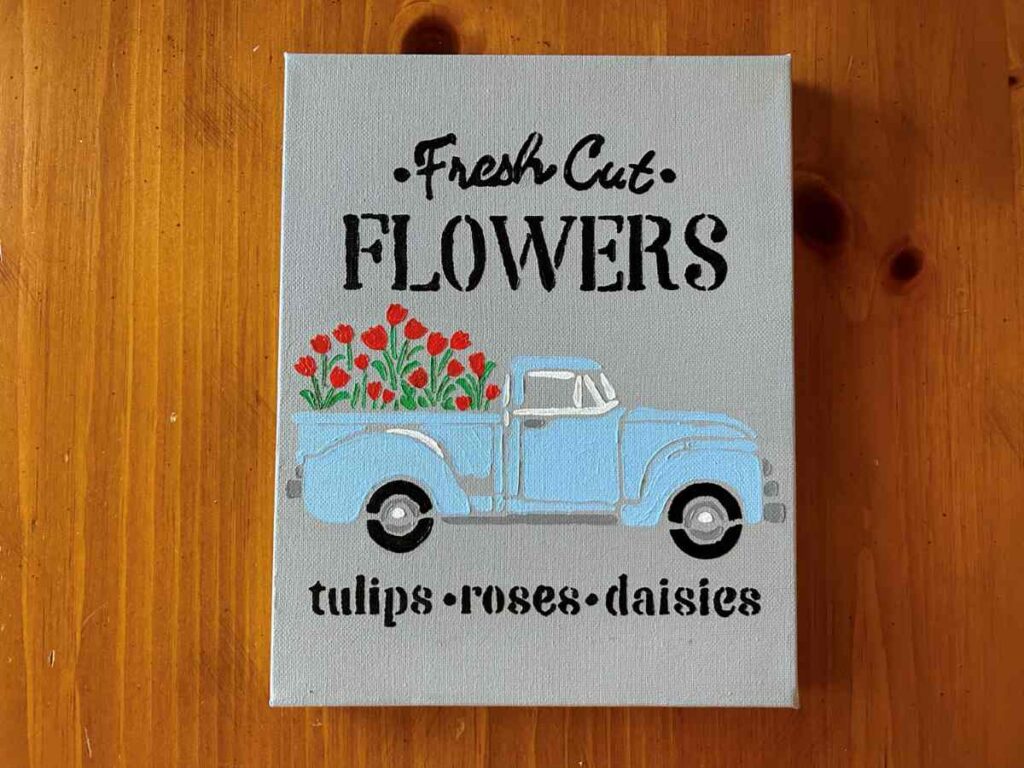
Many options exist, whether you want a phrase, animal, or flowers. Simply find a stencil you love and get ready to paint!
Canvases
Once you pick your stencil, you can choose your canvas for your stenciling-on-canvas project. You’ll need to ensure your stencil fits on the canvas you choose.
There are two primary types of canvases, including canvas panels or stretched canvases.
Canvas panels are hard, flat, and sturdy, and you can frame them.
Stretched canvases have a softer feel, as there are no hard backings besides the frames. They’re also ready to hang right after your paint dries.
One isn’t necessarily better than the other. It’s more of a personal preference when making your decision.
Paintbrushes
Another essential material you’ll need is small paintbrushes. You can choose any paintbrushes you’d like. But you should ensure you have a variety of sizes.
A small brush is especially helpful for the tiny details within your stencil.
Acrylic Paint
When stenciling on canvas, your best paint option will be acrylic paint.
Other paint types, like oil or watercolor, can bleed significantly under your stencil. It won’t create a uniform look, making your art piece hard to recognize.
Acrylic paint holds its form well and dries rather quickly.
Painter’s Tape or Stencil Adhesive
Using painter’s tape will do the trick to keep your stencil in place.
All you need to do is tape each corner or side of your stencil to your canvas. This will prevent your stencil from sliding all over the place while you paint over it.
Without doing this, you can expect smudging and excessive paint bleeding within your stenciling on canvas project.
Stencil adhesive is another option to secure your stencil. It’s a spray that dries tacky to keep your stencil in position while working.
Paper Plates or Palettes
You’ll need somewhere to put your globs of paint while working on your stenciling on canvas project. Paper plates make great disposable palettes. Or you can get some artist palettes, which you can reuse for other painting projects in the future.
How to Paint on Canvases with Stencils
After you gather all of your materials, it’s time to paint! Follow these steps to help you through the stenciling on canvas process.
1. Paint Your Base
Grab your materials and start thinking about what color you want your background to be. It’s usually best to pick something neutral, as this will help your design pop.
Think along the lines of white, tan, or gray. But muted pastel colors can also make great backgrounds!
You’ll want to ensure your background doesn’t compete too much with your design’s color scheme. Bold colors for both the background and design can make your painting feel busy.
You can begin painting once you choose your background color for your stenciling on canvas project.
It might be best to use a flat brush for this as it can cover more canvas space at once. Round brushes are better for the actual stencil part.
Be sure to smooth out any extra paint on your canvas. You’ll want your canvas to be as flat as possible for your stencil. Lumps and bumps can cause abnormalities when you paint your stenciled design.
2. Affix Your Stencil to the Canvas
After your background is completely dry, you can move on to the stenciling part. Acrylic paint typically dries in under 30 minutes.
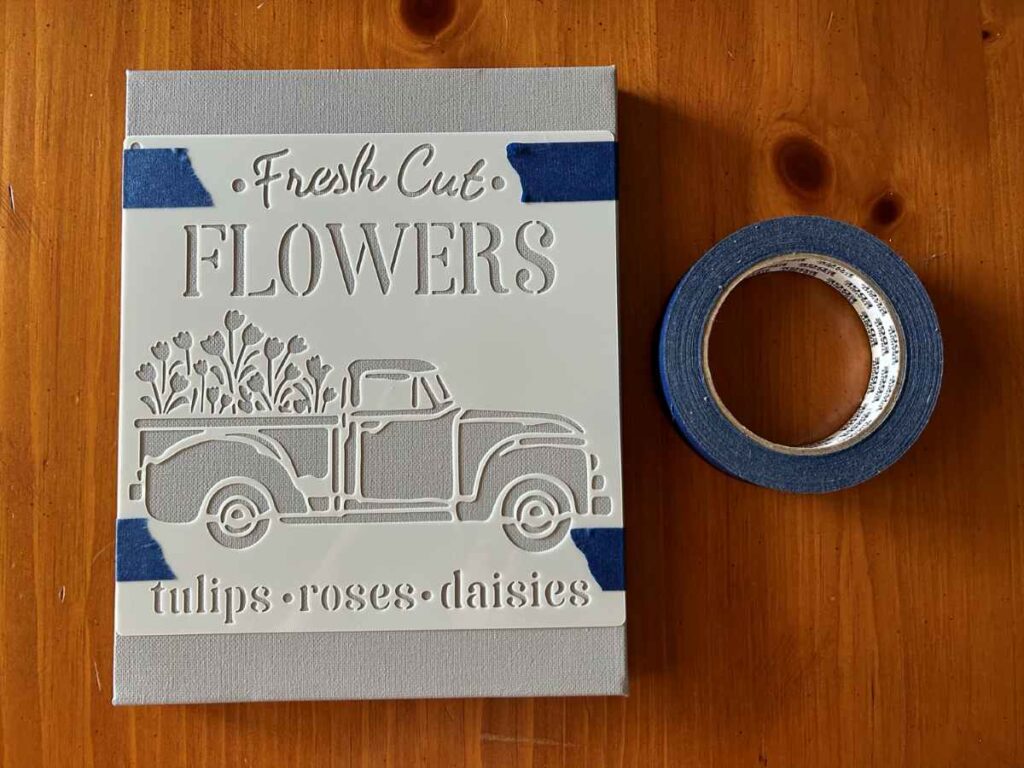
After you’re sure it’s dry, grab your painter’s tape and tape the stencil to your canvas. Ensure the tape wraps around the back of your canvas for added security. You don’t want it lifting up while painting your stenciling on canvas project.
If you don’t feel that your tape is keeping your stencil still enough, you can opt for stencil adhesive. The tacky texture is perfect for preventing sliding and won’t ruin your painting when you peel the stencil off.
You could even use both options if you feel worried about the stencil moving!
3. Begin Painting Your Stencil Design
Don’t put all your colors on your palette at once. They’ll dry out before you get to them, leaving you with unusable hard globs.
Start with one color at a time and work your way through each section of your stencil. It’s also wise to save the tiny detailed pieces of your stencil for last. They require a little more focus and precision.
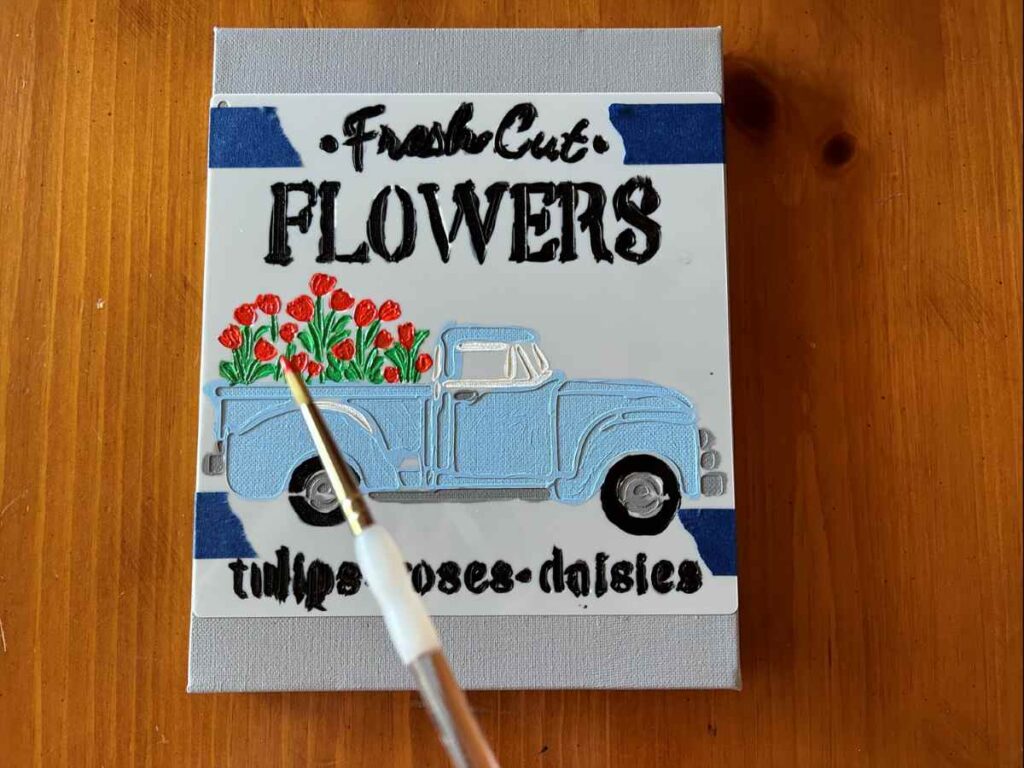
You can typically paint over a stencil as you would normally paint anything else. Paint in strokes.
But it can also help to dab the paint with your brush to get close to the stencil edges. This is especially true with small details, as a brush stroke won’t usually fill in the tiny cutouts.
Be sure to scrape off excess paint from your brush when painting to prevent globs within your stencil design.
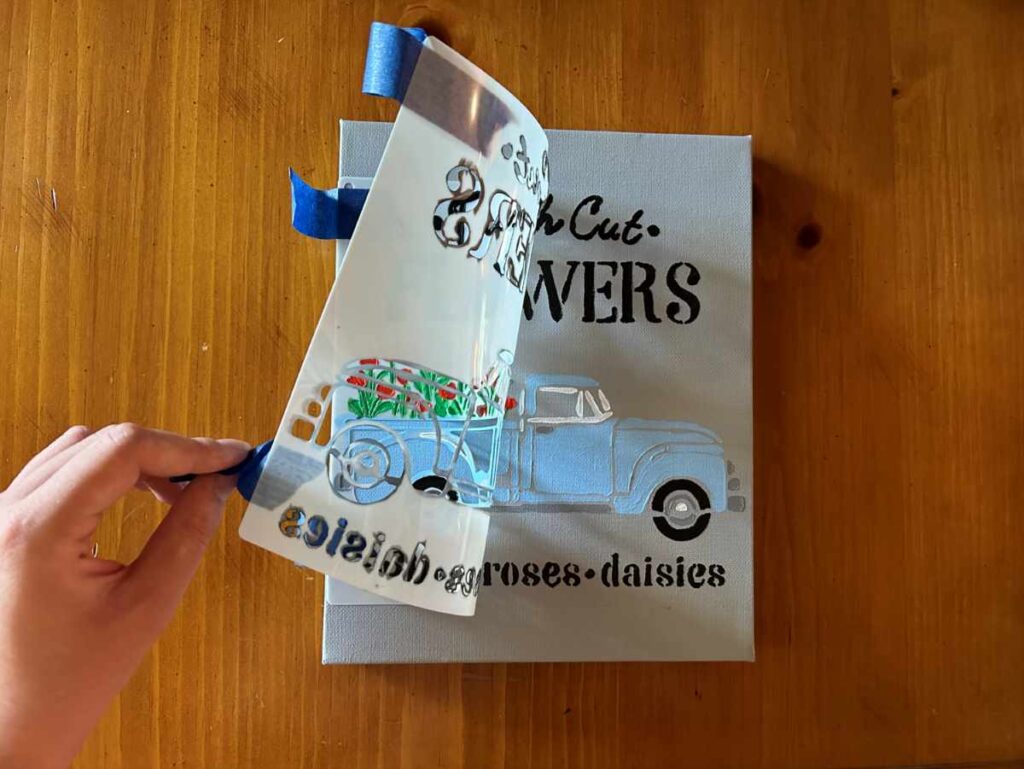
4. Peel Your Stencil off
Once you finish painting, you can begin peeling your stencil off. You should do this immediately after painting to prevent the paint from peeling off your canvas.
It’s a good idea to start with one corner and gently and slowly lift it. It might feel like it’s stuck to your canvas, as some of the paint may have acted like glue as it dried.
But it should still come off without disturbing your painted masterpiece.
For the most part, your painting should look rather uniform and neat. But if it needs fixing, you can go back with a brush to correct overly smudged or paint-bled areas. Detailing brushes are very helpful for this.
With this step, your stenciling on canvas painting is now finished! It’s time to admire your work.
5. Wash Your Stencil (Optional)
After your stencil is off, you may want to clean it so it’s perfect for your next project. You can do this with simple soap and water, as acrylic paints are water-based.
Using your fingers to rub the excess paint off should be just enough pressure for the paint to wash off.
What to do with Your Stencil-Painted Canvas
Now that you have your painting finished, there are a few things you can do with it. You can keep it for yourself or allow someone else to enjoy it!
Display It
Stenciled canvases can make excellent decorations in your home. You can hang them on walls, place them on your desk, or put them on shelves. And you’ll be proud to display them since you created them!
Stenciling on canvas is an excellent alternative to pre-made decorations and paintings you find at the store. These projects are affordable and 100% customizable.
Creating different stenciled canvases for each season or holiday might even be fun. Paint pumpkins and bats for Halloween, or snowflakes and ornaments for Christmas. There’s no need to buy holiday decor when you can make it yourself!
Gift it
If you don’t want to keep your newly made artwork, that’s okay too! Stenciling on canvas projects can also make beautiful gifts.
Friends and family would probably love to have something that you made. It means a lot to people when you make something for them. And they’ll appreciate that they can decorate this artwork in their homes.
You can always personalize these paintings with stencils that the gift receiver would like.
Maybe the person enjoys camping and often goes away to do so. So, you can make an outdoorsy camping canvas for them!
The more personalized you can make a gift like this, the more the person will love it.
Sell it
Do you enjoy creating stenciling on canvas projects? If you find it fun and would love to make more paintings, maybe selling them could be an option!
Home decor like paintings are popular things everyone needs to make their home more personalized.
People often buy them online as well. You could create an online store! Personalized art is always something that people are looking for.
Frequently Asked Questions
How do you prevent paint from leaking underneath the stencil?
Tape does a decent job of holding your stencil still when stenciling on canvas. But it doesn’t always keep your stencil flat. This is especially true if your stencil is old and used.
If you’re concerned about paint leakage, use Mod Podge. Simply secure your stencil and paint a thin layer of the Mod Podge over it. Then you can paint after it dries. Your lines should be a little cleaner when removing the stencil.
What happens if you let the paint dry before removing the stencil from the canvas?
While allowing the paint to dry before removing the stencil should be okay, there’s the possibility of removing some paint. This is because the excess paint on the stencil edges might get stuck to your canvas.
You don’t want to go through all that work of making your painting and then ruin it at the end. There will be minimal sticking if the paint is still wet when peeling your stencil off.
Can you use hairspray as a stencil adhesive?
Yes, you can use hairspray for a stencil adhesive if you don’t have actual stencil adhesive or painter’s tape.
You can spray it on the back of your stencil and wait for it to dry a bit. When it feels tacky to the touch, you can fix the stencil to the canvas and begin painting. Hairspray should work just as well as stencil adhesive.
Try Stenciling on Canvas!
Stenciling on canvas is a great project for adults and kids alike! It uses affordable materials and a simple process that everyone can follow.
This is the perfect project for a paint night with friends or just something to do on a quiet day. So, gather your paint, pick out your favorite stencil, and get started on your new canvas painting!
Are you looking for more guidance on painting with stencils? Check out How to Paint with Stencils for more help and ideas!

Ashley Masiello is a crafting fanatic, video editor, artist, general freelance writer, and a writer for That Sweet Tea Life. She has a bachelor’s degree in film/media and two minors in writing and art.
She loves to try out crafts, projects, and recipes in her free time. And she enjoys sharing fun and interesting artistic knowledge with others. Whether you like scrapbooking or cooking, there’s a fun learning process for everything!
Ashely can be reached at [email protected]