Paint pouring has grown in popularity since it was first introduced to the art world in the 1930s by David Alfaro Siqueiros. It’s part art, part craft, and part therapy all in one, and it’s fun for all levels of crafters–including the not-so-crafty!
Read on to learn what paint pouring supplies you need to get started.
What You Need
Paint
Obvious, I know. But you don’t need just any paint for a successful paint-pouring project–you’ll want to choose acrylics for your main design colors. Still, a household latex paint can be used as an initial coat if you have some extra lying around (a base coat should be used to cover your canvas to ensure the acrylics flow smoothly and to create a surface that will allow your colors to really pop).
If you have open acrylics you want to use up, make sure they flow easily and are free of clumps. Select three or four colors that go well together (check out a complementary color wheel for guidance).
Pouring medium
Mix your acrylics with a medium specifically for paint pouring, like Liquitex Professional Effects Medium. Some crafters use polyvinyl acetate (PVA) craft glue as a medium.
Canvas
Don’t let the word “canvas” limit you. Although you can definitely use traditional painting canvas for your pour art, all kinds of materials can make a creative and unique canvas. Consider paint pouring on the following:
- Glass
- Tile
- Wood
- Vinyl records
- Picture frames
- Paper
- Pottery
- Furniture
- Fabric
- Leather
- Metal
- Phone case
- Plexiglass
- Plastic
- Rock
Pouring cups
These don’t need to be fancy. Recyclable or disposable plastic cups work fine, as do Dixie cups. If you fall in love with paint pouring and decide you need to invest in a specific paint-pouring cup, rest assured; you can find several varieties to choose from.
Disposable gloves
Grab some disposable gloves to keep your hands clean while you create.
Old sheets, tarp, or drop cloth
Paint pouring can be messy! Cover anything in your workspace you want to keep paint-free using newspapers, plastic sheeting, a tarp, old sheets, or even a drop cloth or two.
Palette knife, spatula, stir sticks
These palette knives are good for mixing and stirring and for certain more advanced pour techniques, like swiping. You’ll be happy to have them around when it comes to finishing the edges of your pour-paint masterpiece.
Silicone oil (optional)
Silicone oil rises to the surface when it’s poured, creating small bubbles called “cells.” These add texture to your art and make it even more unique, exposing other color layers beneath what you would see without silicone oil.
High-viscosity silicone oil will give you smaller cells, whereas a lower-viscosity oil will result in larger cells. Although optional, silicone oil is absolutely something to consider adding to your list of paint-pouring supplies.
Toothpicks (or similar)
Keep these with your painting supplies to address bubbles and lumps.
Finish or sealant
Oil-based, water-based, or resin-based, a finish helps protect your creation while keeping its colors looking vibrant. You can even choose a glossy or a matte seal.
Get Started
Prepare your space
Find an area that’s relatively undisturbed. If you have kids or pets, try to do your paint pouring in a room with a door that you can close while the paint dries–which could be days.
This will ensure your canvas stays level while drying (because kids and pets won’t be bumping into it) and minimizes dust and pet hair that could get stuck in the wet paint.
Lay out whatever protection suits your space–drop cloths, tarps, newspapers, or old sheets.
Prepare your canvas
Elevate your canvas and make sure it’s level. There are several ways to elevate–you can use pushpins, cans, jars, or even elevators made specifically for paint pouring–just make sure they’re all the same height and place one under each corner of your canvas.
Elevating the canvas is important so that it doesn’t get stuck to any paint that spills off its sides and pools beneath.
Also, prime your canvas before you begin your pour so the paint flows evenly across it. Priming also helps the acrylic “stick” to the canvas. To prime, simply paint an even base coat over your canvas with a solid color. White or black are good options.
Mix your paint
Put some acrylic paint in a cup or container and add at least as much medium, but consult the directions on the medium you chose. Some mixtures call for a ratio of up to 10:1, medium to paint.
Mix until the color is uniform. The mixture should be the consistency of warm honey; if it’s too thin, add water and stir again, but be careful not to use too much water (the general rule is that your mixture shouldn’t contain more than 30% water).
Allow some time for any bubbles to rise to the surface to ensure there’s no air in the mixture when it comes time to start pouring; otherwise, your creation will come out pockmarked.
If you choose to use silicone oil, add a few drops to your mixed paint and give it a few gentle stirs.
Start Painting
You’re ready to get creative! There are several methods you can use for paint pouring. Here are some of the more popular techniques.
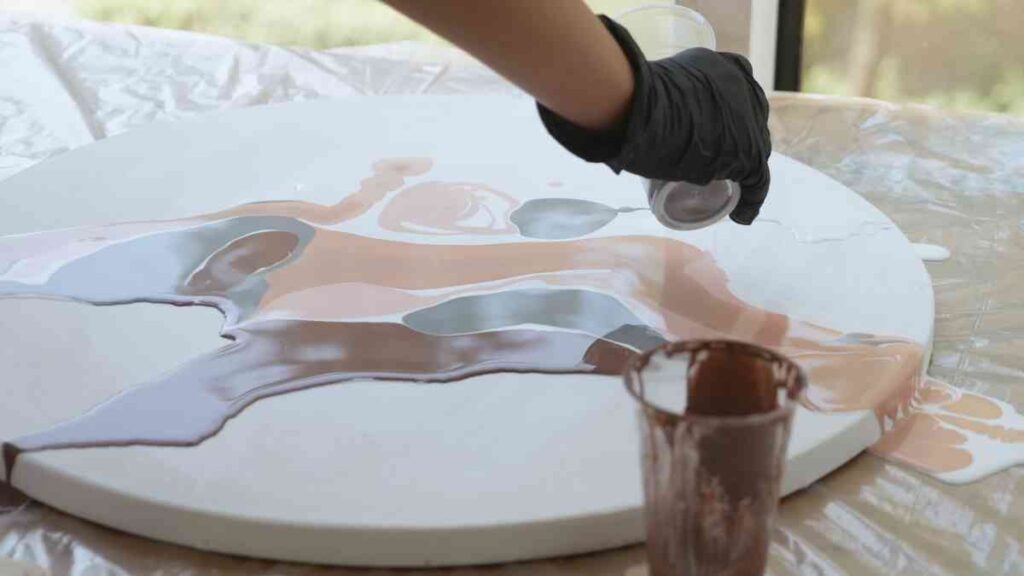
Traditional method
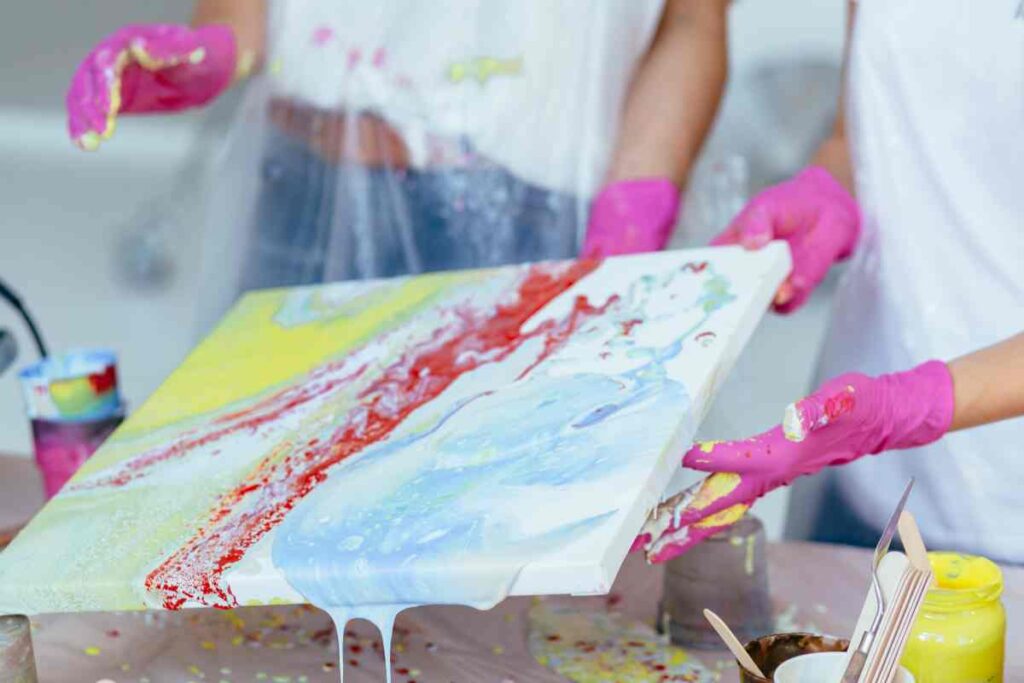
This method is perfect for your first-time paint pouring. Simply put a different color in each cup, then carefully apply the color to the area of the canvas where you want it. Once you’ve applied all your colors, carefully tilt the canvas so the paint spreads out to the edges.
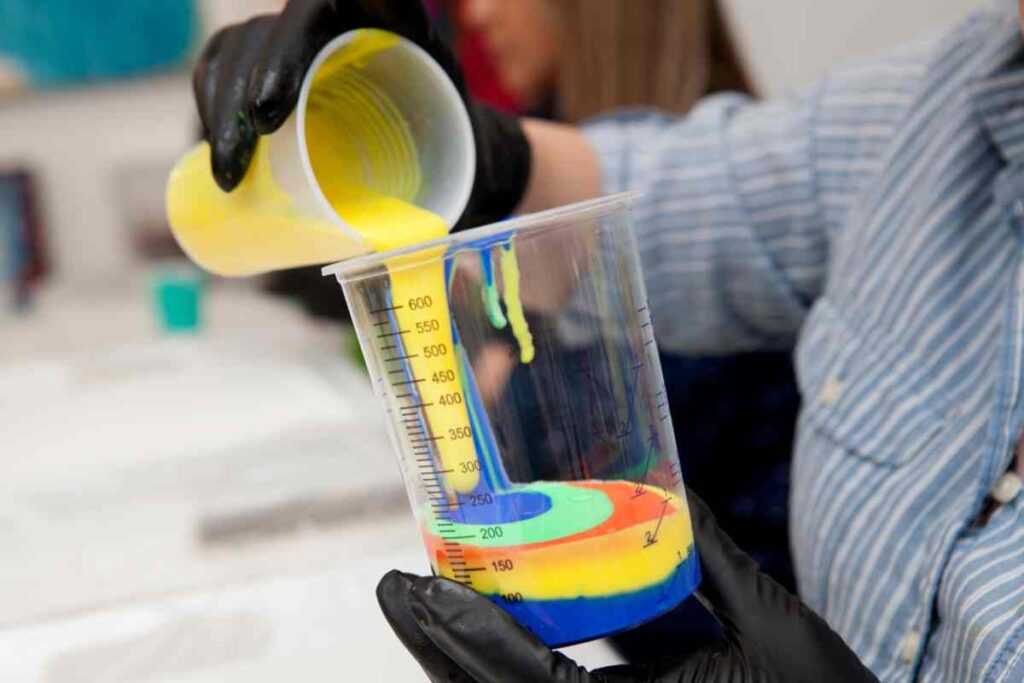
Dirty method
Mix your colors in individual cups. Once they’re the proper consistency, pour them one by one into a clean cup to layer them.
Carefully pour the paint on the canvas in whatever pattern fits your mood! Just make sure to pour the paint evenly. When you’re done, gently tilt the canvas to cover it entirely and spread out any puddles.
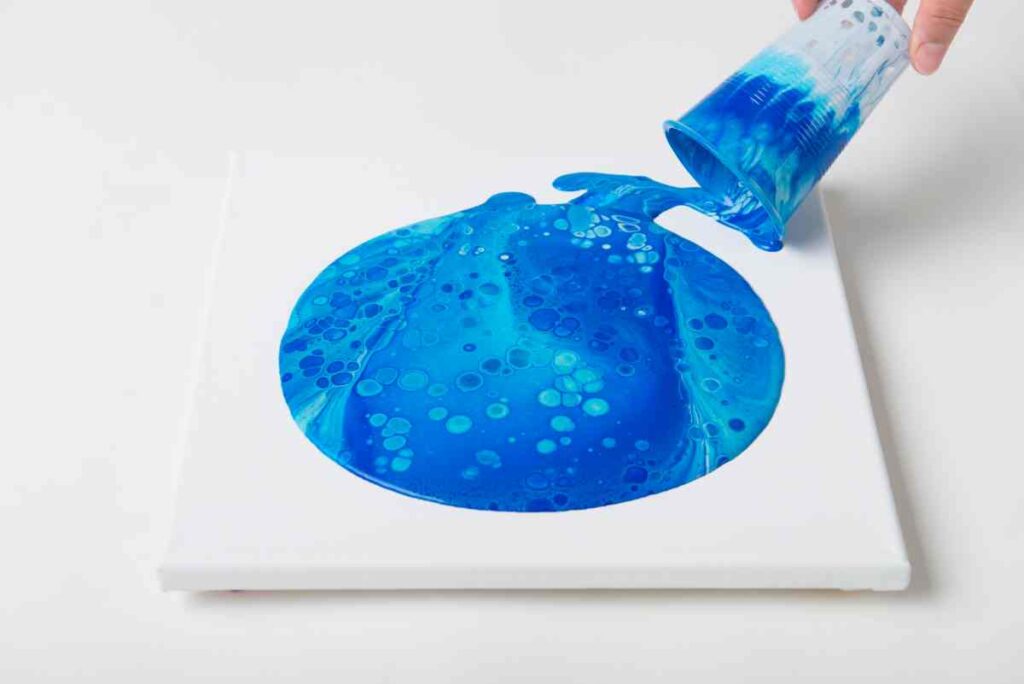
Puddle pour
A puddle pour is a more controlled variation of the traditional pour. Start with each color in its own cup, then begin by making a series of puddles. Add a drop or two of another color to the center of each puddle, up to as many colors as you’d like.
Go slowly to prevent air bubbles and splashes. Note that the first color you puddle will remain at the bottom, so it should contrast with the canvas or base color (usually using your darkest color first is the best method).
When you’re happy with your puddles, tilt the canvas to spread and even out the paint.
Flip cup
The flip cup method is like the dirty method, only you flip the cup of layered paint directly onto the canvas. Do this by placing the canvas on top of the paint cup, then carefully flip it and the cup together. Be sure to hold the cup tightly against the canvas as you flip it.
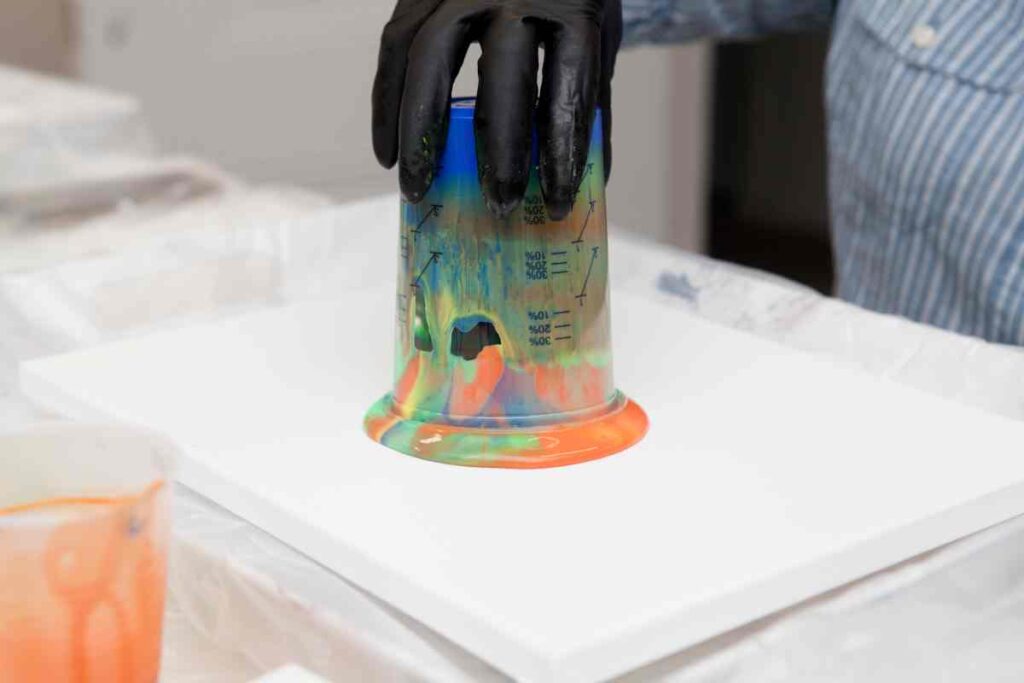
Pull the cup off the canvas quickly and at an angle, then tilt the canvas to cover it with the paint.
Funnel pour
The funnel method is basically the dirty pour method, but the tapering effect allows you to make a sort of spiral pattern as you pour the paint.
Layer your paints in a funnel, or cut off the bottom of an old soda bottle and layer them in there, covering the opening with your finger until you’re ready to apply the paint to your canvas. After removing your finger, slowly move the funnel around the canvas in a spiral, or in any pattern you like!
Bottle bottom puddle pour
Wondering what to do with the bottom half of the soda bottle you cut off when you were trying out the funnel pour? Try a bottle bottom puddle pour!
Simply place the bottom part of the plastic bottle cut-side down on your canvas, then pour your paint into the little well at the center. Alternate contrasting colors until you get a pattern or design you like and have enough paint to cover the canvas evenly.
Finish up
Finish edges
Check the edges of your canvas for any unpainted spots. Using your palette knife or wooden craft stick, gently smooth some of the surrounding paint over to cover the blank area.
Apply a finish
Once your canvas is dry, add a protective finish–oil-based, water-based, or even resin-based, glossy or matte.
Troubleshooting
Lumps and bubbles
The best way to avoid lumps and bubbles is to take care before you even make that first pour. Filter or strain your paints before using them, and wipe down your canvas with a slightly damp microfiber cloth. Pet hairs and dust can cause just as much of a headache as unwanted air bubbles in your final creation.
If you do find lumps or bubbles when you’ve finished pouring, use a toothpick to pick them out or pop the bubbles. Unfortunately, once the paint has dried, there’s no remedy for lumps and bubbles.
Clumps on the edges or back of your canvas
Again, prevention is key here. Line the edges of the canvas where you don’t want to paint with painter’s tape (if you don’t have it on hand, add it to your painting supplies list).
If you do end up with clumps on the back or sides of your canvas, try carefully slicing them off with a sharp boxcutter, or sand them off with fine-grain sandpaper.
Let Your Paint Pouring Supplies Flow
Any reason is a good reason to grab some paint-pouring supplies and give paint-pouring a shot. And now that you know how to get started and what to add to your supplies list, the sky’s the limit.
Learn more about paint pouring and other painting tips and tricks on our website!

Ronda Lindsay is an avid crafter who developed a love for all things DIY as a little girl with an extremely resourceful mother. When she’s not using her writing skills in her daily work in government communications, she’s busy dreaming up her next crafty creation, whether that’s in the kitchen, behind a camera lens, or among her vast scrapbooking supplies.
With a bachelor’s in English and a master’s in professional writing, Ronda enjoys learning about new DIY tips and tricks and sharing them with readers of That Sweet Tea Life! She hopes to one day be as creative as her big sister.