If you’ve seen paint pouring on social media, you may have wondered how exactly artists create those beautifully marbled works of art. With just a little bit of practice, it’s actually pretty easy to achieve!
Keep reading to learn all about paint pouring for beginners, and you’ll have your very own masterpiece in no time.
Step 1: Gather Your Materials
The first step in paint pouring for beginners is to gather all the materials you’ll need! Below you’ll find a detailed list of all the essentials.
Paint
Paint pouring only works with acrylic paint, so the most important aspect of choosing paint is making sure that all the paint you select is acrylic.
Otherwise, how you choose your paint is totally up to you!
One thing to keep in mind when mastering paint pouring for beginners is that the various shades will blend into one another a little bit once they’re poured on the canvas. Therefore, be sure that you’re picking colors you’re okay with having a little overlap with one another.
The number of paint colors is also totally up to you, and the greater number of paint colors you choose, the more vibrant your canvas will be.
Finally, you’ll also want to think about whether or not you want the base color of the canvas to be white.
White bases are the best option if you don’t want the color of the canvas to tint the colors you pour, but painting the canvas a different color can be fun, too!
If you don’t want a white base, pick another paint color and paint the entire canvas first, letting it dry completely before you do the paint pour.
Canvas
Any size canvas will do, as long as it can support acrylic paint! Canvas size and shape are all based on your own preference.
When learning paint pouring for beginners, it’s easiest to use a canvas because it acts as a sturdy base for your paint pouring.
Once you’ve gotten the hang of paint pouring, you can do projects with pretty much any object your heart desires!
Floetrol
The next item you’ll need to successfully learn paint pouring for beginners may seem a little intimidating, but don’t sweat it!
Floetrol pouring medium is a specific version of the pouring agent or medium required for successful paint pouring.
In general, a paint pouring agent or medium is needed to thin the acrylic paint so that it’ll flow nice and smoothly when you pour it onto the canvas. Using a substance like this will also maintain the quality of the paint’s original hue while allowing for full pouring capacity.
Floetrol is the most commonly used in paint pouring, but you can also use Elmer’s Glue if you want something inexpensive or something you might already have in the house.
You can also find pre-mixed paint online, which allows you to skip the steps of buying a paint thinner and adding it to the paint before pouring. When paint pouring for beginners, this option may make the process a little easier.
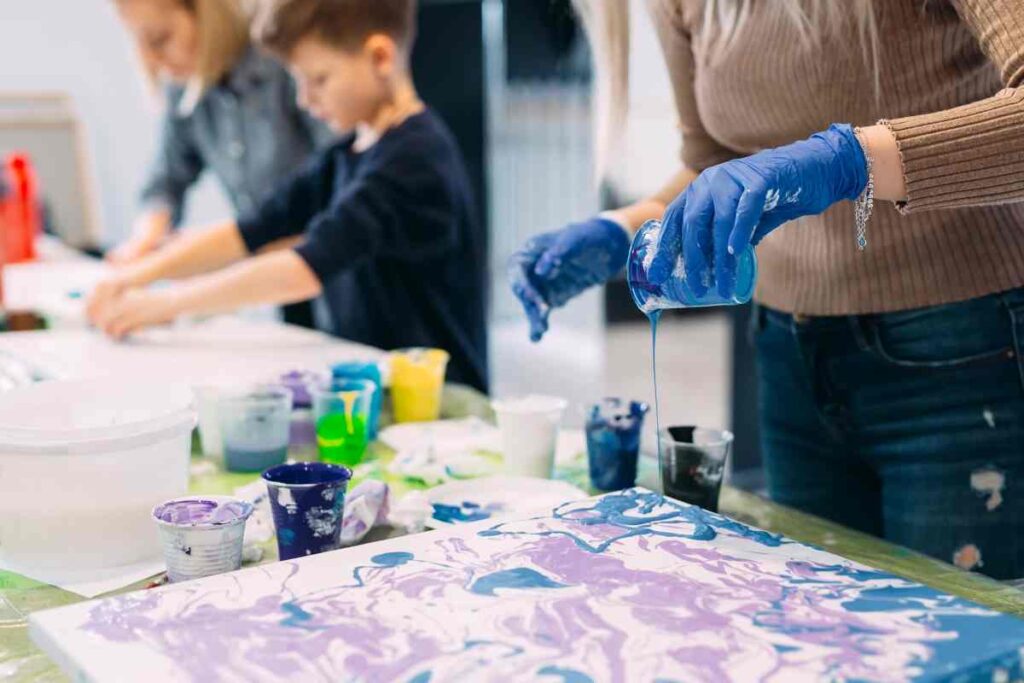
Plastic Cups and Stir Sticks
First, you’ll need a set of plastic cups to serve as mixing cups for each individual paint color. These cups should be smaller than the pouring cup.
In addition, you’ll need a plastic cup to serve as the pouring cup. Eight ounces is a good starting size for a pouring cup.
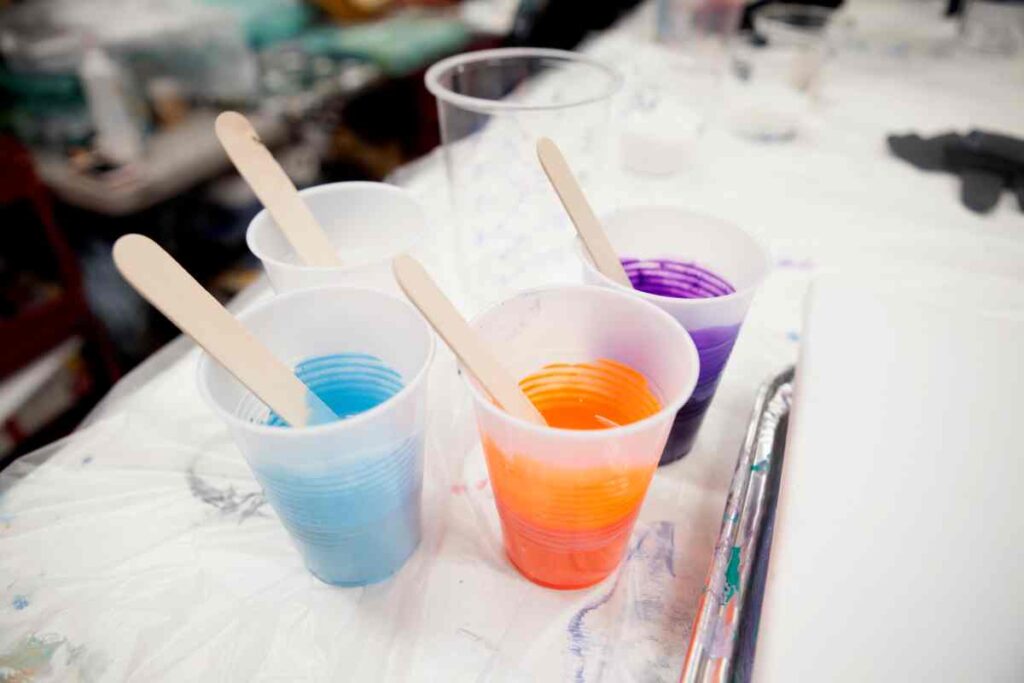
When it comes to stir sticks, purchase at least as many stir sticks as you have mixing cups. You’ll use these to mix together each paint color with the Floetrol.
Pro tip: Popsicle sticks work as great stir sticks, too!
Plastic Gloves and Cardboard
These items are both to contain the mess and facilitate easy clean-up, a crucial step, especially when learning paint pouring for beginners.
Specifically, you’ll need to put plastic gloves on before you pour the paint so that it doesn’t get on your skin.
The cardboard goes under the canvas so that you protect the surface under the canvas from getting any paint on it.
Feel free to add other protective materials like newspaper, garbage bags, or an apron as you see fit!
Step 2: Prepare Your Individual Paints
When paint pouring for beginners, it’s important to understand that each paint color you plan to use should have its own separate mixing cup.
Mix your paint using a 2:1 ratio with twice the amount of pouring agent as there is paint, and use your paint stirrer so that the pouring agent is fully mixed throughout.
If you’re using Floetrol, be sure to shake the bottle thoroughly before adding it to each mixing cup.
The final consistency of the mixture should flow like chocolate syrup or warm honey. If it’s too thick, try adding a few drops of water to the mixture. If it’s too thin, just add more paint!
Step 3: Layer Your Paint Colors
If you’re still learning paint pouring for beginners, this next step may seem a little confusing at first. However, it’s easy to get the hang of!

Layering will occur in the pour cup, so pour one color from its mixing cup into the pour cup at a time. Pour slowly and at a consistent speed.
Tilt the pour cup as you pour each color. This technique helps each layer of color stay fairly separate as it’s poured into the cup.
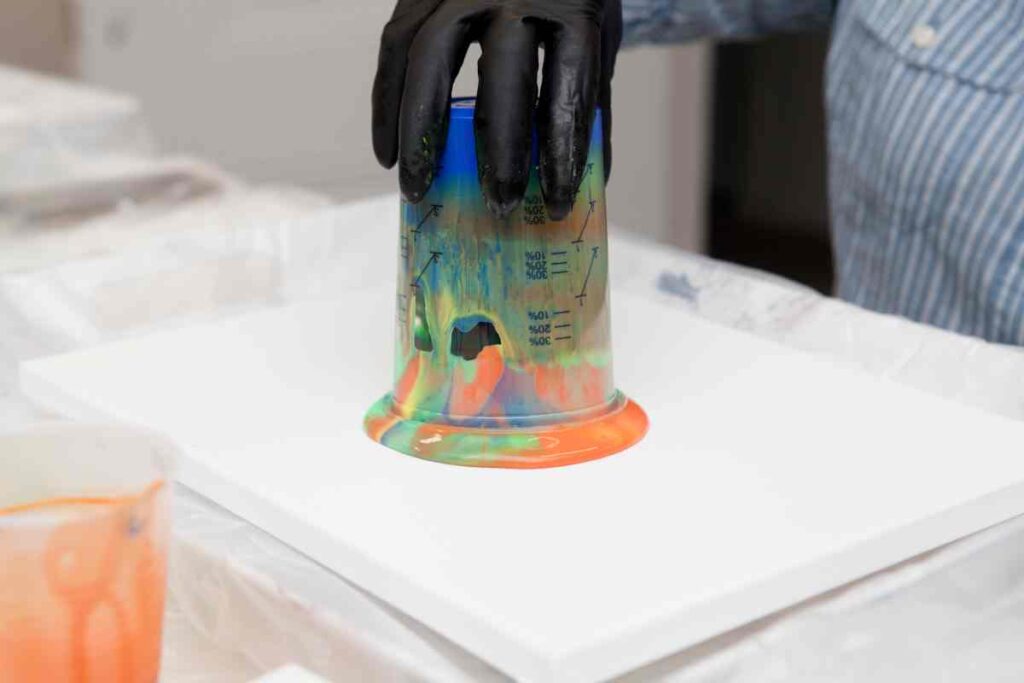
Step 4: Secure the Pour Cup against the Canvas
There are many methods of paint pouring, but the best one for paint pouring for beginners is the flip cup dirty pour method.
For this particular method, the canvas should be on an elevated surface with cardboard or newspaper under it.
Once you have this set-up, in one smooth motion, flip the cup upside down and against the surface of the canvas. The entire opening of the pour cup should be touching the canvas. It’s also helpful if you put the pour cup in the center of the surface.
If you’re having difficulty with this technique, you can also try flipping the canvas on top of your pour cup and just turning both over at the same time!
Give it a minute before moving on to step five so that the paint has time to move down the sides of the cup and completely onto the canvas.
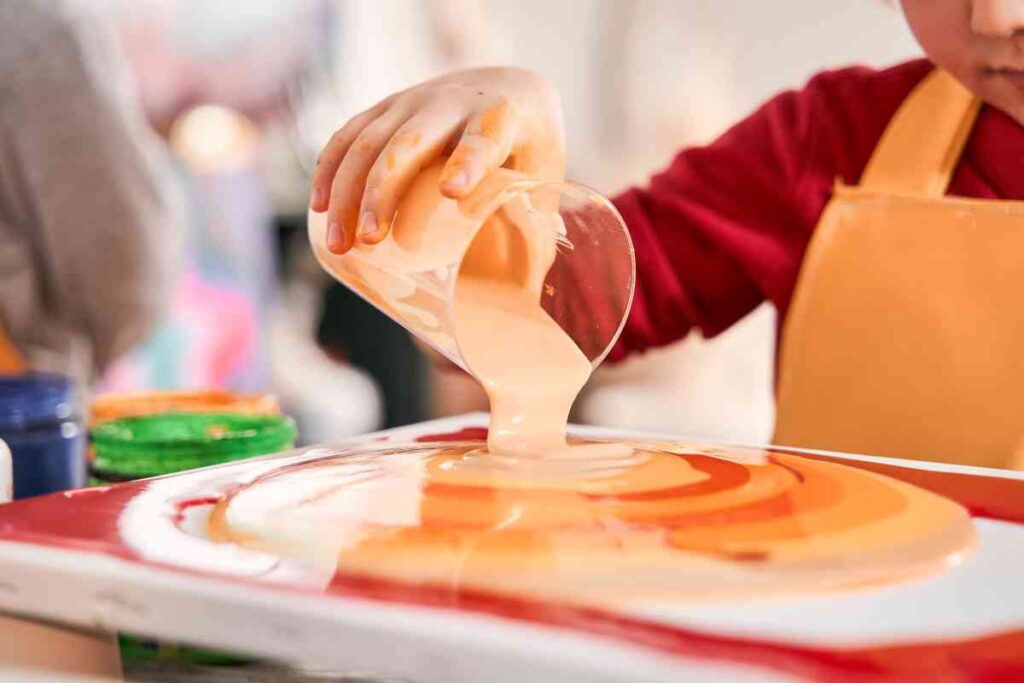
Step 5: Empty the Pour Cup onto the Canvas
Next, slowly remove the cup and let the paint cover the entirety of the canvas.
You may need to tilt the canvas in a particular direction if the paint isn’t covering all of the canvas on its own.
Step 6: Let Dry
The final step in paint pouring for beginners is super simple: just walk away and let your project dry!
Specifically, leave your canvas on the elevated surface for 24-48 hours to let it completely dry.
If you want to varnish your finished painting, wait at least ten days after your initial pour before varnishing.
Frequently Asked Questions
How do I figure out which size pour cup to use?
When paint pouring for beginners, you’ll probably have to do a little trial and error to make sure you have the correctly sized pour cup.
Sizing your pour cup is a delicate balance because a cup that’s too small won’t allow you to pour all the paint colors you have. On the other hand, a cup that’s too big will cause the paint you’re pouring to start mixing prior to the pour, which could lead to the colors getting a little muddy.
Base the size of your pour cup on the size of your canvas. There is an acrylic pouring calculator online that can help you figure out a really exact amount!
If you want to just eyeball it instead, make sure that you start out with more paint in your mixing cups and pouring cup than you think you’ll ultimately need.
What are the benefits to varnishing my canvas once the paint pour is dry?
When figuring out paint pouring for beginners, you may not want to add any extra steps to the process. However, varnishing your canvas is a quick and easy addition that has a lot of benefits!
For example, adding a varnish to your canvas is aesthetically pleasing. The varnish makes the painting look shiny even after the canvas has dried completely, which can also enhance its colors.
In addition, the varnish is protective. It provides a barrier, which makes the paint less likely to chip off of the canvas over time.
Can I reuse the leftover mixed paint I didn’t use for my first paint pour?
You can! Just make sure that your paints are stored properly in between uses.
Specifically, because the mix cups have both paint and your pouring agent in them, you can’t just pour them back into the original container.
Instead, put your mixed paint in a new glass, plastic, or silicone container and make sure that the container is airtight.
Can I just use water to thin my paint?
Using water is an effective way to thin your paint, and it’s probably cheaper and easier than purchasing a pouring agent.
However, mixing even a small amount of water into your paint will make your colors much duller and will weaken the pigment in the paint.
Therefore, it’s not the best idea when learning paint pouring for beginners to use water on its own, but you can use it sparingly in combination with other pouring agents.
Mastering Paint Pouring for Beginners
Now that you’ve read our comprehensive guide to paint pouring for beginners and learned all the essential steps, you’re ready to try it on your own! All you need is a few materials and a good attitude to create a stunning piece of art.
If you found this post helpful and want to expand your arts and crafts skills, check out our DIY page for tons of fun projects!

I’ve been a professional painter for the last 20 years. That Sweet Tea Life is a place where I get to slow down and visit the craftier side of painting.
I’ll share with you everything I’ve learned painting hundreds of pieces of furniture and sets of kitchen cabinets.