Wanna learn how to weather wood?
Get ready because we’re about to explore an incredible technique that can transform ordinary lumber into stunning, vintage masterpieces with an antique charm.
Weathering wood can enhance the character of your crafting projects, adding a touch of rustic appeal that transforms a piece of static furniture into a well-worn conversation piece.
Below, you’ll learn how to weather wood so you can fast-track the natural wear and tear on wooden surfaces without waiting decades for nature to take its course.

What is Weathered Wood
Weathered wood results from prolonged exposure to the elements, be it sun, rain, snow, or wind, which causes its surface to age.
Over time, aged wood takes on a silver-gray hue and captivating texture full of wormholes, uneven edges, and rough grain.
The most common type of weathered wood is barn wood, favored for conveying a rustic-chic look to DIY projects and home decor.
Reclaimed wood has been making waves in the interior design scene as an eco-friendly alternative to store-bought lumber. It’s a sought-after choice for creating furniture, art pieces, and statement walls that bring a touch of rustic charm to a space.
How to Weather Wood
With all its promise as an eco-friendly building material, reclaimed wood can be hard to find. Sometimes it even costs more than brand-new lumber.
Luckily, you can mimic the weathered look of aged wood using simple household items and a little bit of elbow grease.
Below, you’ll discover four ways to create natural wear and tear on a brand-new piece of lumber so that you can transform ordinary wood into a beautifully aged masterpiece.
The best part about weathering wood is that you’re trying to make it look old and worn, so leave your perfectionism at the door. This is a great DIY project if you’re looking to get a little destructive.
So, without further ado, grab your safety goggles, and let’s get started!
Vinegar and Steel Wool
Do you want to make your brand new 2×4 look like a piece of driftwood washed up on shore? You can make your seaside decor dreams come true using just vinegar and steel wool to create an ashen-gray stain.
Tear a pad of steel wool into pieces, then stick them into a mason jar. Add a cup or two of white vinegar, and screw on the lid.
When the steel wool is exposed to the acid in the vinegar, it will start to rust and change the color of the surrounding liquid.
The tint of the color will depend on how long you leave it in. Aim to let the steel wool soak for around 30 minutes for a light gray stain. Let the solution marinate for two days if you want a darker tint.
Once it reaches your preferred color, remove the steel wool and apply the tinted vinegar to your wood like a regular stain.
Let it dry for a few hours before using your wood in a DIY project or moving it to a new place.
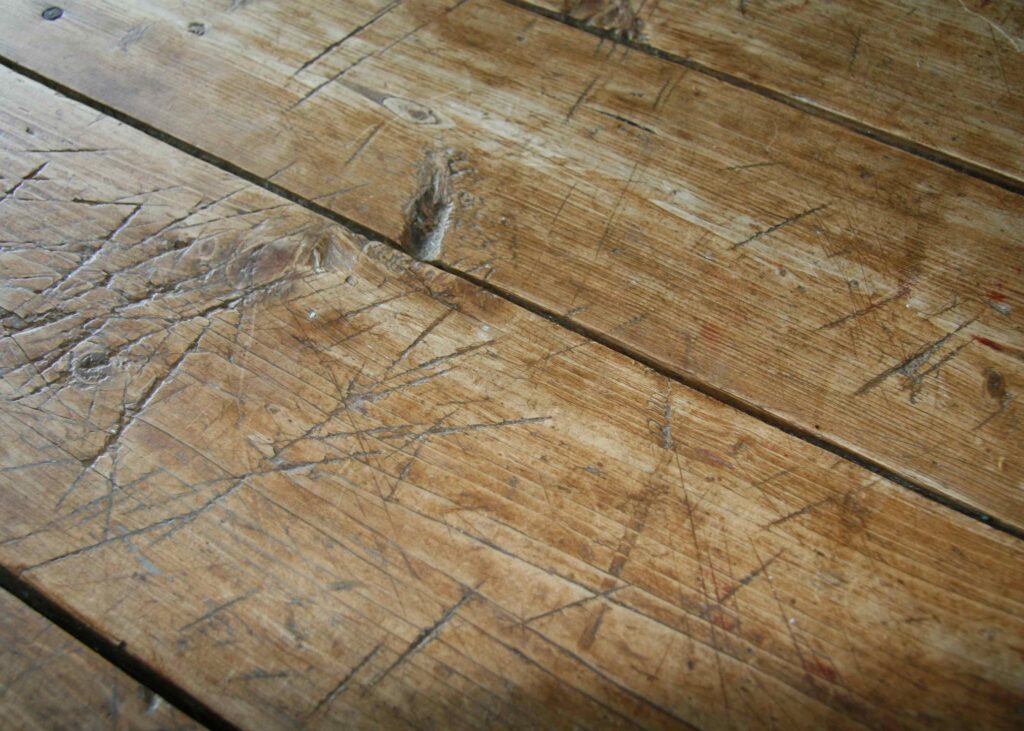
Fake Wear-and-Tear
This method might be the most fun way to weather wood on our list. If you’ve ever dreamed about taking out your frustrations on an inanimate object, now’s your chance.
You’ll need a weapon of choice to give your lumber fake wear and tear. A hammer, crowbar, or a bag of nails will do just fine.
Depending on the look you’re going for, you may also need a coarse wire brush or some steel wool.
And, of course, don’t forget to wear those safety glasses and gloves for some protective armor.
There are many ways to accomplish this method. You can bang on the wood with a hammer or crowbar, paying special attention to those perfectly-cut edges and giving them a good strike so they look more uneven.
You can also slug a bag of nails or screws against the board’s surface to create more texture in the grain.
Another way to simulate wear and tear is by dragging steel wool or a coarse wire brush to mark up the surface.
Once you’re satisfied with the level of vandalism, give your wood a light sanding to tame down the weathered look and make it look more natural.
Distressed Chalk Paint
Distressing with chalk paint is a great method for weathering wood without much effort. If you’re the type of person who can’t color inside the lines, you’ll definitely appreciate this crafting project.
This technique is ideal for amateur DIYers because the end result is supposed to look unfinished. It’s a great way to complete a project without over-stressing about making it perfect.
Start by finding the right chalk paint that will enhance your lumber. Country Chic and Jolie Paint both offer high-quality chalk paint with an endless variety of colors.
There are many ways you can distress with chalk paint. Before you start any method, make sure the surface of your wood is clean, and try to use a chalk paint brush or any brush with natural bristles.
Dry Brush Method: The dry brush method is definitely the easiest way to distress chalk paint. It creates a textured, imperfect finish without spending much effort.
Just dip a dry brush into the paint and drag it lightly over the wood’s surface. Build up the paint layers slowly until you’re happy with the color. If you add too much paint on the surface, you can always sand it off later, which leads us to the next method.
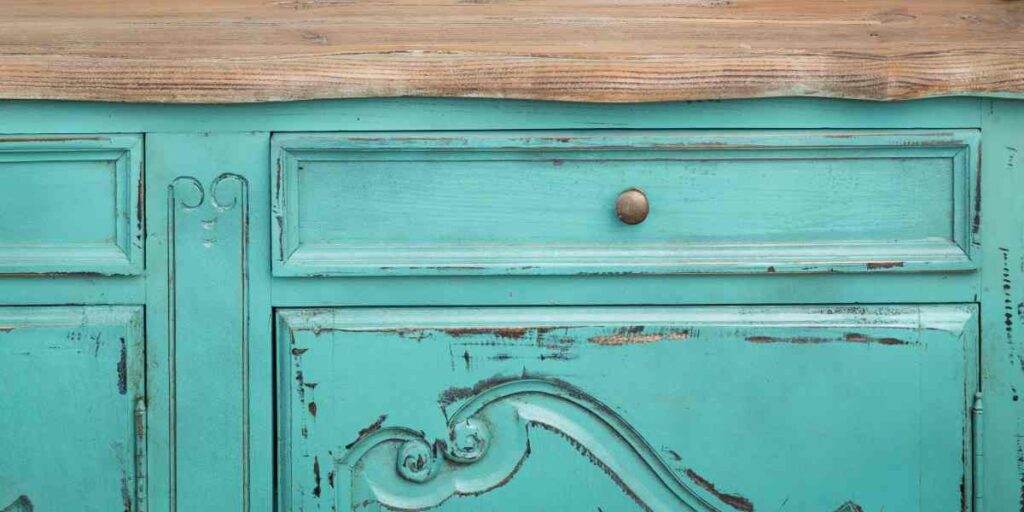
Sandpaper Method: Start this technique by applying an even layer of chalk paint. After it dries, use sandpaper to distress the edges and corners of the wood.
Keep a careful eye when filing down the wood. If you remove too much paint, you’ll have to do touch-ups later.
Color Washing: This method involves applying a thin layer of chalk paint on the wood’s surface and then wiping it off with a damp cloth before it dries. You’re left with a subtly tinted surface that looks faded and aged. You can also use different colors for varying effects on the wood.
Baking Soda, Vinegar, and Sun
The last method of weathering wood is by channeling the actual weather!
You must use untreated tannic woods like redwood, pine, cedar, or mahogany for this method to work.
Start by finding a sunny patch of grass in your backyard. Set up two sawhorses if you’re only weathering a couple of 2x4s or a board. Use drop cloths if you’re trying to weather an entire piece of wooden furniture.
Create a solution using equal parts water and baking soda. It should have the consistency of a watery paste.
Brush the paste over the wood in thick coats, ensuring even coverage. Pour some white vinegar into a spray bottle, then spritz it over the wood.
Leave the lumber baking in the sun for at least 6 hours, then brush away the caked-on baking soda with a hard-bristled brush. Use a damp rag to wipe up any excess mess.
The wood should have a grayish tint, thanks to the mixture of baking soda, vinegar, and sunshine. If you want to deepen the stain, repeat the process until the wood reaches your desired color.
Frequently Asked Questions
Now that you know how to weather wood, read the answer to some frequently asked questions queried by the internet’s DIYers.
How do you age wood to look like barn wood?
Barn wood is favored for its textured appearance, faded tint, and imperfect edges, but it’s hard to find and often comes with a hefty price tag. Consider making your own if you don’t want to shell out the coin for barn wood.
The process relies heavily on an electric grinder and some finesse. Once equipped with protective gear, grab your grinder and go to town on the wood.
After blunting the edges, eroding the surface, and creating realistic wormholes, you can transform that bland 2×4 into a piece of barn wood with lots of character.
What’s the fastest way to age wood?
Of all the methods we mentioned in our guide on weathering wood, the fastest way is the vinegar and steel wool method. You can easily create a homemade stain in just 30 minutes, and after brushing it onto the wood’s surface, you’re left with a silvery-gray tint that makes it look vintage.
Not only is this technique the quickest way to weather wood, but it’s also the cheapest, as it only requires vinegar, steel wool, a mason jar, and a paintbrush.

How to Weather Wood: Summed Up
Weathering wood can transform an ordinary 2×4 into a statement piece with lots of character. It adds a hint of rustic charm to furniture without breaking the bank.
All the ways of weathering wood are easy to accomplish and use items around the house. No matter if you go down the fake wear-and-tear route or use vinegar and steel wool, even the most amateur DIYer can weather wood.
Now that you know how to weather wood, discover more tips and tricks to add to your crafting encyclopedia by checking out our Painting Furniture page for creative DIY inspiration.

I’ve been a professional painter for the last 20 years. That Sweet Tea Life is a place where I get to slow down and visit the craftier side of painting.
I’ll share with you everything I’ve learned painting hundreds of pieces of furniture and sets of kitchen cabinets.