Starting a bathroom renovation project, but not keen on replacing the cabinetry? With some time and a little bit of elbow grease, you don’t have to!
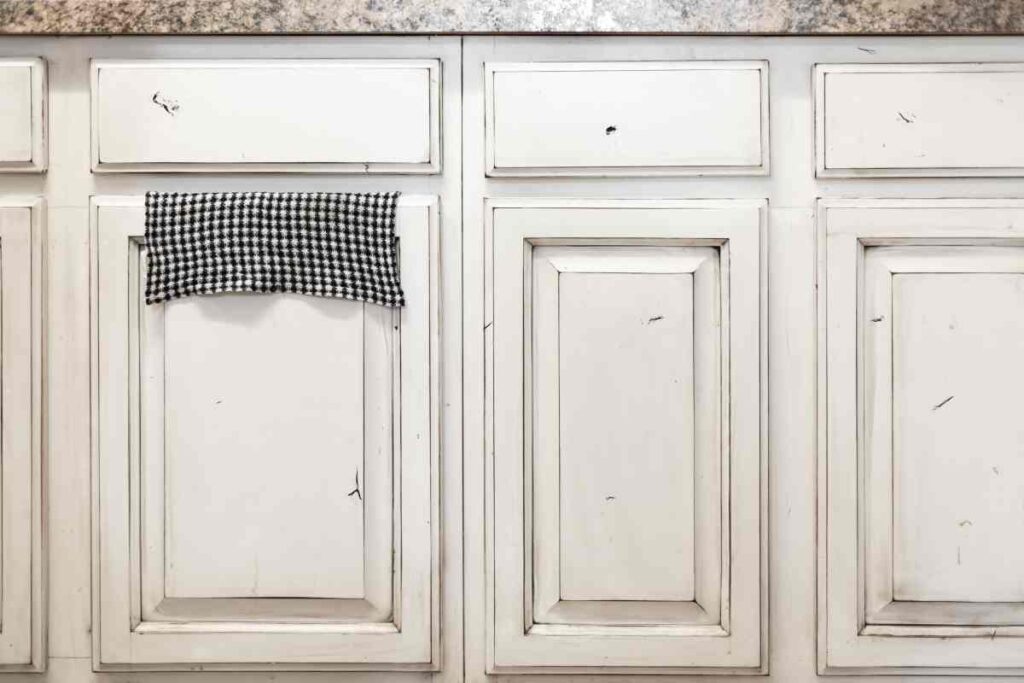
Distressing bathroom cabinets is one of the most popular ways to refurbish the look and feel of your washroom without having to purchase and install new furniture.
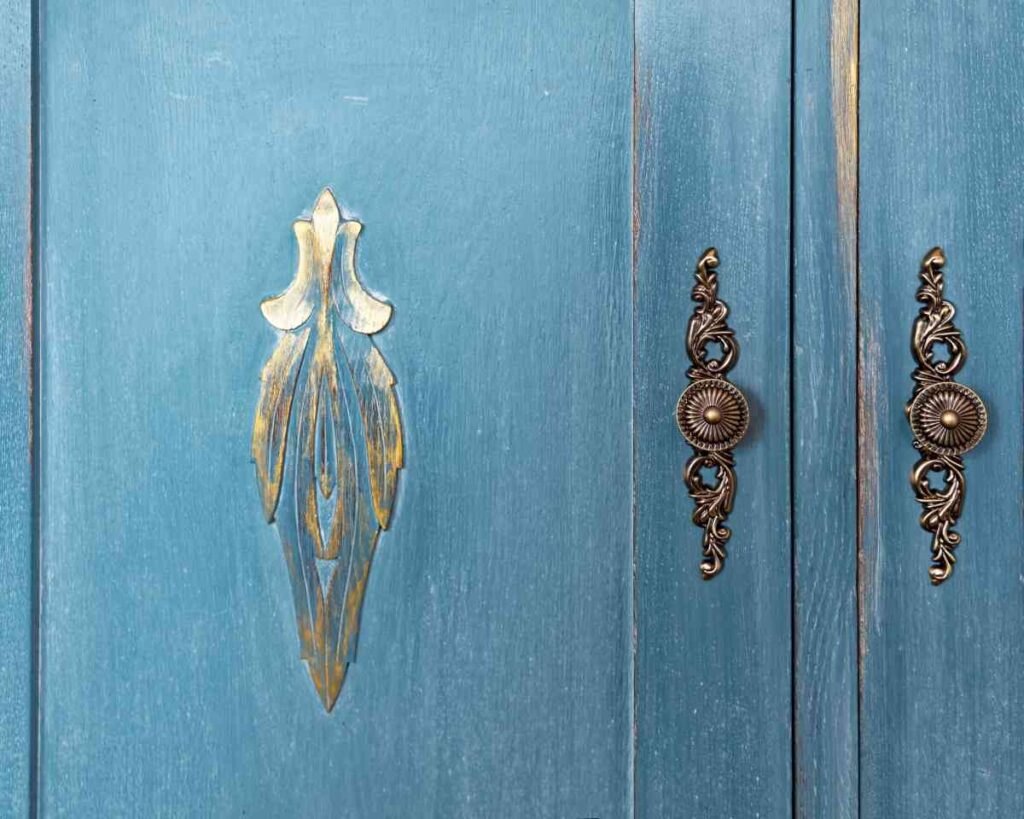
The distressed look, also known as shabby chic, is a way to emulate natural wear and tear to create an antique feel.
Keep reading for our complete guide on distressing bathroom cabinets.
Distressing Bathroom Cabinets: A Step-By-Step Guide
When you’re distressing bathroom cabinets, the key is to distress areas of the furniture that naturally wear and tear with time and use. Details include rougher edges and fading paint, or paint that appears darker in some areas and lighter in others.
The particular method of distressing bathroom cabinets that we chose is called dry distressing. Dry distressing is one of the most popular ways to distress furniture. Although it requires several steps, the end result is always worth it–especially if you approach the project with patience and care.
Materials Needed For Distressing Bathroom Cabinets
- Painter’s canvas drop cloth
- Painter’s tape
- Microfiber cloth and/or gloves
- 200-grit sandpaper or sand block
- Paint primer
- Mini paint roller
- Standard paint brush
- Furniture wax
- Chalk paint (two colors)
- Sealer
- New cabinet hardware (optional)
- Wood putty (optional)
- Putty knife (optional)
A Step-by-Step Guide
1. Set up your workspace
Before you begin, you’ll need a designated workspace for your project. Your workspace will be divided into two areas: the bathroom, where the frame of the bathroom cabinet is installed, and a separate area where you can sand, paint, and distress the cabinet doors and drawers.
Painting outside is easiest, but you can also set up your workstation in a basement, garage, or any room in your home. Make sure the area is properly ventilated, which will help with the drying process and airing out fumes from the paint.
You’ll want to place painter’s canvas drop cloth over the floor to protect the floor and surrounding surfaces. You can use painter’s tape to secure it in place. To paint the cabinet doors and drawers, you can use a plastic painter’s tripods to elevate the pieces, so you can stand while you work. You can also set down the painter’s canvas and work directly over it, on the floor.
2. Remove the cabinet drawers, doors, and hardware
The next step of preparing your workspace is removing the cabinet drawers, doors, and hardware. When you’re distressing bathroom cabinets, you’ll want to ensure the distressing looks realistic. You’ll need to treat the frame separately from the bathroom drawers and cabinets to do this.
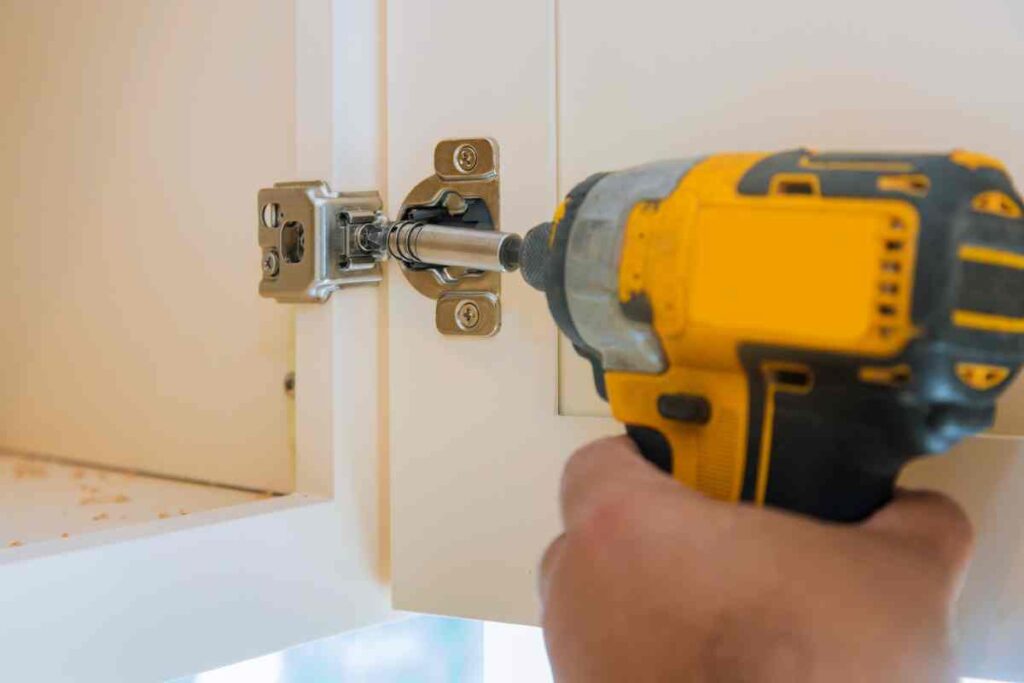
Once you’ve removed the drawers and doors, go ahead and remove the hardware, which includes drawer pulls and knobs, and door hardware. You can hold onto the old hardware and screw it back on at the end, or make the final product look even more unique with new hardware.
3. Clean all the surfaces you’re going to paint.
Before pulling out the paint, you have a few more steps left of prep work–and these are important.
First and foremost, you’ll need to clean all the surfaces you’re going to paint. Even if you think a surface is clean, you’ll be surprised to see how much dirt, dust, and grime you can still remove.
To clean, you can mix water with dishwasher soap and use a damp rag to wipe the surface. You can also go over it with a pair of microfiber gloves. To clean hard-to-reach areas, like ridges in the doors, you can use a Q-tip.
4. Fill in scratches and holes
This step only applies if you are replacing the old hardware with new hardware and if the supports are different.
If you choose a new style of knobs or pulls, the supports that connect it to the frame may be different. If so, you should fill in the holes left behind. To do so, use wood filler and a putty knife to apply the product smoothly. Make sure you apply the material to both sides of the surface. You can also use wood putty to fill in any holes or abrasions.
5. Sand all surfaces you intend to paint
Now comes the more labor-intensive part: sanding! Sanding is important because it creates friction on the surface. The friction forms a stronger bond between the surface and the primer and paint. If the furniture was previously sealed with polyurethane–you’ll know if it is because it will likely have a sheen to it–you’ll need to sand it more thoroughly.
Use fine 220-grit sandpaper to do the job. You can even use a sanding block if that’s easier. We also recommend wearing a face mask to avoid breathing in any debris.
6. Clean furniture again, as well as the surrounding areas
When you’re done sanding, you’ll notice that your work surface and surrounding areas are covered in sawdust. You’ll need to vacuum the area and clean the surface of your furniture again to ensure the sawdust doesn’t interfere with your paint job.
Distressing bathroom cabinets can get messy, so you’ll want to take care and clean as you go. You can use a microfiber cloth for this step.
7. Apply primer
It’s time to apply your bonding primer! Note that if you’re painting a lighter color over a dark surface, then you should use a white bonding primer.
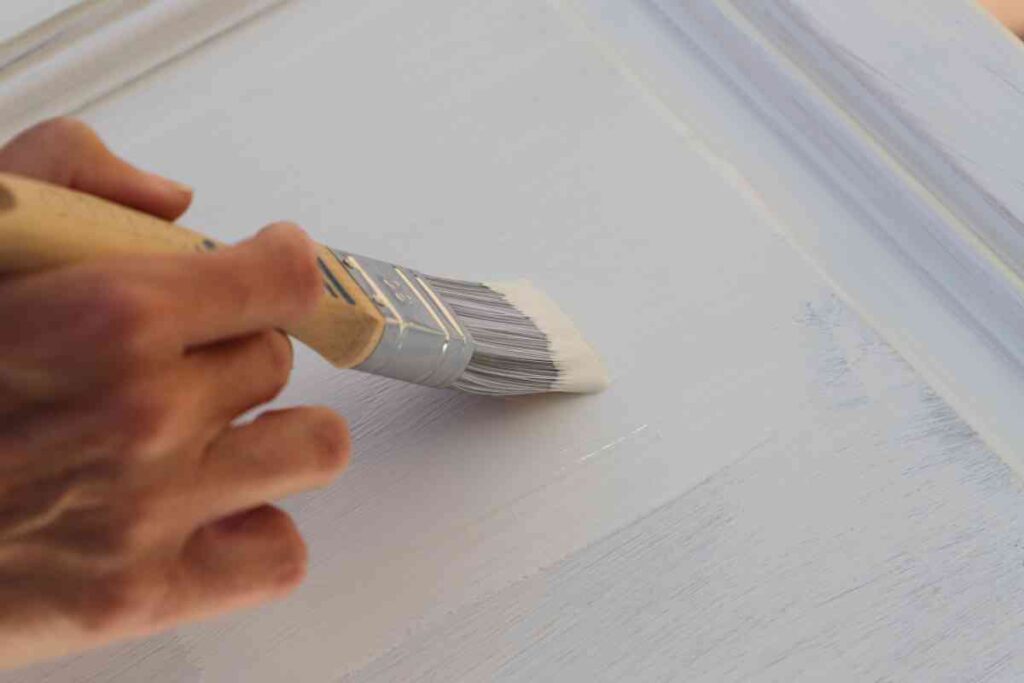
For this step, you should use a mini paint roller to paint the cabinet frame, doors, and drawers. You can use a paintbrush to apply primer to ridges on the cabinet doors and drawers, if such applies. Be sure to move the brush in the direction of the grain using long, even, and smooth brush strokes.
Allow the primer to dry overnight before moving on to the next step.
7. Sand lightly again. Then, tape over the areas you want to protect
Once the primer has fully dried, it’s time to lightly sand the surface again. Repeat steps five and six. When you’ve finished, use painter’s tape to cover any areas you don’t want painted.
8. Paint the cabinet frame, doors, and drawers
You’re about half-way through the project of distressing bathroom cabinets! Now that your cabinet’s surface has been prepped and primed, it’s time to start painting. You’ll need two paint colors for these next few steps.
We recommend using chalk paint when distressing bathroom cabinets because it’s easier to sand and will enhance the distressed look. Choose any color you wish, but make sure your base coat is darker than your topcoat.
If you want a final look that really stands out, we suggest using a color that’s completely different from the topcoat for this step. For example, if the topcoat is off-white, use brown during this step to simulate exposed wood. For a more subtle look, use a shade that’s only a few shades darker than the topcoat. This paint color will show through once it’s distressed.
Using a chalk paint brush, paint one coat of your base color. You can paint the coat thick and haphazardly; doing so will enhance the distressed look. Allow the paint to dry completely. Dry time is usually between two and four hours, but will differ depending on the paint.
9. Lightly sand and paint a second coat
We’re back to sanding again! Lightly sand the surface of your cabinet frame, doors, and drawers. Then, clean the surface using your microfiber cloth, and paint a second coat of your base coat.
10. Paint the topcoat
Now it’s time to switch over to the top coat. This is the lighter paint color you selected and will be the main color of your finished paint job.
Using your mini paint roller and paintbrush (make sure they’re clean!), apply up to two thin coats of paint to your bathroom cabinet. Allow the paint a full 24 hours to dry.
11. Rub wax onto specified areas of the cabinet
Now we’re onto a key step in the process of distressing bathroom cabinets: applying the wax.
There are several benefits to applying wax when distressing bathroom cabinets. Wax helps to enhance the wood grain, and it also acts as a blender of sorts, allowing your two paint selections to come together nicely. Using dark wax over groves and laminate designs, for example, can draw attention to details, add depth, and enhance the antique look of your finished piece.
Depending on your desired finish, you can use light-colored wax for a more subtle finish or dark wax if you want it to pop.
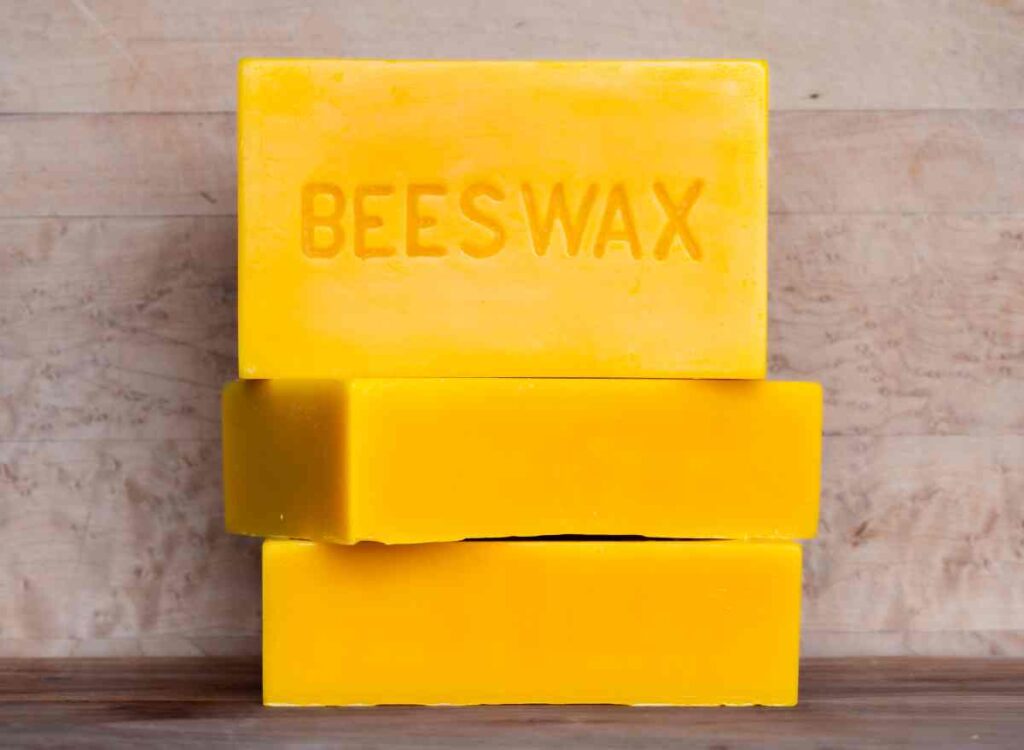
Begin by rubbing a block of wax onto the cabinet frame, doors, and drawers, but only over areas you want to distress. When you’re distressing bathroom cabinets, you want it to look natural. Rub wax mostly along the edges of the doors and drawers, on the corners, and around door handles. You can also add a few streaks to the cabinet frame, if you’d like; however, it’s important to remember that less is more.
12. Sand lightly on waxed areas
You’ve reached the main step in distressing bathroom cabinets! This is the step where you use sandpaper to lightly sand over the waxed areas and create the distressed effect.
Using light pressure, sand along the desired areas to subtly reveal your base coat. Be sure to focus on only distressing areas of the cabinet that would naturally wear and tear over time.
13. Paint on a sealer
The next step is to finish your project with a protective sealer. When choosing a sealer, you’ll want to look for one that’s non-yellowing so that it won’t affect the look of your paint. As a rule of thumb, it’s also best to apply at least two coats of sealer, although you can add up to four coats for furniture expected to have a lot of use.
Use a paintbrush to apply the sealer and allow two to three hours of dry time between coats. After the final coat, allow 24 hours of dry time before moving to the next step.
14. Reinstall the cabinet drawers and doors
This is the step in distressing bathroom cabinets where you get to see your hard work come together! After ensuring the top coat is fully dry, it’s time to reinstall the cabinet drawers and doors. If you’ve chosen to use new hardware, install the hardware before installing the cabinet doors and drawers.
15. Wipe the cabinet with a damp cloth
Now that your project is complete, wipe down the cabinet with a damp cloth or microfiber to remove any leftover residue. Then, take a few moments to admire your hard work!
Pro Tip: Remember Less is More
When you’re distressing bathroom cabinets or any furniture, you may feel the pull to over-distress some areas to ensure it’s noticeable in the finished product. Hint: it will be noticeable!
The key to a beautiful, realistic piece of distressed furniture is that it needs to look natural. If overdone, it could give off the feel of being a do-it-yourself project, and not in a good way.
Less is most certainly more! Don’t go overboard when you’re distressing bathroom cabinets. You can always add more of an effect, but it’s way harder to remove it.
Another important tip to remember is that when sanding, do not use anything rougher than 220-grit sandpaper. Doing so can roughen the furniture’s surface too much, causing excess wear.
Wrapping Up Distressing Bathroom Cabinets
Distressing bathroom cabinets is certainly a project that requires time and patience. But if you’ve taken care while performing each step, you’ll be tickled to see what a little effort can do! In just a few days’ time, you’ll have a transformed piece of cabinetry without having to invest in totally new furniture.
Now that you’ve learned about distressing bathroom cabinets, you’ve gotten a head-start in the world of upcycling. Visit our page on 22 Upcycle Furniture Ideas to Inspire Your Next Upcycle to learn more!

I’ve been a professional painter for the last 20 years. That Sweet Tea Life is a place where I get to slow down and visit the craftier side of painting.
I’ll share with you everything I’ve learned painting hundreds of pieces of furniture and sets of kitchen cabinets.