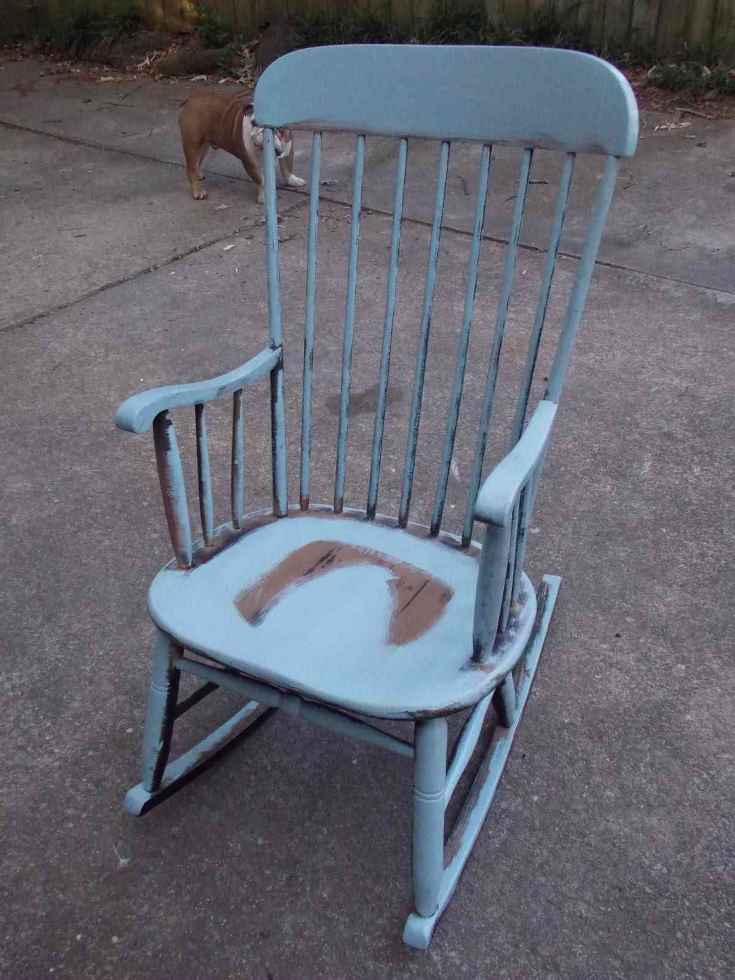
Few things are more comfortable and relaxing than kicking back in a rocking chair at the end of the day. However, rocking chairs are expensive and don’t seem to be as comfortable or durable as they used to be.
So, if you want to save money, engage your DIY spirit, and enjoy the comfort of a classic rocker, read on for ideas for an upcycled rocking chair.
A Basic Upcycled Rocking Chair
Rocking chair upcycles aren’t as difficult as they sound. The nice thing is that you can go as in-depth or as basic as you want to.
In this article, we’ll look at how to perform a fairly basic rocking chair upcycle. However, if you have the desire and the skill, you can alter and rebuild different parts of the chair, including the arms, legs, and back.
Gather Your Materials
The first step in any rocking chair upcycle is to gather the tools and materials you’re going to need.
Strip the Existing Paint or Stain
Whether you’re doing a basic rocking chair upcycle or a more in-depth one, you’ll always want to start by stripping the paint or stain currently on the chair. Your fresh coat of paint or stain won’t adhere to the chair with the existing coating on it.
Start with the Easiest Solution
To strip a coat of paint or stain off a rocking chair, start with the easiest option – denatured alcohol, lacquer thinner, or paint remover. Apply your product of choice to a small section of the chair, roughly the size of a dime.
Let the paint remover sit for ten to twenty seconds, then wipe it off with a rough rag. If it successfully removed the paint, you can repeat the process with the entire chair.
Move on to a Sander
If a liquid paint remover doesn’t do the trick, your best bet is to use a power sander to forcefully remove the paint.
Sand the Wood
Next, if you haven’t already, use a power sander or sandpaper to completely sand down the wood. Sanding is arguably the most important step in your rocking chair upcycles.
As with paint stripping, sanding will help smooth the chair’s surface so the paint can better adhere to it. Here’s how to properly sand down your rocking chair.
- If you’re using a power sander (recommended), sand in circular motions, starting with the roughest sandpaper. Typically, you’ll want to start with 60 to 120-grit paper, depending on the condition of the chair.
- Sand the chair thoroughly with your starting grit before sanding it a second time with a lighter grit. Typically, the second round of sanding is with 200 to 240-grit paper.
- Repeat a third time with an even lighter sandpaper.
- You’ll likely have to use sandpaper if there are round rungs on your rocking chair. When using sandpaper, always sand with the grain of the wood and never against it.
Once you’re finished sanding the chair two to three times, you’ll have to thoroughly clean it. Use a vacuum sweeper to suck up large pieces of debris and sawdust.
Next, use a damp cloth and warm water to remove the finer debris and dust off the chair. Even the smallest speck will show up as a blemish when you paint the chair, and you’ll have to start over with your rocking chair upcycle.
Do I Always Need to Sand?
In most cases, you’ll always have to sand the rocking chair, especially if it’s in rough shape. However, you can only get away without sanding your chair if it meets the following criteria.
- There aren’t any deep nicks or grooves in the chair.
- The paint or stain is in decent shape.
- You’re planning to use the same type of paint or stain during the upcycle.
For example, if there’s currently an oil-based paint on the chair and you plan to use a different oil-based paint, you don’t always have to sand. The same goes for chalk and water-based products.
However, sanding the chair is always best if you want to be thorough and don’t want to run the risk of having to restart your rocking chair upcycle.
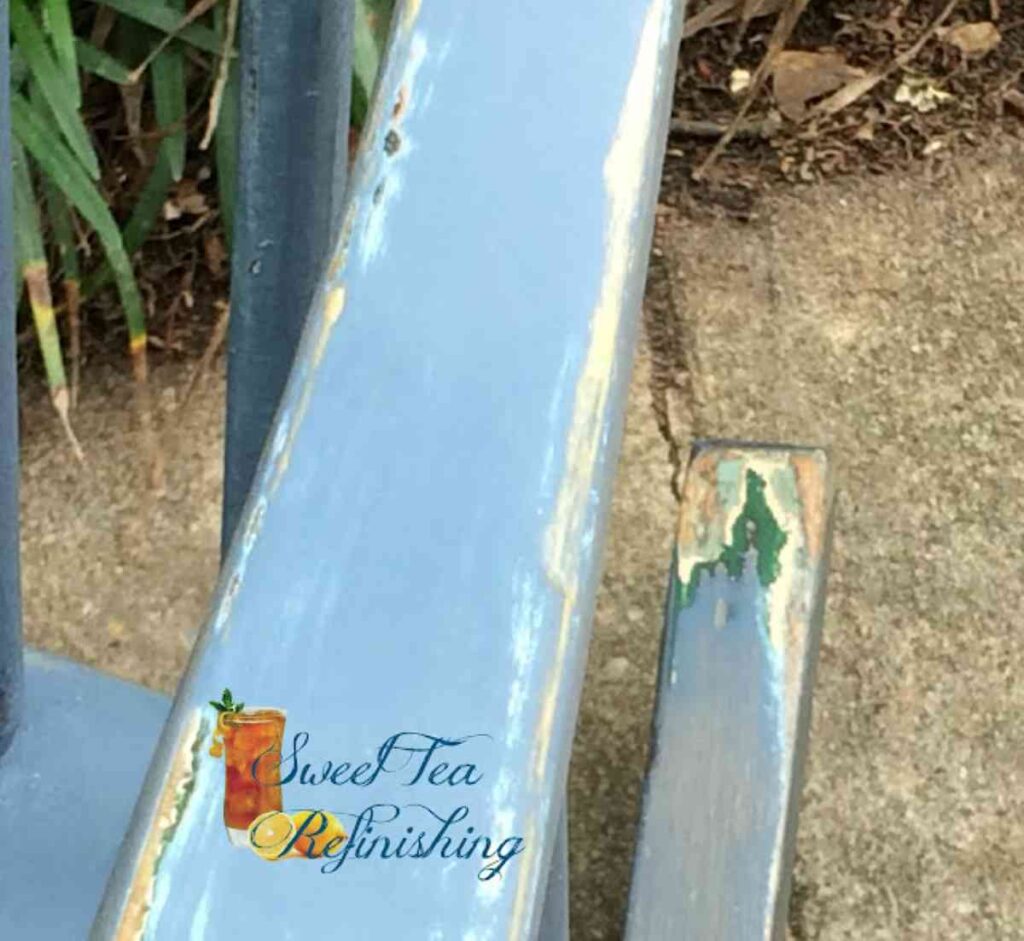
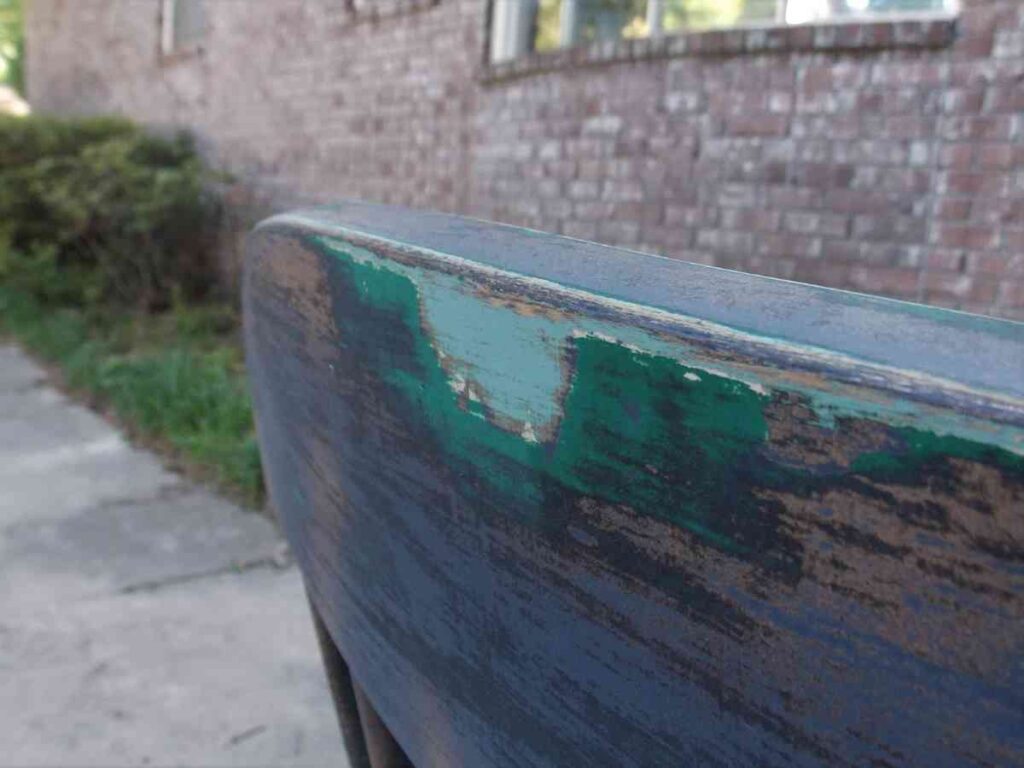
Repair any Chipped or Damaged Areas
Now that the chair is sanded down and smooth, you’ll be able to spot defects and flaws. Look for chips, grooves, or cuts in the wood, and repair them before continuing.
For minor cuts, you can get away with a colored pencil. However, you’ll have to use wood putty for deeper grooves and dents.
Wherever you added wood putty or filler, lightly sand the area with 220 or 240-grit sandpaper. Don’t be too aggressive. Just make it so that the wood and the putty blend seamlessly.
Finish
Give the chair a final cleaning with a damp rag to ensure it’s spotless. When you’re finished with that, you’re ready to start painting.
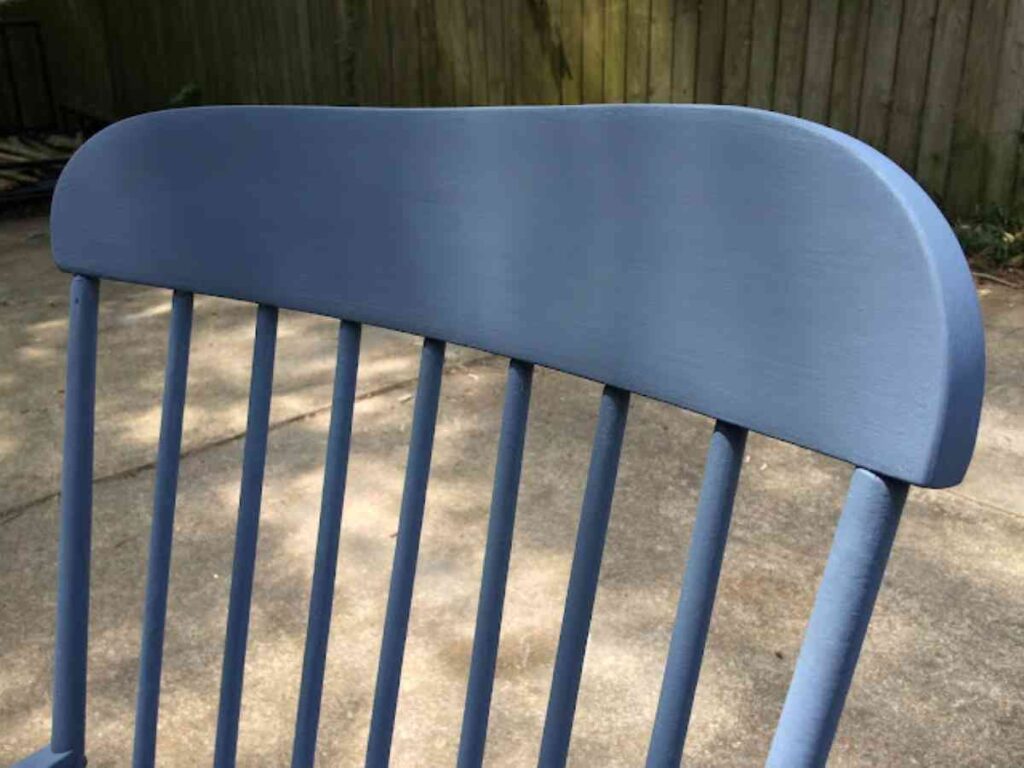
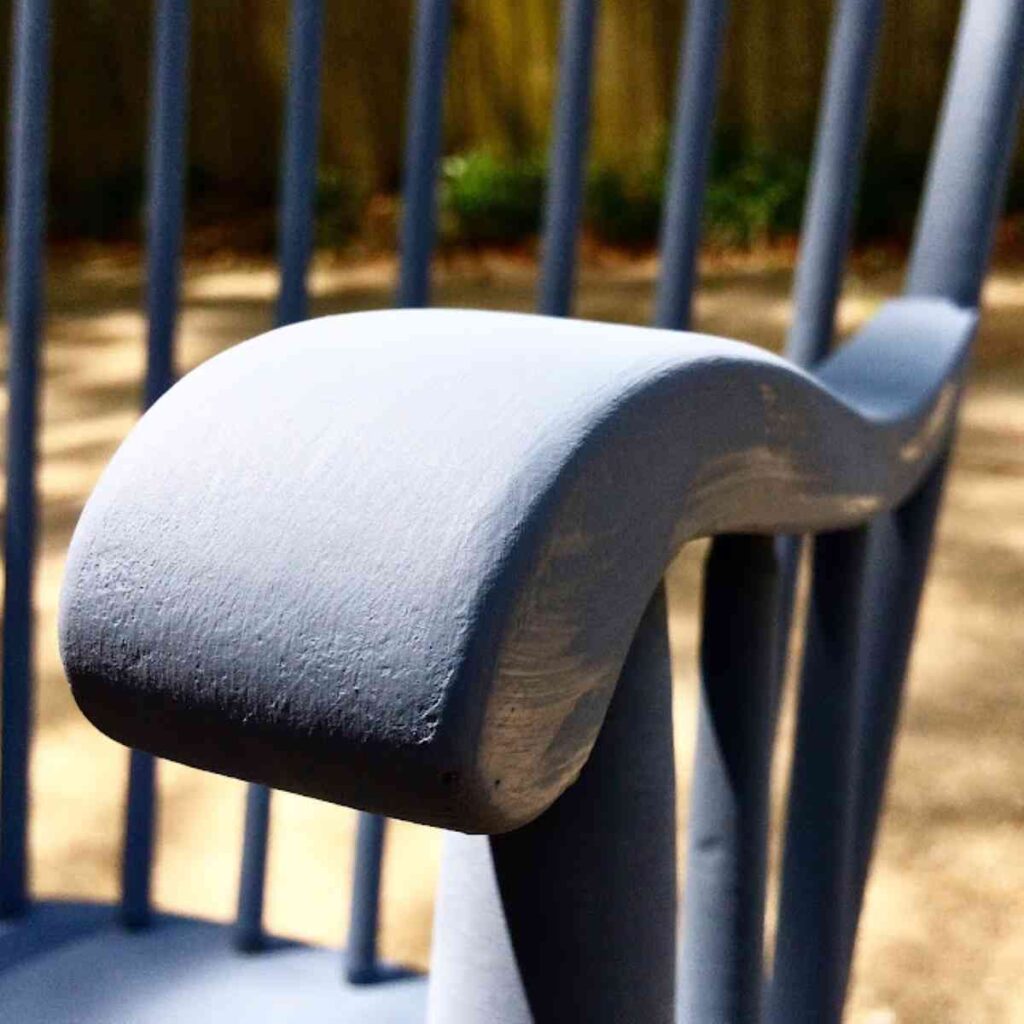
Give the Chair a Fresh Coat of Paint
With a completely sanded-down chair, you can use any type of paint you desire. For our example, we used Country Chic Paint.
This Country Chic Paint is a great option because it’s chalk-based, self-priming, durable, and easy to apply. They also have several great color options, which is perfect if you want to add multiple colors and some character.
No matter what paint brand you use, you should opt for either chalk or oil-based paint. These paint types adhere better and look better on wood products, adding a nice shiny finish.
Add as many coats of paint as you deem necessary, but give each coat plenty of time to dry before adding the next.
Add a Personalized Stencil
Next, if you feel extra creative, you can add a personalized stencil design to the chair. Using a metallic cream, as we did here, will make the design pop and stand out from the rest of the chair.
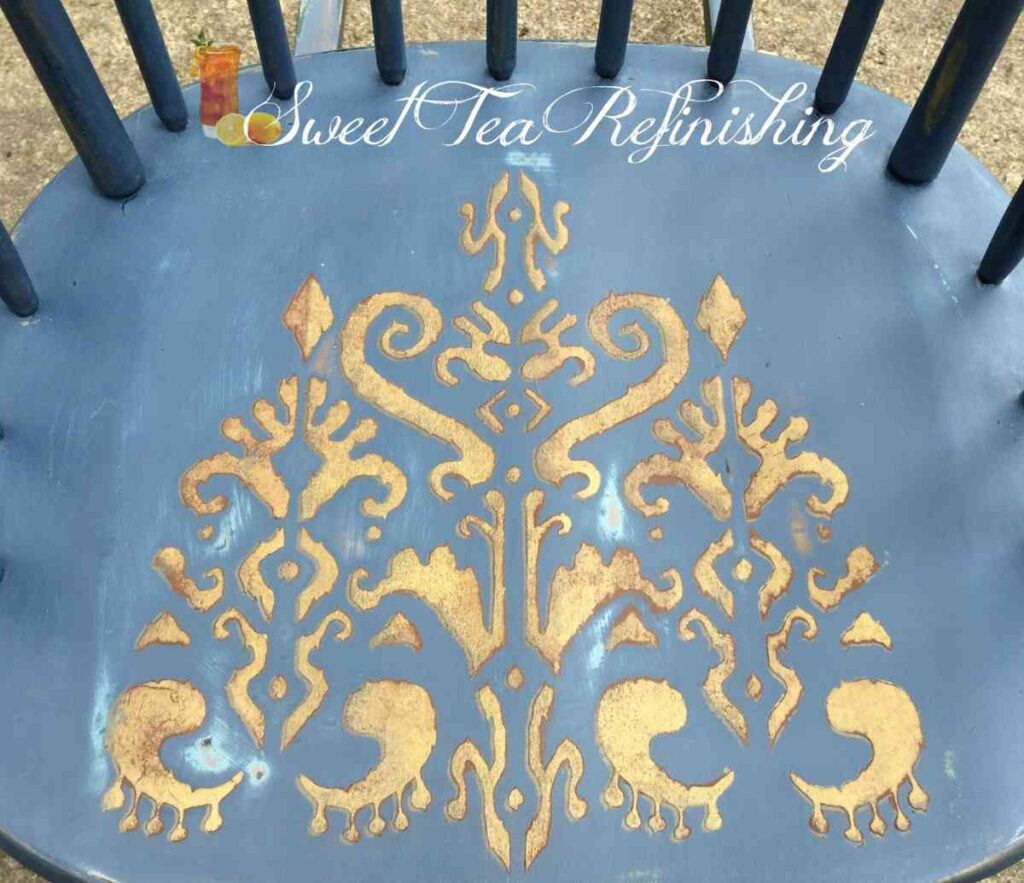
Once again, you can add multiple coats to the stencil if you really want it to pop.
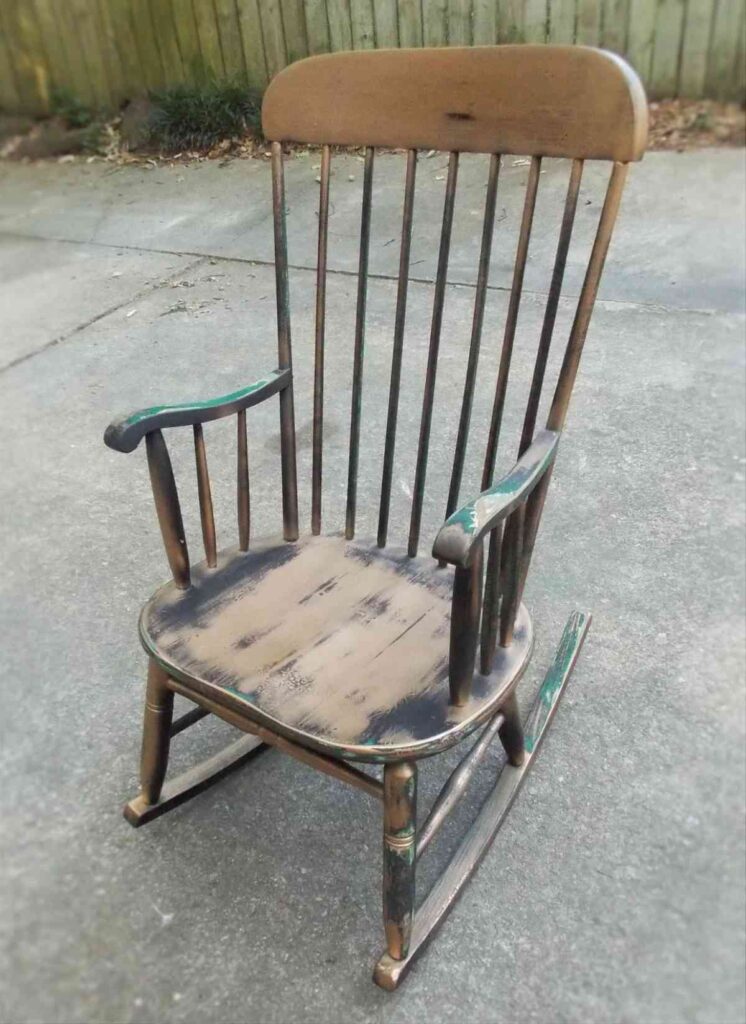
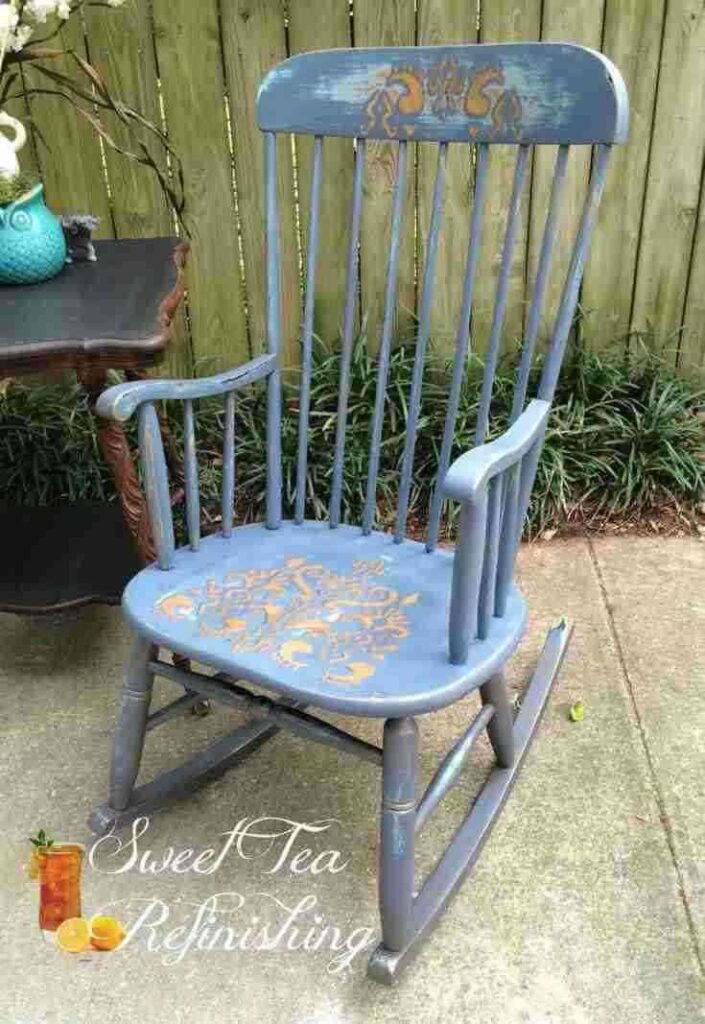
Add Distressing if Desired
As a final touch, if you’re feeling ambitious, you can add some distressing to the chair. In our rocking chair upcycle, we sanded back the stencil design, switching between 320-grit on a power sander and 220-grit with sandpaper.
Final Thoughts About Doing a Rocking Chair Upcycle
As you can see, rocking chair upcycles aren’t too much work, and they’re a load of fun. It’s a great way to personalize a rocking chair while working on your DIY skills.
If you liked this furniture upcycle and are thirsty for more great DIY tips and ideas, check out our sister pages!

I’ve been a professional painter for the last 20 years. That Sweet Tea Life is a place where I get to slow down and visit the craftier side of painting.
I’ll share with you everything I’ve learned painting hundreds of pieces of furniture and sets of kitchen cabinets.
Brenda Young
Saturday 28th of May 2016
Great project Thea! I came >.< this close to using the embossing cream on my stenciled project as well, but in the end decided against it for the table top. Love your color choice too!
Vanessa
Thursday 26th of May 2016
Great rocker. I love the gold stencil too.
Vanessa
Thursday 26th of May 2016
Great rocker. I love the gold stencil too.
The Blue Building, Inc.
Thursday 26th of May 2016
I.LOVE.THIS. Great job adding character and bling to this plain Jane rocker!
Robin @ ReDo It Yourself Inspirations
Wednesday 25th of May 2016
Great color choices, Thea! That design is gorgeous. Fabulous job!